Woodworking
Here I discuss anything to do with what I am up to in my wood shop.
Below is an article I wrote for Ann Marquez’s blog site at Desert Muse Publishing. It pretty much sums up the tie-in between writing and woodworking the way I see it.
WRITING WITH WOOD
In a way, cutting patterns out of wood is akin to writing with wood. The difference is that someone already wrote the story and I am just printing it out on different paper. I may alter the pattern slightly, giving my interpretation of the story. It’s akin to a band doing cover tunes.
Woodworking has been a passion since discovering and destroying many of my dad’s tools in the garage when I was a little kid. I never really knew how to use them, but I could slap two pieces of wood together and make something, no matter how weird the result. In elementary school shop class, I channeled that interest into the “standard” carved walnut bowl. Eventually I tackled a square-rigged sailing ship that other kids destroyed before it was completed. Our shop teacher, Mr Rosen, who actually had all his fingers, did have a glass eye. When he got mad, he’d give us the “fish eye.” He taught me how to square a board and how to use basic shop tools. I later used those skills to build furniture, guitar amp cabinets and boxes for my analogue modular synthesizers. Eventually, just making boxes for musical instruments and various furniture items around the house was not much for artistic expression. In the mid 90’s in Oklahoma, my wife Kim bought me my first scroll saw. It was on the budget side, but it set me on a path that saw me cutting out designs and making even fancier boxes. Those designs branched into many different projects including log slices, clocks, Christmas ornaments, thermometers, and other things.
I now have a much nicer scroll saw. Though it is still considered a bottom feeder in the world of scrolling, it does the job for me rather nicely. I still have the original saw but it languishes in my storage shed. It provided so much pleasure, I hate to part with it even though to use it now would be a big step back.
I get most of my designs either from Woodworks and Crafts magazine or from a company called Wildwood Designs. I have created a few designs, but am a lousy artist so I depend on others to provide me with designs. I just acquired a computer program to convert pictures into usable scroll saw patterns, but quickly discovered it’s not as easy to do that as the advertising implies!
I love the smell, the feel, the look of wood. I love working with it and love the finished product. I’ve sometimes gone to great lengths to get pieces of a particular wood, from buying it at exotic lumber stores to going to firewood yards and scouring through their logs to chain sawing felled trees in someone’s back yard.
Below you will find some examples of my work. There is a story behind each one. I try to include a paper with each project describing the type of wood, when it was made and where the pattern came from.

This is a castle shelf made mainly from oak plywood. The doors and face with the hinges on it are solid poplar and the rails are solid cherry. The drawer underneath is luan mahogany plywood. I now holds all of our lead D&D figurines from a bygone era!

I call this my “unemployment” deer shelf. I was in the middle of cutting this when I was laid off at my maintenance planner job in Indiana. I worked on it quite a bit but had to set it aside when I finally got a new job and didn’t get back to it until a year later when I got my scroll saw back. I made two of these simultaneously by stacking. The back is luan mahogany plywood. The shelves and rails are poplar. The animals are aspen.

This is a dolphin (or as I call it my “dolfink”) clock. It is made from solid oak. It was inspired from my oldest daughter who likes dolphins. Anyone who knows Popeye will know where I got dolfink from.

This is one of my log slices. I like to take a log and slice it with a chain saw diagonally and cut a pattern into it so that the grain of the wood is visible. Unfortunately, this slice happens to be maple. Unless maple is spalted (molded), the grain pattern is pretty plain. In this case, my wife backed it with red felt and painted around the edge and this is the result.

This is another log slice. This time it is also maple, but it contains a bit more interesting though subtle figuring, but it is not spalted. My wife backed it with green felt but left the edge unpainted. I’ve used this duck scene in other works.

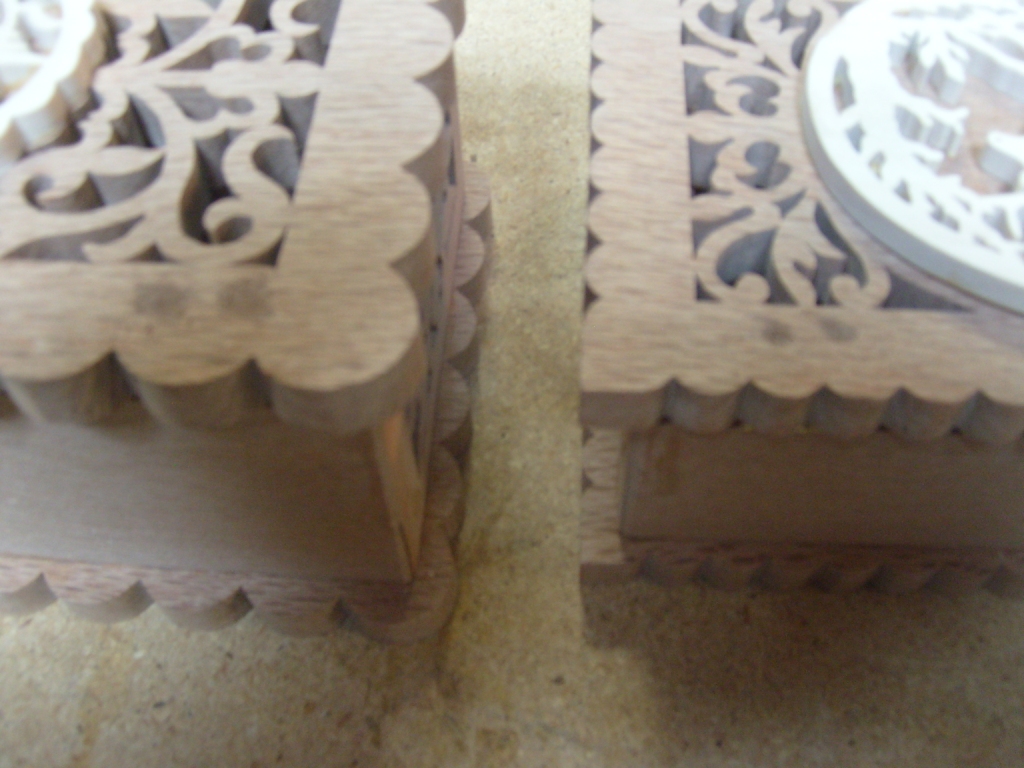
I love to make boxes too, and this is one of my later examples. The main body of the box is African padauk. The light-colored design is aspen and the dark filigree is purpleheart.

This is a griffin clock made from jotoba, or Brazilian cherry. I gave this away at the 2011 Las Vegas Writer’s Conference as one of the raffle prizes for the kid’s scholarship program.

This is my latest completed project. A Jeff Gordon 1957 Chevy clock. The wood is solid African bubinga. I finished it in April. It is two wide pieces sandwiched together to make it wide enough. The actual splice is somewhere around the right side headlight.

This is one of my favorite log slices. It is a piece of elm from my firewood pile when we were living in Miller Beach, in Gary, Indiana in 2000. The wood was still a bit green so after I cut it and planed it, I had to cook it in my microwave to dry it out a bit. It took a while and stunk up the house a bit, but it was worth it! It now hangs on my mother’s wall.

This jewelry box shows that old oak palates are good for something! Yes, the box is made from wide pieces of oak palates I found somewhere. The trick was making sure the pattern holes coincided with the nail holes because they tend to turn the wood black around the nails. The top piece is aspen. My mom also has this piece.

This box is made from purpleheart. I love to work with that wood. It has a very consistent grain and cuts very well. The top piece is thin oak.

This is a ram log slice. it was cut from a poplar log and has a bit of spalting in it though I never really knew that poplar spalted like maple. Apparently it does! This piece of wood also came from my firewood pile in Miller Beach.

I had no idea what I was getting into when I took this project on. My wife picked the pattern and I was really anxious to dig into it. Little did I realize it involved a lot of woodburning! Yes, if you look close, the side pieces highlighted in read all have woodburned designs in them. I am no woodburner! I did my best but well… At least it looks good at a distance! The wood is standard Baltic birch plywood from Hobby Lobby. Nothing fancy.

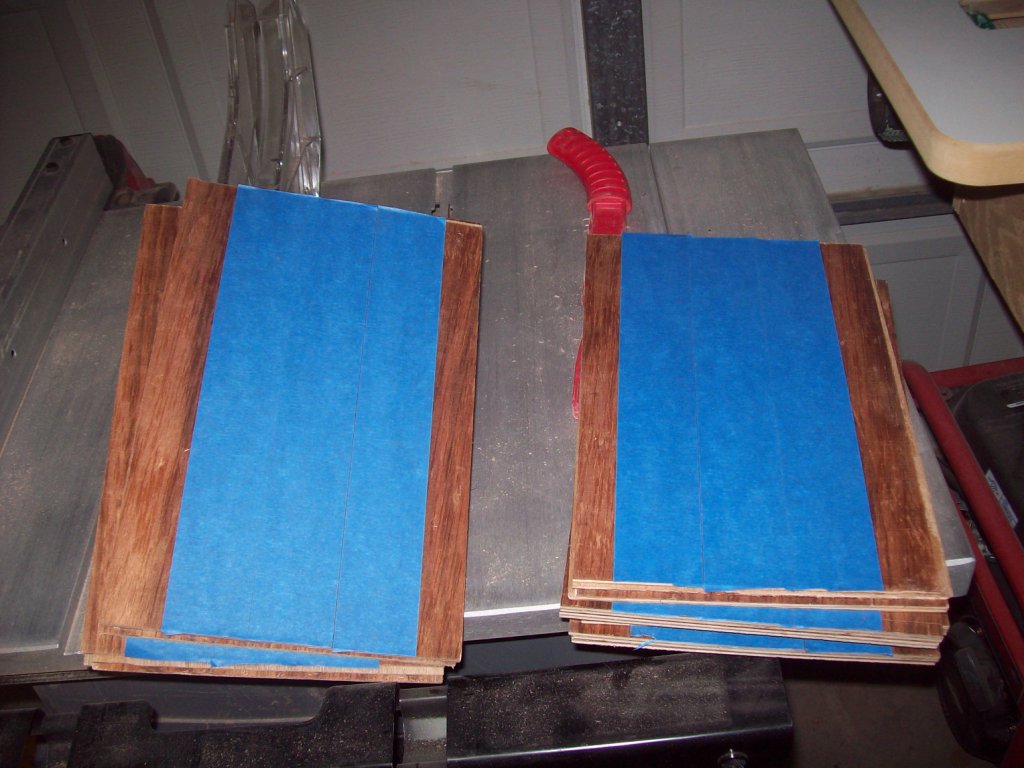
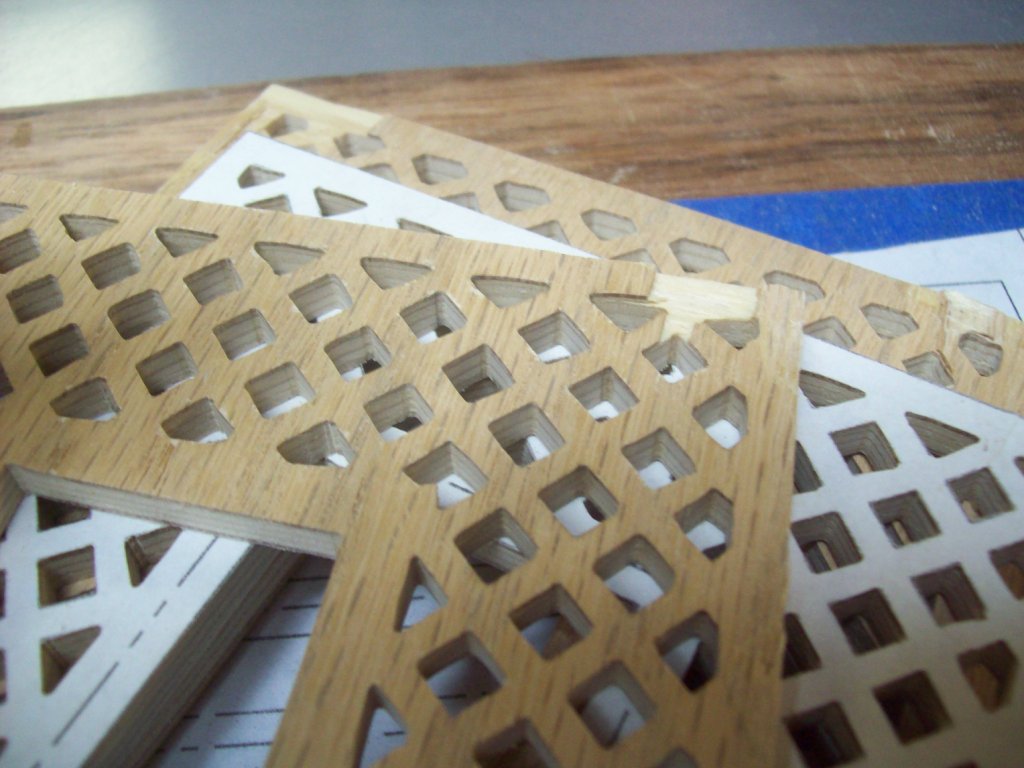
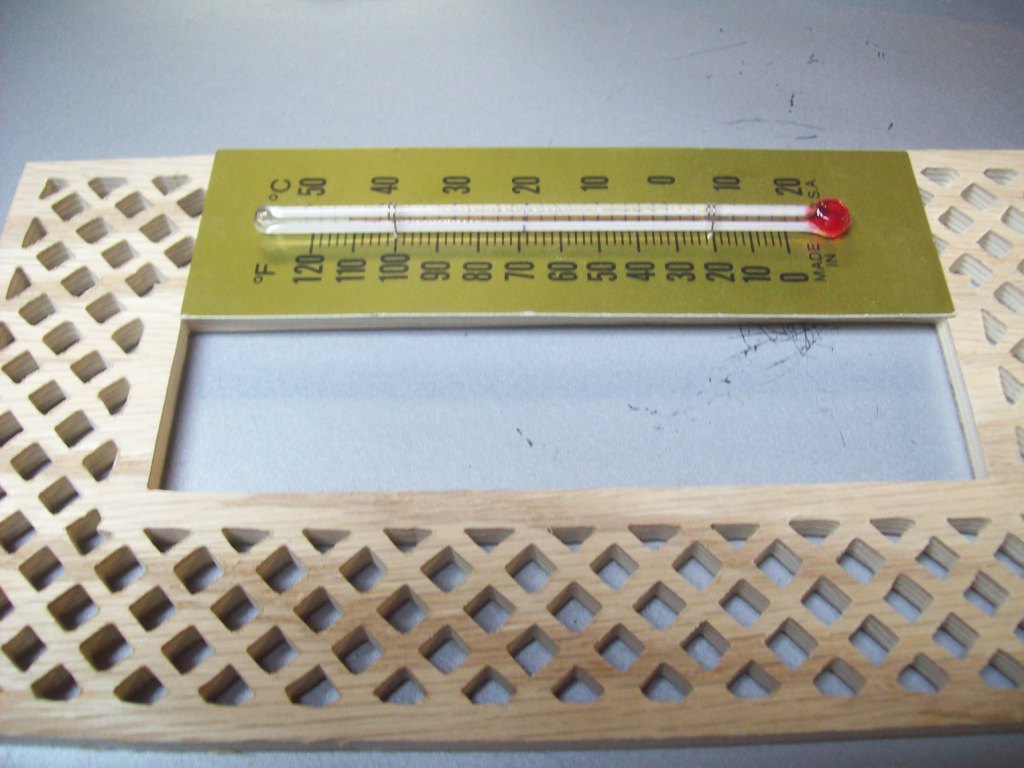
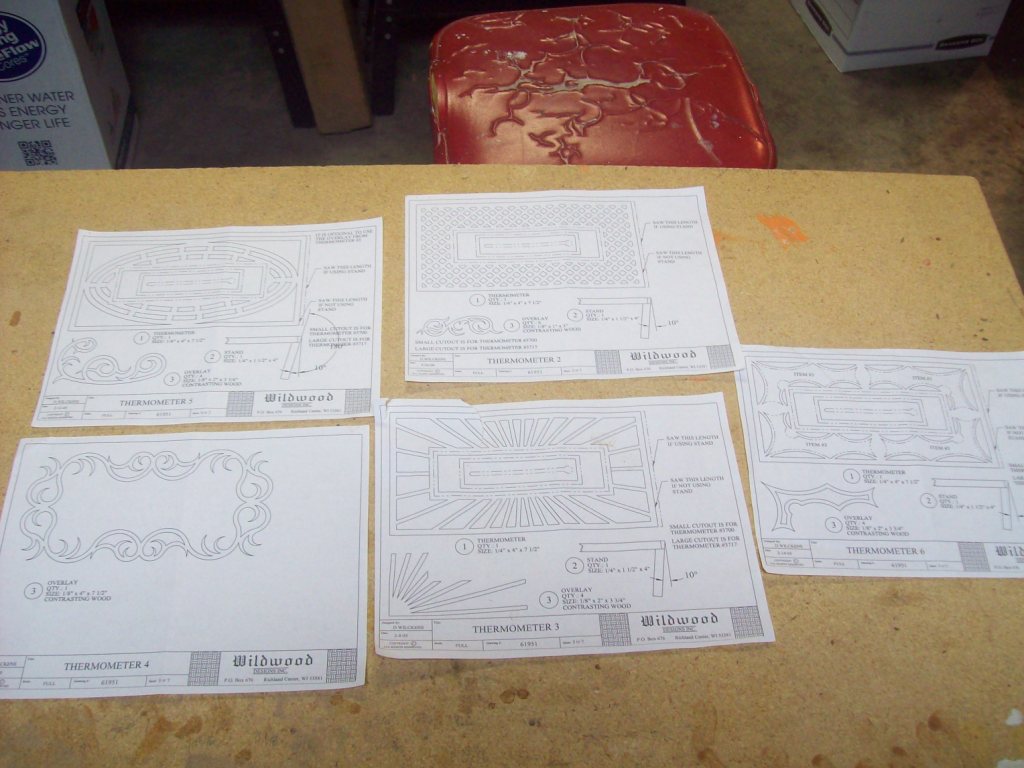
These are a sampling of some of the mass-produced Christmas presents I like to do. In this case, they are thermometers instead of tree ornaments (for instance). The backings are luan mahogany and the filigrees, if they have them are aspen. I backed them all with different colored felt. I say mass-produced because I cut three at a time by stacking them. I made 40 of these altogether. Nine designs, I think.

This wolf silhouette was inspired by my friend, Bobby Licher. He used to have a band called Pocket Full of Blues. He is a big fan of wolves and I saw this pattern and the rest is history. The wood is purpleheart and it is backed in blue felt.

This is a top view of a chess board I made for my daughter Brook. The dark pieces of the chess board are wenge and the light pieces are maple.

This is an inside view of the box. It is lined with aromatic cedar. However, the cedar was quite dried out and even after cutting it to shape it still didn’t have a lot of smell left. Oh well, it will be covered with foam for the chess pieces anyway. The sides of the box are made from Zebrawood. I burned up a lot of scroll saw blades cutting the design in all four sides. That wood, especially in that full thickness of 3/4″ was tough! Also, the left side looks warped, but it isn’t. It’s the curve of the woodgrain that makes it look warped. It kept throwing me off but I kept checking it over and over again and it was straight. Kind of disorienting!
The project took over a year, all told. Glad it’s finally done so I can move on to other things.

Here’s a side view showing the fretwork that burned up my saw blades.

Besides fretwork, I also do a bit of woodturning. This was one of my early successful projects. It is a bowl made from sassafras. Yes, that is the same sassafras that the bark is used to flavor root beer. No, I didn’t smell root beer the whole time I was turning it! The wood doesn’t smell anything like root beer. It smells like wood. It is kind of soft and you can see from the grain, very uneven, yet with sharp chisels, I was able to successfully turn it without too much trouble. I obtained the piece of log when we first arrived in Indiana from a friend’s yard, I think. The wood is quite light when dry. I remember this being a bit wet when I started it.

This was an oak hot pad Kim gave me and told me to do something with. Turns out it is a familiar pattern from one of my log slices above, just reversed. I made sure it was sized to fit onto it with plenty of space around the rim. She put the red felt backing on it. Makes it stand out pretty nice.

Kim’s a big quilter and she needed a quilt stand, so we found plans for a stand someplace. It came with patterns and a hardware kit. I got the oak from Lowes. Nothing fancy, just cutting straight lines with an occasional curve here and there. Took about a week. Never uses it. Turns out we found something else that works much better so it sits in the spare bedroom. Oh well…
EVOLUTION OF A SPECIAL PROJECT
A while back, I did a special project for a friend of mine, Laurens “Bakkie” Bakker, drummer in the Dutch heavy metal band Picture. He’s an avid fisherman, especially with all the canals they have in Holland. He wanted me to make a pike, and this fish design I came up with is as close as I could come up with.

I used a piece of walnut, planed down to 1″ and cut short enough to accommodate the pattern and the base. The original design included a clock cutout, but if you look close, you can see that I drew more lines through the clock hole (since I didn’t have any extra clock inserts anyway). I sprayed glue onto the back of the pattern, let it dry a few seconds, then stuck it to the wood. With this type of contact cement, I didn’t let it dry too long, or the paper would stick too much and when it was time to remove the leftover pattern, it would be even harder to remove (more on that later).

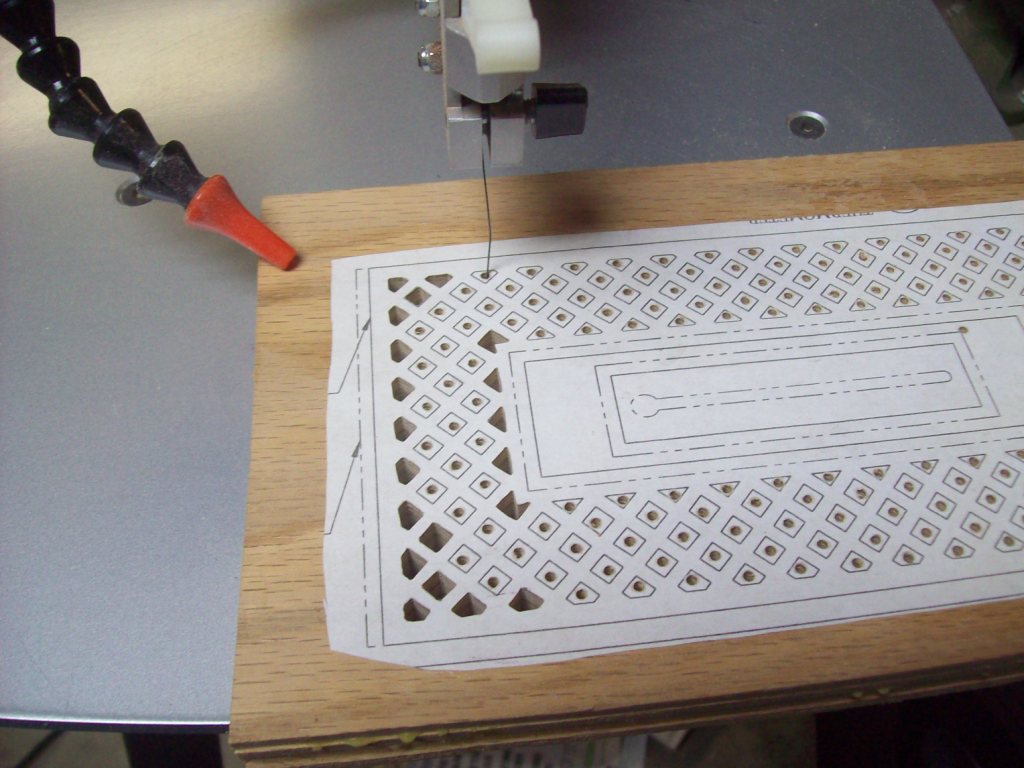
The next step was to drill the pilot holes. Each and every cutout needs a pilot hole to thread the scroll saw blade through. As you can tell from the pattern, there are a lot of holes to cut out!

Here I’m setting the blade through the hole. With this type scroll saw, the blade stays attached from the bottom side and is threaded up through the bottom of the wood. On some of the higher end saws, the blade can be threaded down from the top because the upper arm of the saw lifts up. My new saw does that, but this older Craftsman didn’t. It was a lot harder to thread the blades this way, especially if the holes were not drilled clean on the bottom.

Here I’m cutting out one of the inside pieces. I’ve threaded the blade through the pilot hole and cut out the shape. You can see another pilot hole inside one of the shapes to be cut, to the right and to the left of what I just cut out. The red cone-shaped tube next to the blade is a dust blower.

Here I’m lifting out a piece of waste wood after cutting it out.

All the inside holes are now cut. When cutting with a scroll saw, you ALWAYS cut the inside holes first! Once that is done, you cut the outside.

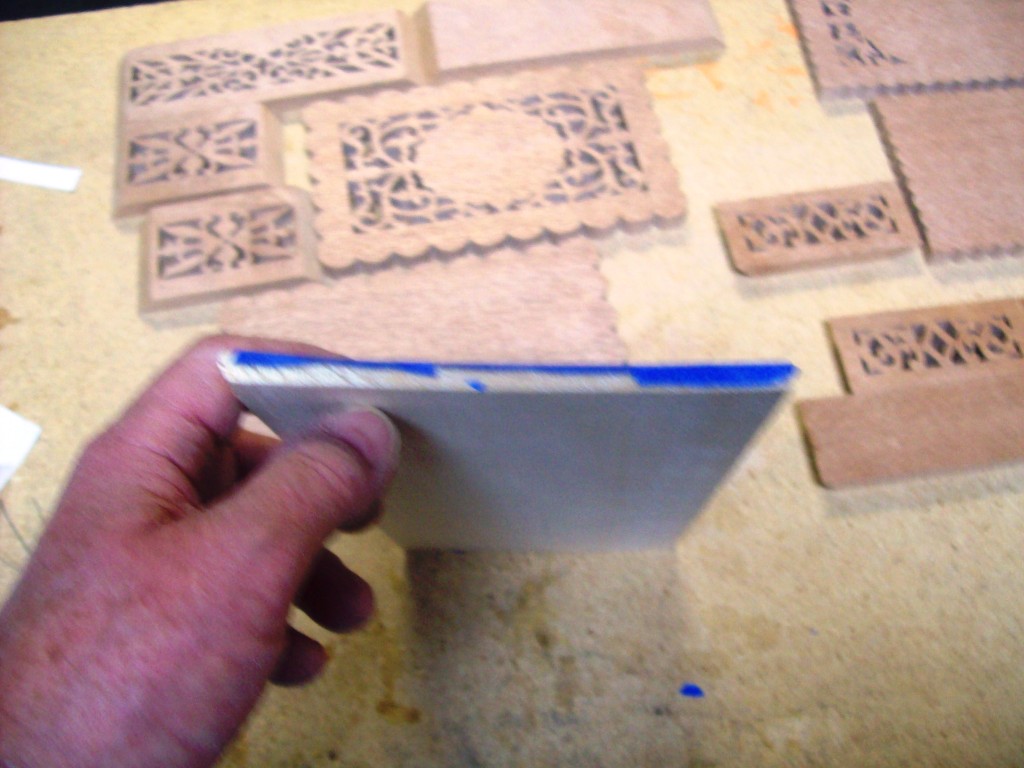
The outside cuts are done and the main pieces are ready to finish. To remove the paper pattern, I’ve learned a few things. I used to use minimal spray glue, but during the cutting process, I’d lose the pattern halfway through and would have a mess and lose track of my cuts. I tried heavier glue, but it would stick in the grain. I’d have to sand it off with heavy grit and would sometimes break some of the finer and more delicate details within the patterns. I found by using the spray glue and letting it dry for just a few seconds, it gives me a strong enough bond to hold through the cutting process. It still won’t just peel off, so I have to use Goof Off, a solvent that I think has Ketone in it. It’s pretty nasty stuff, but it gets the paper and 90% of the glue off. Then, all it takes is light sanding and it’s ready to go.

I do most of my sanding on my drum sander. I built this one from a kit I got from a company in Canada called Stockroom Supply. It’s called the V-Drum sander and it works great. I also use disc and belt sanders if called for, but this baby is my real workhorse.

Here is the fish plaque before finishing. I couldn’t find the photo of it actually completed so this will have to do. It turned out pretty decent, I think. I made it at the same time I made a batch of those thermometers featured above. They were all presents for the band. If you love heavy metal music and ever get a chance to hear Picture, I don’t think you’ll be disappointed. They rock!
MY EMPLOYMENT DEER SHELF
Back in the day, I made two of these deer shelves. One of them can be seen above. I called it the Unemployment Deer Shelf because I started them both when I was unemployed in Indiana. The one above is hanging in my mom’s house in Palmdale, California. However, Since I’ve been gainfully employed for over a decade, it’s time re-titled this third version my Employment Deer Shelf.
My wife has always wanted one. At the time, there was no way I could’ve cut through three double layers of luan mahogany plywood to make the backboards. As it was, cutting two at once was a chore since with my 16-inch scroll saw, I had to not only cut the backboard in half, I had to use spiral wound blades for the cutting because even cut in half, the saw didn’t have enough reach for any of the cuts. Another problem was the long parallel arm style of the saw caused wedge in the cuts and despite an accurate cut on the top where the line was, when the blade got to the bottom, it had drifted one way or the other. When I’d finish an inside cut, as often as not, I’d have to fight to force the waste piece out of the hole. That also meant that the copy underneath was a crappier looking cut. It would be slightly mushroomed out, or the fine detail would be skewed or had wild cuts in it. That problem was prone with everything I cut with that old saw, which started as a Ryobi and became the Craftsman I used up until late last year. It was always the same. Make the cut and force the piece out. That meant that I’d always have to cover the back of the piece with something because the back would look terrible. It didn’t matter that I had the table and blade squared, the blade would still drift because the long arms of the saw would wobble and cause flex, flaring the cut on the back side.
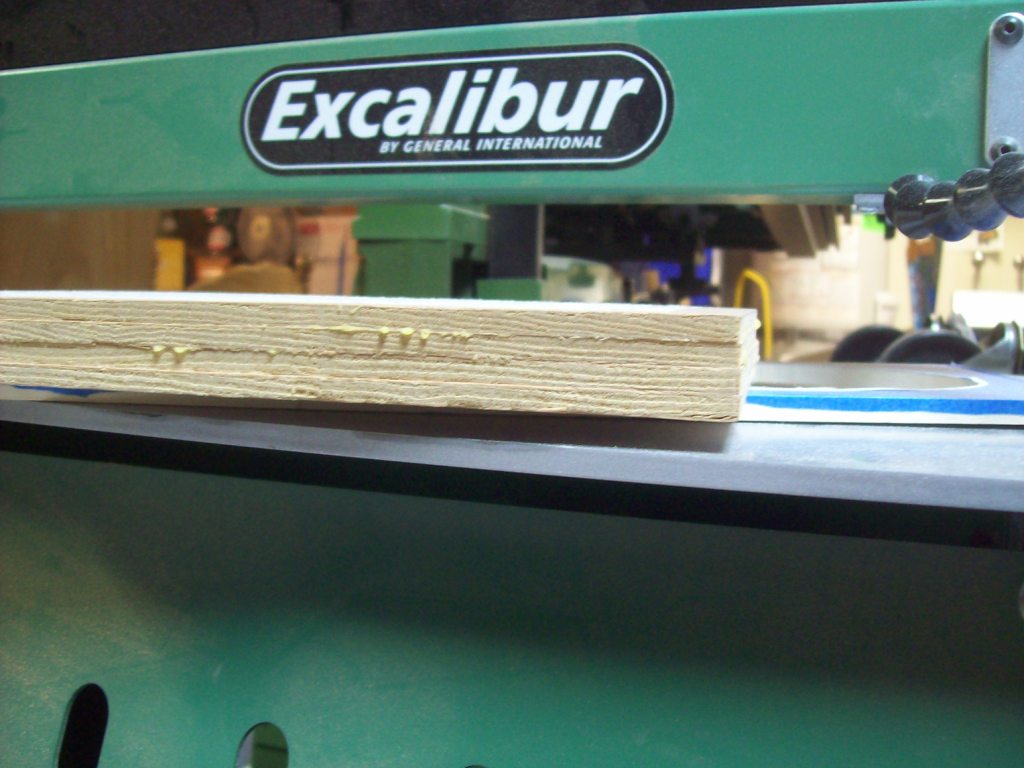
When I got the new Excalibur 31-inch saw, it used a parallel link system which made a world of difference. I no longer had a problem with wedge. When I make a cut now, the piece pops right out. It never gets stuck. Another thing is that with the longer reach, I can do the entire Deer Shelf without cutting it in half or having to resort to spiral wound blades. The only caveat was that as I cut the backboard, especially doing the end sections, my chair was placed about three feet from the saw!
This time I took no shortcuts with the wood. Instead of the Luan mahogany plywood I used for the other two, this time I dug out the widest slab of that walnut I’d been saving since Indiana. It was quite a challenge to find a clean piece that was not only wide enough, but not cracked, warped, or had something else wrong with it. It was dicey, but I managed to get just the piece I needed. I trimmed the excess off the raw piece and ran it through my planer. I had to cut it down to a hair under twelve inches wide so it would fit in my rather small planer but it was worth it. I planed the wood down to ½-inch thick.
For the shelf braces and rails, I used some left over purpleheart that was already planed down to ¼-inch. For the shelf bases, I planed down a piece of that chestnut door framing I still had left over from my wife’s uncle’s house that burned down in West Virginia. The last of the wood will be aspen which I’ll use for the animals that will be set onto the different spots on the backboard.
Now for some visual aids. Progress has been quite slow. I started this project in late winter but as it got hotter, work became unbearable in the garage with the heat of summer so I held off. In fact, I just had a chance to try again Memorial Day weekend, September 3rd, 2012. It was cool enough to go out there for a while without passing out.

This is the backboard cut out. All one piece, too. The paper pattern is still glued on. I’ll remove it later with solvent. I used to sand the paper off, but it was messy and also took more wood than I wanted to. The solvent works better and relies on less sanding.

Here are the three shelves, cut out. I turned one over so you could see the chestnut. It’s planed down to ¼-inch from the original ¾-inch. Notice the dark stain at the bottom of the middle piece. That’s an old nail hole. It’ll be at the back of the shelf and facing down so it shouldn’t be noticeable.

These are shelf braces and rails cut out. They are all ¼-inch purpleheart.

This is one of the raw boards I cut the rails from. You can see the pilot holes in the two uncut pieces.

This is the other uncut rail board. The pilot holes haven’t been drilled yet.

Here I’m cutting a shelf rail. Note the blower aimed at the saw blade. Also note that I don’t use the hold-down bracket on the saw. I removed it. I found it extremely annoying and useless as I have on all of my scroll saws. It was the first modification I made when I found my mojo as a scroller. I tried the hold-down and it just didn’t do it for me. I can see the work better and most hold-downs grab the wood, block the line, and are generally a nuisance. I never have a problem with the wood jumping on me. I did when I first started, but that was because I was rushing things. If you don’t rush, you don’t have the wood jumping. Simple as that.

The fan in the far left is blowing, despite how the blades look. I wear the mask anyway because dust drifts up and everywhere. I could have that fan on high and the dust would still drift everywhere. Besides, working with exotic woods can be hazardous to your sinuses. Trust me! I also don’t use glasses for this. I can’t see up close with them on and despite safety concerns, stuff doesn’t go flying everywhere with this type work unless you’re being stupid.

Another angle of me cutting.
Well, that’s it for now. More as I progress. The next phase will be cutting out the animals. I have a stash of aspen that I’ll use. Once they’re done, it’ll be cleaning off the paper, sanding, and gluing everything together. The last step will be finishing and putting a felt backing on the baseboard.
Until next time…
***
It’s been about a month since I had a chance to work on the Deer Shelf and I finally got back to the last of the cutting. All that is left are the animals.
Because the wood is so light colored, I chose aspen. Very similar to pine in density, aspen is soft and very easy to work with. The thin boards my in-laws sent me came from Lowes in West Virginia. They are not available locally in Las Vegas. I used to get this also at Menards when we lived in Indiana. Apparently, even though we are much closer to Colorado, where I assume most aspen comes from, they only ship it east instead of west.
Aspen makes a great contrast wood against almost any other wood because it is so light and the only other woods that compare to it in color might be some of the lighter poplars, maple and light pine (off the top of my head). However, when it comes to grain, there is no comparison. On the aspen I use, there is little to no grain visible unless you were to stain the wood and I have no intention of doing that. This wood is perfect against the purpleheart and walnut I’m using for the rest of the project, even the chestnut.
In the first image, I’m arranging the cut out patterns on the boards to take advantage of not only the space available on the piece of wood, but also any defects in each board. You can’t see it very well in the photo, but just above the dogs head is a seam where the wood was spliced together. I made sure his head goes just below that seam. I’d hate to cut through that and find a defect in the glue at that point! I also look for cracks at the ends and shift the patterns as necessary to avoid them as needed.

Next I spray the tacky glue to the back of the pattern pieces and lay them on the boards. The trick is to spray just enough glue to make the pattern stick but not enough for the glue to soak too deep into the wood and become a problem to sand out later. What I do is spray a healthy dose of glue onto the paper, let it dry tacky so it’s not wet, then lay it down. That way, it will stick hard, but the glue will not soak too deep into the wood. I used to spray heavily, then rush to lay it down. I’d have to sand like crazy to get all the glue out of the grain, especially with open grained woods like oak. I’ve resolved that problem somewhat by using Goof Off solvent to remove the patterns now instead of sanding them off. Heavy sanding can cause a lot of damage, especially to fine detail.
Another thing about me using heavy glue is that I still have a problem sometimes with the pattern bubbling up, especially if I have to leave the project for a few months or longer. That can almost destroy a design, especially if I’ve already drilled the pilot holes and then lose the design. It will be almost impossible to re-glue another pattern exactly on top of any work I’ve already done. By using heavy glue, letting it dry a bit first to make it really tacky, then sticking it on, it stays better so I can take it off with solvent and not worry about it soaking into the grain or heavy sanding.
Note, the glue tends to get on your fingers so rubber gloves are not a bad idea. I should’ve used some!

The next step is drilling the tiny inside pilot holes. For these fine detailed holes, I use the smallest drill I have. I found that the smallest drill my 28 teeth per inch blades will fit through is a #68 bit which I got at a local hobby store called Danseys’ Hobbies here in Las Vegas. I may pay a few bucks more, but it beats hassling with Internet or mail. I only drill as many of these pilot holes as necessary. If I can get away with a larger hole, I go for it because that tiny hole is a tight fit and if there is any bend in the blade from the bottom clamp on the saw, the blade won’t go through it.

Here is one of the deer with the tiny detail holes. I could have gone with a larger hole for the eye, but went with the smaller bit for that hole because the larger bit can sometimes drift and I wanted to make sure the hole wouldn’t go outside the pattern.

Once all the inside holes are drilled, I then do all the outside and larger holes. Though this is a relatively narrow piece of wood, I NEVER cut to the piece from the edge of the board if it is a thin piece of wood. Doing so creates an instability in the wood and could lead to cracking that could break the work. I always keep the inside piece intact unless the board is at least 1/2-inch thick.
Also, it is good to start the cut at a point so that there is no seam or cut point at a smooth spot. However, you do not want to start the cut at a thin spot. The reason for this is torque. Notice I drilled the pilot hole at a dull point, the ear, rather than a sharp point at the end of one of the antlers. If I’d done that, when I cut all around the piece and came to the other side of that delicate antler tip, if the saw blade grabbed for some reason, that jerk could easily snap off that antler.

All the cutting is done now and the animals are laid out for you to see. All that is left now is to remove the pattern paper from all of the pieces, sand and file everything, fit and glue.

We’ll cover the cleaning and prepping in the next phase.
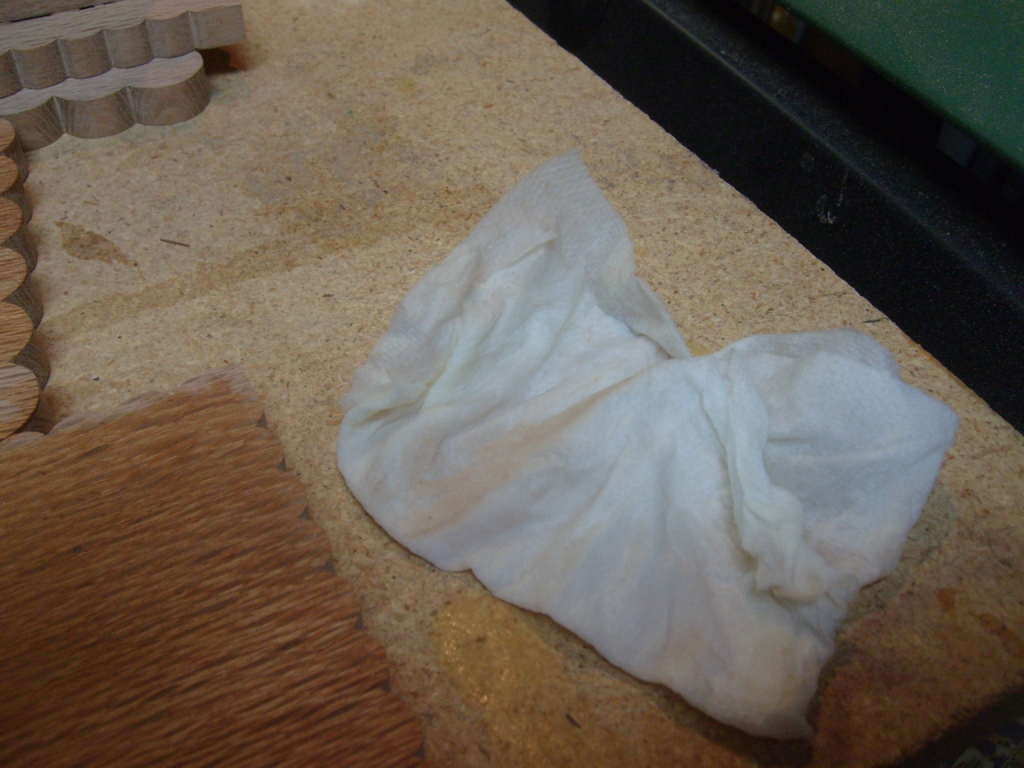
The cleaning phase progressed nicely. However, I didn’t have the camera during the stripping process so I can only describe what I did. I filled my mini-can with Goof Off. Then I took a 2′ X 4′ piece of 1/4″ plywood that I use for gluing and messy projects out into the driveway, dropped the tailgate of my truck a laid it in the back. Then I brought the refilled solvent can out along with all the pieces of the project along with a wad of paper towels, my shop trash can, a putty knife (to lift the paper off) and some heavy-duty rubber gloves.
The trick to removing the patterns is soaking the paper with enough solvent to loosen the glue but not saturating the wood. With the solvent can, which is like the old lighter fluid cans with the flip-up spout and pointed nozzle, I let the solvent wick out onto the paper. I used to squeeze the can so it would squirt out but it would soak the wood and that was too much solvent. By letting the tip drag on the paper, the solvent wicks out onto the paper at enough of a rate to soak into the wood.
For the larger pieces, I’d do a section at a time because out in the open, the breeze would dry it and the glue would re-stick. Once wet, I’d take the putty knife and get under the paper at a pointed spot on the paper where it was easy to start a peeling motion. Using this technique, I’d slowly soak and lift the pattern off the wood. Unfortunately, as I found out later, this technique still leaves residual glue which has to be sanded off. Too much glue can clog the sander surface.
Once all the paper was removed and tossed in the trash can, I let everything sit in the driveway to air out for about a half hour before bringing it back in the garage. Then I let it sit overnight and commenced work the next day. That way I had less fumes to deal with and didn’t allow them to carry into the house.
The next day, I prepped my V-drum sander. This sander was a lot more affordable than a standard drum sander and it was a do-it-yourself project from a kit out of a company in Canada. After pricing drum sanders, I found the ones with enough capacity not only required huge amounts of cash, but 220V power which I don’t have in the garage. This model is their second largest and has an 18″ capacity in one sweep. It does what I want. I ordered the critical parts from them, which are the drum, bearings, table top (pre cut) and the sand paper rolls. I had to make the box, buy the motor and add my own vacuum attachment. It’s a breeze to set up and use.
Here it is below naked with the pre-cut paper lying on top ready to install.

Now here is a shot with the paper installed and ready for use.

To sand, I simply drag the pieces across the drum, keeping them as flat as I can against the formica table top. It works pretty well except it can put a groove in the leading edge of the piece if you’re not careful. I always rotate the piece to compensate for this and it usually works pretty well. There can also be a tendency for it to grab if there is excessive glue, if the pieces are tiny, or if the paper develops a tear. I’ve learned to live with these quirks. I’ve had the paper unravel on me which can be quite a surprise. I’ve been slapped in the wrist by that paper occasionally but with no damage. Safety gear is of course recommended.
Below is all the pieces on display after the residual glue has been sanded off. This also knocks off the rough kerf (flaking at the edges caused by the sawing). There is still a lot of fine filing to be done within the inside cuts but that will come during the detailing before final gluing.

Next is squaring the shelves, rails and rail braces. I use a disk sander for that. First things first. I recently found a digital angle finder at Harbor Freight Tools. It works pretty good and helps me get that precise angle on the disk sander shelf and miter gauge.

I do all my fine squaring on my disc sander. The scroll saw can only as accurate as I can follow a line. Everything needs to be trued. Therefore I square up the sander table first, then I true up the miter gauge. Below is my disk sander.

Here is a shot of me squaring up one of the shelf braces. First I sanded the long sides of every brace. Once that was done, I put on the miter gauge and used the long end as the reference against the miter to true up the short end against the sander. That gives me as close to a perfect right angle as I’m going to get.

Everything is now hard sanded so all that is left is to take my jeweler’s files and go through all the inside cuts and get rid of any errant kerf, hanging glue or other debris. A good run over with the vacuum will finish that up. Once that is done, everything will be ready to glue.
Now that everything is hard sanded and squared, it is time to do the cleaning and fine detail. That involves cleaning out the debris stuck in all the inside cuts. It might be kerf from the saw blade, debris from the sander or more glue/pattern mix left over from the cleaning. for most of that work, I use jeweler’s files.

I have a variety of shapes and sizes but favor a few that see the most action. I’m holding one of them now. It is tapered as shown and is flat on one side and triangular on the side facing the camera.
From this point on, the job becomes quite tedious. With all the pieces involved, there is a lot of checking, filing, a quick vacuum, a second check, maybe another bit of filing and another vacuum before going on to the next piece. I often just blow off the debris with my mouth and hope for the best before vacuuming everything later. Then I do a final check. Depends how lazy or in a hurry I am.
Here I am detailing a piece of purpleheart railing.

Now there are some places even a jeweler’s file will not reach. For those tiny places, I save worn scroll saw blades. I hardly ever break blades anymore so I have plenty of extra blades left over. They really come in handy for fine work.

Notice how the leaf veins are clogged with debris. A jeweler’s file will never fit into those tiny cuts. However, a blade the same size I cut them will! Just remember to use a straight blade! A mangled blade will bend and get stuck! Don’t use a new blade either because after doing a bit of this, you’re going to bend the blade along the portion you are not using.
It doesn’t matter whether you use the cutting side or the back side. Sometimes it’s better to use the back side of the blade because all you want to do is run something through those lines to clear the debris out, not recut them. However, sometimes, I’ve had to almost resaw them by hand due to the wood swelling or warping slightly and closing up the gap. When that happens, things can get a bit tight and you can get some pretty sore fingers and thumb over it!
Here is the leaf cleaned out. Sorry for the blurry image. My camera didn’t focus properly close up though it looked clear in the finder.

Once everything is clean, neat and spiffy, it’s time to start gluing. Yeah, thought I’d never get to that part!
The first thing I glued were the rails. I wanted them first so I could fit them to the shelf floors. I didn’t put any fancy joints on the corners and wanted to make sure I had a good fit before I glued the assembly to the backboard.

I love those angle clamps. They give me a virtual perfect 90 degree angle every time. Well, as long as the wood pieces aren’t warped!
Next, I glued them to the shelf floors. Here is the large shelf with a weight on top to seat it better. I let it dry for about 30 minutes. Here in Las Vegas with our low humidity and warm temperatures, that was enough time for the glue to set. I use Elmer’s Wood Glue, by the way. The cheap stuff. Nothing fancy. It works just as good as any of that high-end stuff.

Here are two shelves with railing glued. Above them is the small shelf with a weight on top going through the same process.
The rail ends are trued up to the shelf back edge so they will fit straight when I glue them to the backboard.

Now it’s time to glue the shelves to the backboard. This part is a bit tricky but not rocket science. The spots are marked by the design, but the trick is getting everything straight and butted up so there are no gaps. What I did was glue the bottom braces first, very quickly, then put glue on the front of the shelf floor and rail ends and set that all down on the shelf braces. Then I fudged it all around to get it straight before the glue set. This all takes place in about thirty seconds or less. I assembled it all in place first, to get an idea where it was supposed to go, then, took it all apart and started gluing. I followed the same process with the subsequent shelves.
Here is the first shelf in place.

Now here are all three shelves glued in place.

Of course, things couldn’t be a breeze from here. Remember all those animals? You would think it would just be a matter of gluing them on. But oh no! It couldn’t be that easy, could it???
Because this project comes in four different configurations, things have to be customized. Below is the perfect example. Half of the animals won’t fit on the backboard because the shelf braces get in the way. What that means is I’m going to have to customize these animals for each place where a brace interferes.
See the photo below.

Notice first the deer antlers. They’re much longer than that. So, I had to cut them off and glue a tiny piece on the other side of the brace. I also had to cut a wedge out of the shoulder to account for the bottom of the brace on the left. As for the fox, I had to cut its tail off and continue it on the other side. I actually cut a section out the width of the brace so it wouldn’t look out of proportion.
I had to do this with several other animals on both the middle and top shelves.
In the end, it worked out okay. Below is the final product, ready for lacquer.

Next time you should see a transformation from the raw wood into a (hopefully) beautiful finished project
The final finishing is all that’s left. I opted to spray the clear glossy lacquer on instead of brushing it on. Too many nooks and crannys to worry about.
Here is where I really deviate from what everyone else recommends. A lot of finishing experts say you should finish all the individual parts first, then glue them together. Coat them, steel wool or fine sand them down, then coat them again. Rinse and repeat several times. I suppose with certain paints and certain glues, you can get everything to stick. I don’t like that. I like the wood to be raw so the glue, at least the glue that I use, penetrates for a stronger bond.
Second, I rarely put more than one coat on. If the wood really absorbs the finish, leaving a dull surface, I’ll run over it again until it looks glossy or more solid.
Third, I don’t sand between coats. That would involve another mess to clean up. Cleaning up within all those inside cuts multiple times is not something I look forward to over and over again.
Finally, though I may end up with a glob of paint (or lacquer) here and there, a thin spot, a thick spot, a brown or light spot, you know what? I really don’t care. This is a hand-made object, not something from a machine. Sure I want it to look good, but I’m no Rembrandt. I’m not out trying to win some prize at the scroll saw championship. I could care less. I take pride in what I do but I do it for myself, not to win a prize. If you want to take the meticulous time to make it look something more than hand-made, be my guest. Make it look like more than a work of art. Or, more of a work of art. I’m quite happy with what I do. My projects are full of mistakes if you look close. So what?
Now that my philosophy is out of the way, here are my cans of lacquer, ready for use. I have two because one is almost empty. In the end, I used the almost empty one and maybe a third of the full one. Nothing fancy!

Here is another shot of the shelf in raw wood, before lacquering started. Notice my cardboard backboard. I use that broken down box for all of my spraying, such as gluing patterns and painting. I’ve had it for several years now. It’s a bit sticky, but why fix something that isn’t broke?

Here it is again after spraying. I started with the shelves, top then bottoms. After that, I did the backboard front, then back. All the time I have to make sure I get every angle of the inside cuts. That’s one reason I like spray now. With a brush, you have to get inside every tiny spot and have to worry about broken bristles sticking everywhere. Spray tends to get into all the little places. The shelf ended being positioned at just about every angle of the compass so I could get to all the different inside cuts. The trick was trying not to spray too much and getting gobs of excess dripping down on everything.

Notice how it’s a bit darker now. After drying, it’s even darker. The final photo shows it hanging on the wall. Sorry it’s a bit blurry but I took it in almost complete darkness and had to rely on the flash. I didn’t know it was unfocused until I got it up on the computer screen. The review image looked okay on the camera. Oh well, I’m not going to do it over again.

There you have it. A project, start to finish. Hope you enjoyed this essay. Maybe I’ll do some more in the future. If you have any questions about this or any of my other projects, please write me or make a comment and I’ll be glad to answer as best I can.
A CHRISTMAS GIFT
I made this one a month or two ago but couldn’t post it because it was a Christmas present and didn’t want to spill the beans until today. After my sister-in-law thanked me, I figured it was okay to let the world (the few of you that actually come here) see it.
The idea for this project came from a cheap giveaway from one of the casinos we frequent. I forget which casino, but we got several of them over the course of many months gave all except one away as Christmas presents. One we gave to my mother-in-law. When my sister-in-law saw it, she liked it and mentioned she’d love to have one also. Word got back to my wife and next thing you know, I’m using the one we kept for ourselves as a template.
The project is a rotating picture frame consisting of three medium-sized frames in a larger rectangular frame. Each one rotates so that photos can be placed back-to-back allowing six photos which can then be randomly or otherwise displayed on each side.
Here it is:
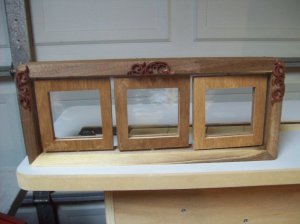
The original was made from cheap pine and the outer frame warped. I wasn’t going to tolerate that, so I made the frame not only thicker, but used well-seasoned walnut that’s been aging for over a decade in the dry Las Vegas heat in my storage shed. I don’t think warpage is going to be a problem. Second, the glass inserts in the three frames were real glass in the original. Rather than going to a glass cutter, besides wanting a safer material, I went to Lowes and purchased the thinnest Plexiglas they had. It worked just fine. Finally, I chose not to place brass clips on the edges of each frame to hold the photos in. Too complicated. Tape will work just fine or friction from the thickness of the photos.
For the inner frames, instead of using walnut and hassling with joining and such, I used three doubled thicknesses of face-to-face Luan mahogany plywood. It comes in almost 1/8-inch thick sheets at anyplace that sells lumber. By gluing the two rough sides together, you can create roughly 1/4-inch plywood, good on both sides. I sandwiched the three layers together with the center one cut in a U shape with the opening to one side so the Plexiglas and photos could slide in. I made sure the thickness of the wood and the available slot left over was wide enough for two layers of the Plexiglas plus photos to slide in without binding. I glued each sandwiched set together and cleaned up the four edges on my disc sander.
The toughest part of the job was drilling the pivot holes for the dowels. They have to be precise, not only to keep the three rotating frames from bumping each other, but also to keep from binding, allowing the frames to fall out, and sitting in the frame uneven. I set up a jig on the drill press to accomplish this so that all the holes were the same depth and at the same distance from the front edge of the top and bottom frame members. I did the same thing with each picture framed piece.
I then had to cut the dowel pieces exactly the same length or all was for naught. If one was off just a tad, a frame would bind or be out of position. If I shaved it off too short, the frame would fall out of the setting. I drilled the holes deep enough to give me a bit of slack, but I didn’t want to take any chances. I pulled it off. The last thing was pounding them in. The holes were a snug but not too tight fit. I didn’t want to break the pegs off or surgery would be involved. I tried glue on one of the pegs but that was a mistake. It actually caused friction and resistance because there as no way for the air to escape around the sides. I almost lost that one! I put all the pegs in before I glued the frame together because I had to assemble everything in one step.
I did screw up the frame edges. The 45 degree angles were not precise. I left gaps. As it turned out, my wife spotted some extra filigrees I had left over from the thermometer project shown up top and that’s those purpleheart enhancements you see in the center and in the corners. She wanted them to dress it up. I wanted them to cover the crummy corners!
Whatever the case, it worked and my sister-in-law loved it.
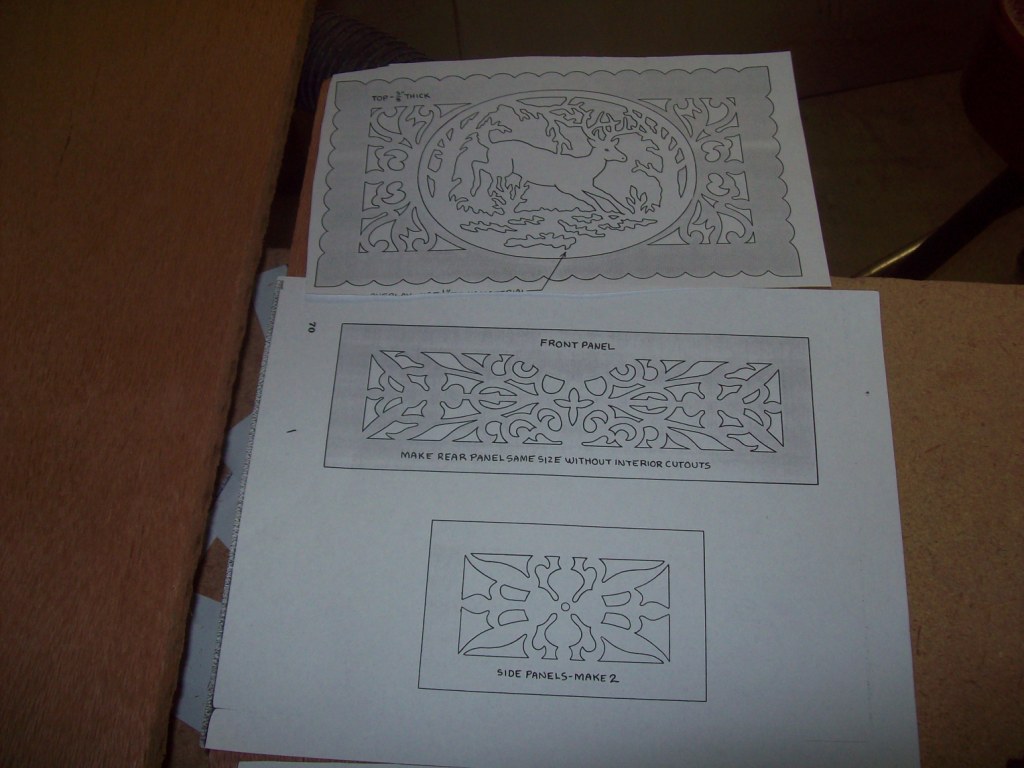
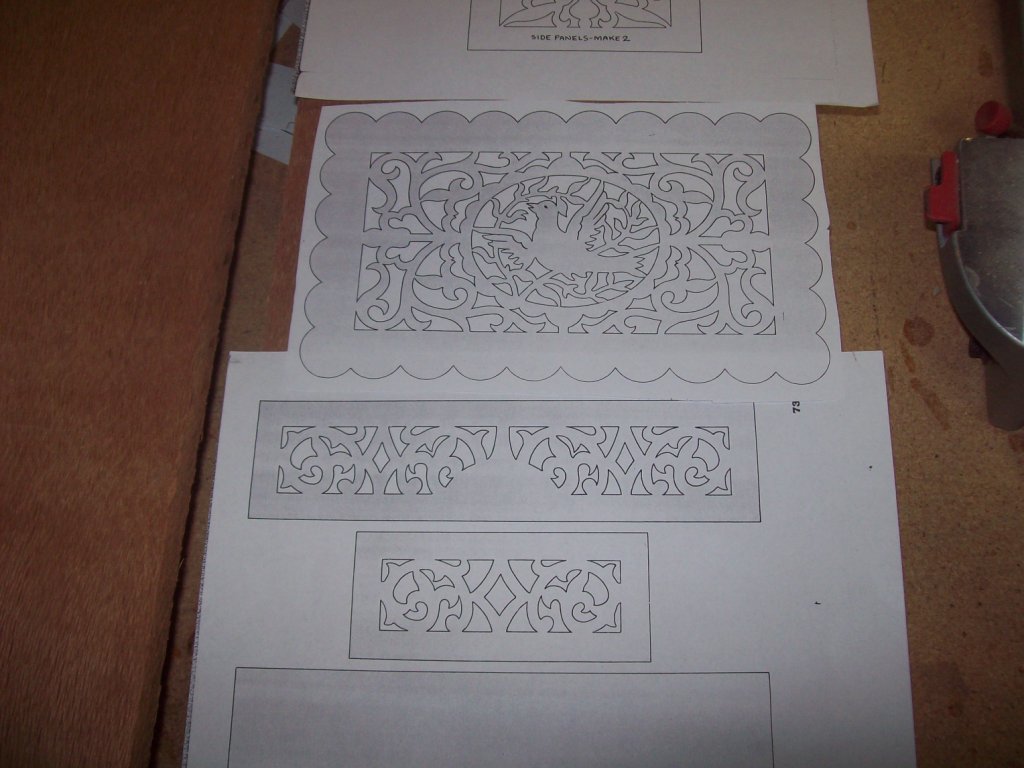
A PAIR OF JEWELRY BOXES
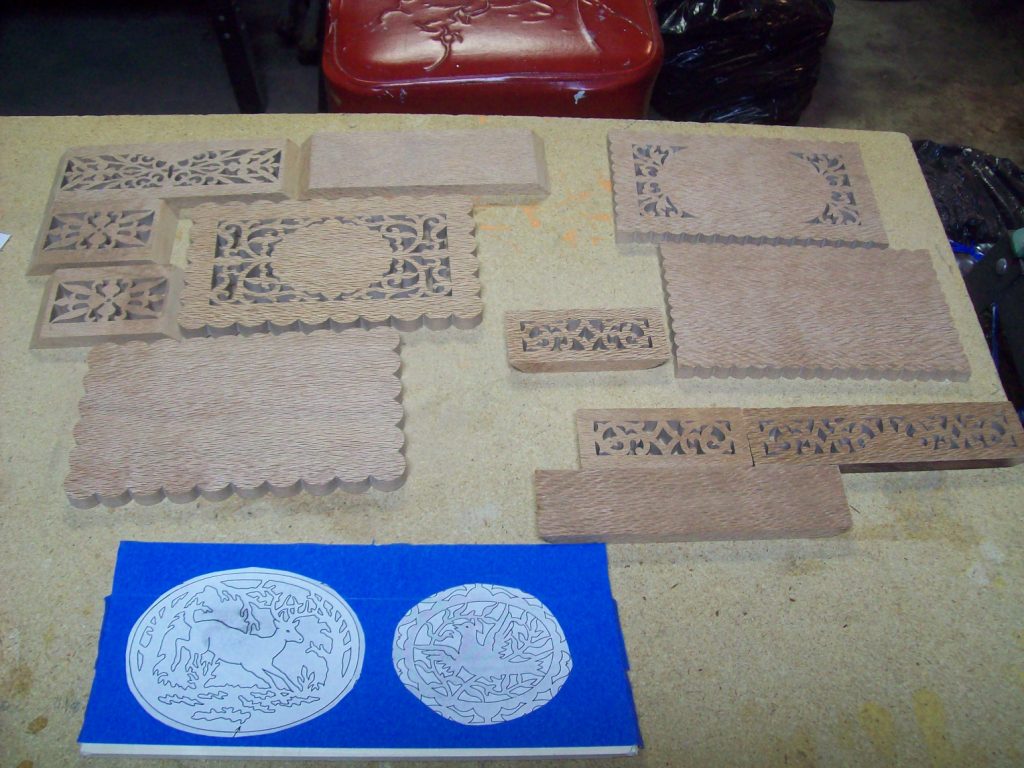
It’s been a long time since I’ve done anything out in the woodshop for too many reasons to list, mostly too boring to go into. Let’s just say the time has finally arrived and here’s the next project. I’ve got a lot of copies of these little jewelry boxes in my pattern box. They came from a book on my shelf, can’t remember which one. I can tell though because the page numbers are at the bottom of each copy! Maybe when I’m more motivated, I’ll dig into the bookshelf and figure out which book they came from and post an image of the cover somewhere down below, or at least give credit for the title.
I’ve been wanting to do some more jewelry boxes or log slices, or something along those lines because I have all this wood available. The log slices are a bit harder to get started because I have to cut the slices with a chain or band saw, then either plane or drum sand them down. That’s almost more work than cutting the designs, so I’ll save that for another time. In this case, these cute little boxes were just calling to me. I’ve never done these exact patterns plus they are relatively simple yet look good and will give me a chance to try out a new pattern technique as you’ll see below, as well as a wood I’ve never worked with.
For this project, I’m using lacewood. I’ve always thought lacewood came from the London Plane Tree, or Sycamore, but eau contraire! Apparently, what we know as commercial lacewood comes from South America. There are several varieties, as usual, but what I have I positively identified as the most common type found in South America.
The wood came in 3/4-inch thickness which is way too thick for such small boxes, so I had to plane it down to 1/2-inch, which not only made it easier to work with, but also cleaned the boards and flattened them out. Lacewood is a very splintery wood and comes with cracks and worm holes, at least all the pieces I’ve seen. It seemed like I wasted a lot of wood but in actuality, I improved the quality of the pieces. Here is the difference below. Notice not only the thickness, but the color difference after planing.
The wood came with several cracks throughout the length. I had to work with those in mind as I laid out the patterns.
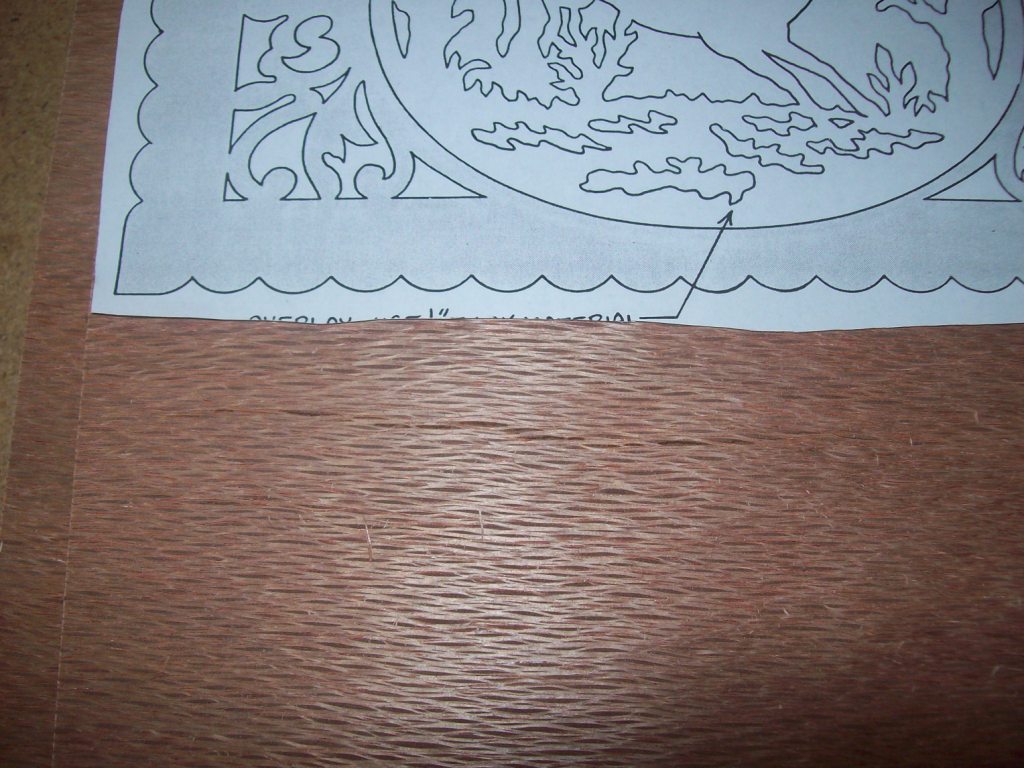
Here you can see where I had to set the pattern on a cut piece to avoid one of the cracks. The crack is the faint “darker” grain line below the edge of the paper.
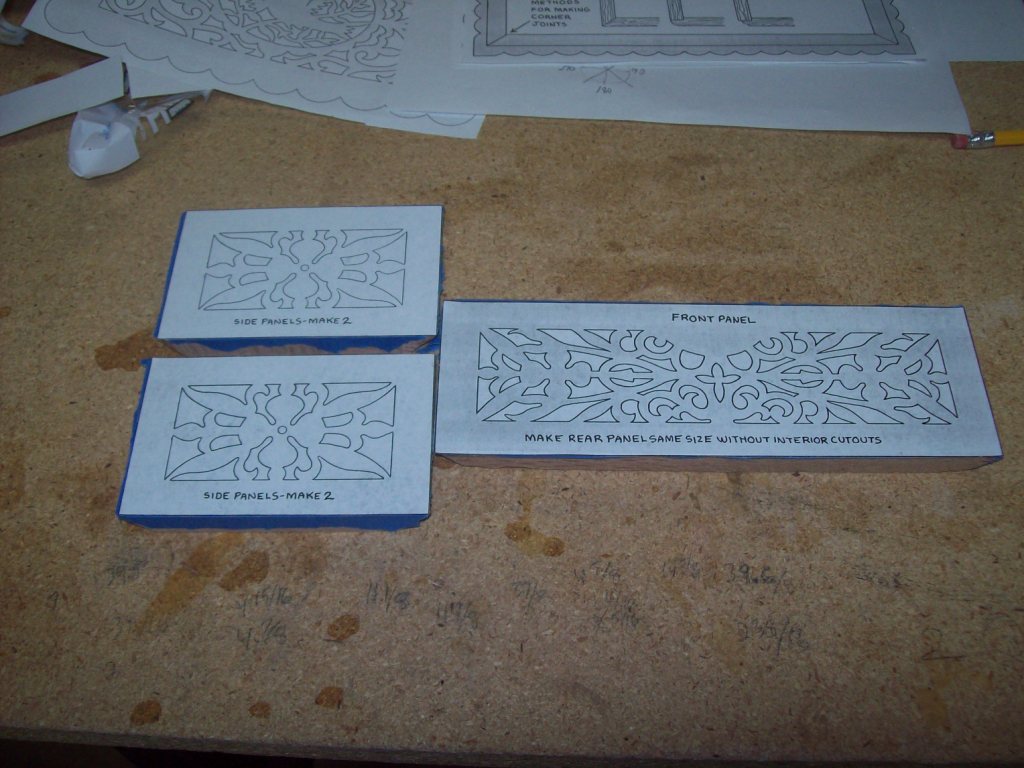
Here are the initial patterns laid out for each box.
The next thing I did was precut the sides. One thing I’ve learned about making these boxes, never ever cut square fitted pieces using the scroll saw! It doesn’t work, trust me! There’s no way a blade the width of several hairs is going to cut a straight line, no matter how carefully you follow the pattern. Not only that, the extra tedium of cutting that long line is not necessary. You also have to consider the corners. If you want to use a mitre, like 45 degrees, which I do, you’ll never get a good accurate cut on a scroll saw. I precut the square sides on my table and compound mitre saw along with the mitred corners and prefit them. That way, I can just slap the patterns on to each piece and cut out the inside cuts. Here are the two box assemblies slapped together with the pattern pieces below them.

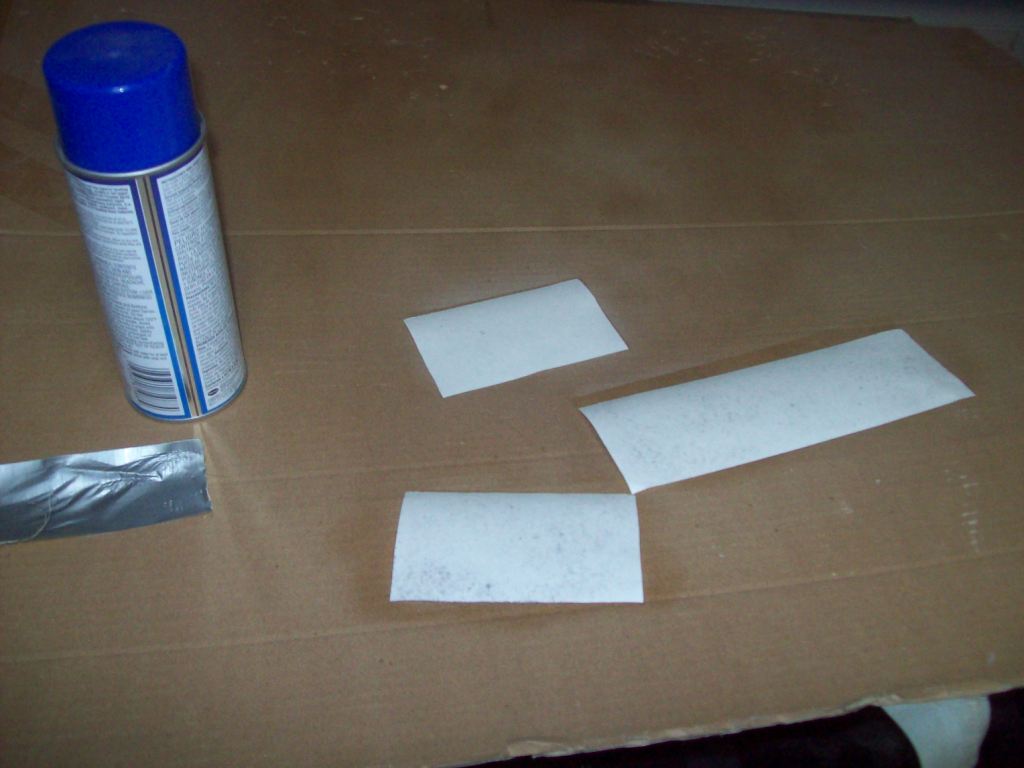
The next step was to apply the patterns. I recently picked up the latest copy of Creative Woodworks & Crafts and there is an excellent article on how to apply patterns. My tried-and-true method has been to apply spray glue to the back of each paper pattern piece, allow it to set a moment, then apply it to the wood. Works well. Unfortunately, I usually have to use Goof Off solvent to remove the pattern and the residual glue. This not only causes a mess but can lead to coating issues. It’s always worked for me but this article made me think. The author likes to use blue painters tape not only for lubing the blade so it will last longer, but also to keep that tacky glue off the wood. I’ve heard of this before but never tried it. His other method was to use double-sided masking tape and avoid the glue altogether. On my quest to find the double sided masking tape, which I never did, I picked up a roll of blue painter’s tape to give it a try. The result is below.

With that on there, I still sprayed my pattern pieces.
Let the glue sit a moment.
There you have it. Patterns, ready to be drilled.

Drilling progressed with no issues because the pieces are small enough that they fit within the throat of the press with no problem. If not, I’d have to use a hand drill.

Here are the pieces drilled out and ready to cut.

The piece cut and now for the big test, ready to peel off the pattern. Sorry for the bad exposure. Didn’t notice until I downloaded it to the computer.

I was amazed how easily the tape peeled right off. There was no residual glue left on the wood at all. Plus, I could see no kerf left on the inside edges of the wood (flaking bits of wood). Very clean. So far, I like this blue tape method and I don’t have to mess with chemicals anymore.
That’s it for now. So far, this little project is working out well. Lacwood, though an easy wood to work with as far as cutting and holding a pattern, tends to have a lot of splinters along the outer edges. My hands are still full of them several days later. Watch out!
Until next time…
* * * DETOUR * * *
A FLAG DISPLAY CASE
I had to take a slight detour in April when my father-in-law passed. He received a full Air Force military funeral with honor guard and a tri-folded flag. My mother-in-law wanted to display the flag so I started working on a display case. This was one of the most difficult projects I’ve ever done! It should have been simple but calculating and getting the angles just right went beyond me for some reason, and it took a lot of “cackelating,” “figgering,” and “contemporating” to finally get it just right. I wanted to make it out of real wood, wood I’ve witnessed cut from a raw log, and not something I picked up at the store. Since I have an abundance of raw walnut, well…
Turns out, that walnut, though a great wood, was a lot rawer than I ever imagined! During this process, not only did I have immense trouble finding pieces good enough to plane, I blew up my planer in the middle of one run and had to go out and get another one to finish the remaining board feet. Even after all that, with the wood having dried in the Las Vegas near-zero humidity for over a decade, I still ended up with some slight warping that I had to deal with.
I was so afraid of getting something wrong. I ran our of clean enough pieces that were long enough, wide or thin enough to use without wasting a huge amount of wood. I managed.
The project took from late April until October, but it was worth it. The funny thing is that in early September, we made a trip to Hobby Lobby in Henderson, Nevada and guess what I saw in the section next to the picture framing area? Yup, almost exactly the same thing! However, it was almost $90. Considering the effort and grief I spent on this labor of love, I’d have probably saved money buying one but I’d rather know my hand went into something for my mom and pop-in-law. They’re the greatest. Besides, it wasn’t all bad! I still had a great time once I got those cuts just right.
Here are a few photos of the results.
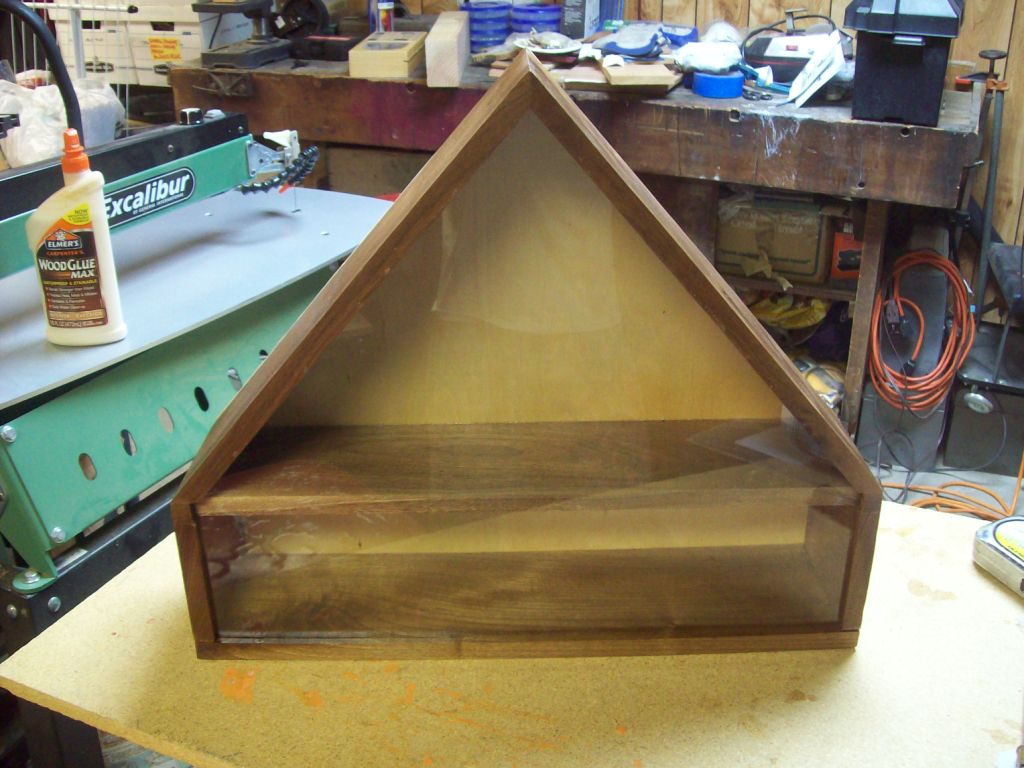
The precise measurements for the angles were NOT 45 degrees! The compartment is 16 X 16 X 23, an exact match to the folded flag. The bottom compartment is for the shell casings the honor guard fired plus any medals Grandma may want to add. The thing is that she has to mount them to the bottom piece because it’s the removable part so the Plexiglas front can slide out of the groove it sits in.
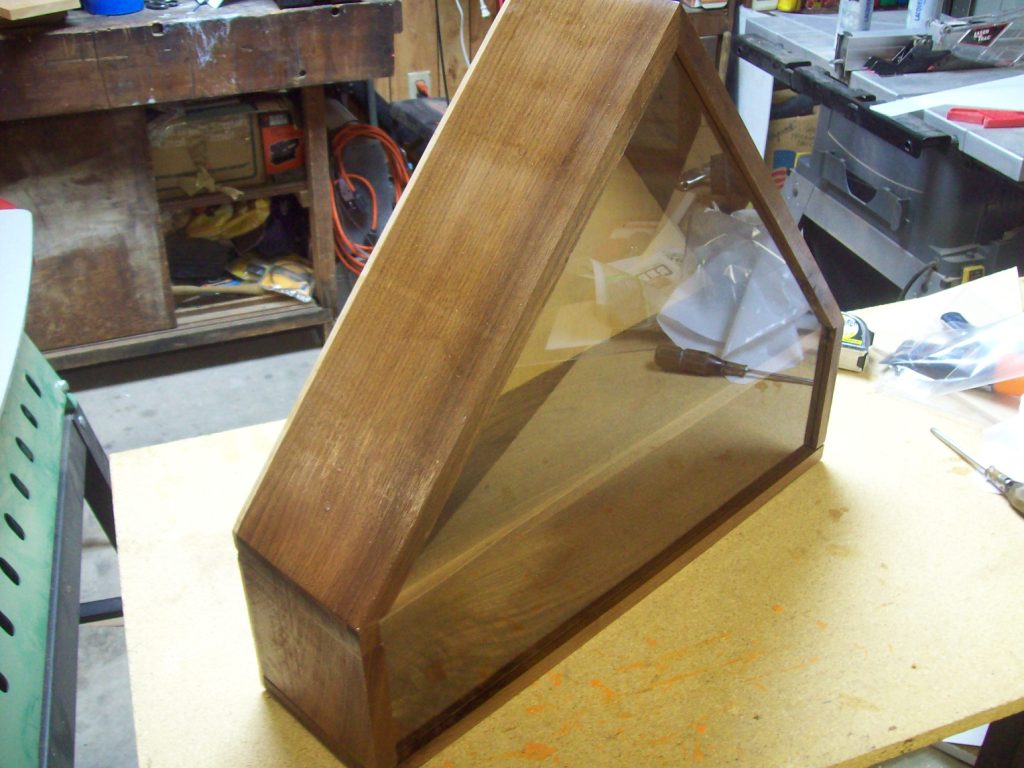
The left side showing the walnut wood grain.
The right side showing more grain and knots that add character.
The bottom is held on with four large wood screws. The bottom board also has a miter groove in it for the Plexiglas like the sides up to the peak.
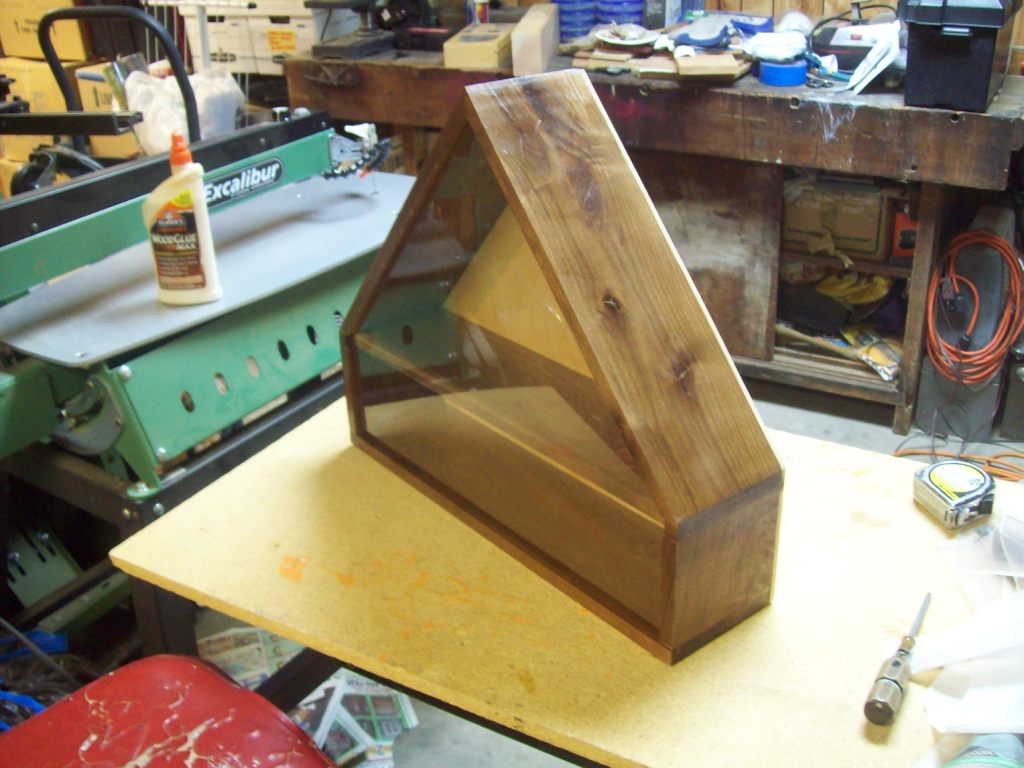
I gave it two coats of spray lacquer. No fancy rubbing or steel wool. Just a coating to keep the moisture out and darken the wood. There are plenty of paint globs on it I probably should’ve rubbed out but didn’t. Hey, it’s HAND MADE!
I’m sure glad I did this project but am also relieved it’s over.
Now, back to the jewelry boxes!
Until next time.
The jewelry box is humming right along now that I have time for it. Below are the completed lacewood pieces. Also, you can see the two top inset pieces, ready to cut. They’ll be made out of aspen, which is a very white wood and should contrast nicely with the lacewood, especially after they get a coating of lacquer.
When I cut the two bottom pieces, I switched from my usual 2-ott 29 TPI blade to a heavier 20 TPI reverse-tooth blade. This blade has the teeth reversed at the bottom for a short bit so that on the up-stroke, the cutting hits the bottom of the wood and prevents kerf (fuzzing the edges) underneath. I also used the heavier blade because the outside is one long continuous cut that I wanted to be smooth. That thin double-ott blade would lead to a much more wobbly finish on the outer edge.
One more thing I did this time around. On the inner folds, which appear sharp on the pattern, I used to take a lot of time going into the groove, backing up, cutting around so I could come in from the other side of the pattern, and hitting it from that side, all for the sake of making that inside groove more pointy. I found that what I ended up doing was usually mess it up and leave multiple blade digs in the groove that I usually had to either file out or just leave.
This time, what I did is when I came into the groove and hit the point, I pulled the piece against the back of the blade (away from the cutting teeth) and quickly swiveled the piece around and headed out along the pattern. Turns out the cuts were smoother and I didn’t have that gouging I usually got trying to make a sharper V pattern. The pointy grooves may not be as sharp of a V, but who cares? Nobody will notice anyway! See the photo below.

Next is something I should’ve thought about a long time ago, which I think I did a long time ago and somehow got out of the habit. Whenever you’re working with an especially splintery wood, it’s a good idea to sand out of the edges! Trust me on this, after getting more than my share of splinters from this lacewood, especially today, it finally dawned on me that I should’ve taken the time to dress up the raw piece before I put the patterns on. It would have saved me a lot of grief. I even still have a splinter in my finger as I’m typing this! See an example of the edge of a piece below.

Finally, since I now use the painter’s tape method and glue my patterns to the tape, it’s been a fantastic way to avoid unnecessary sanding and dealing with that sticky glue spray. However, don’t forget to get rid of the overhang on your work piece! If it gets onto the underside of the board, watch out! When I was cutting the two bottom pieces, I remembered to cut away the overhang on the one but forgot the other. I found out what friction really is when I started the other one and almost screwed up the first few inches of the cut. That sucker grabbed the table like it was glued down! Once I realized what was going on, all it took was a few snips with the scissors and the wood glided right along with almost no friction. Live and learn. Look at the edge below (already trimmed on the yet-to-be-cut aspen piece) to see what I’m talking about.
Notice how the tape doesn’t curl all the way around to the bottom side? If you use this method or something similar for attaching your designs, make sure you don’t add brakes to the underside of your wood!
Well, that’s it for this stanza. Next time, I should have the insets cut and everything will be ready for final sanding and assembly.
Until then, later!
ABOUT A MONTH (OR MORE) LATER
I had every intention of getting back to the project and finishing up the two top pieces. However, the first thing that happened was that I got a major nasal infection. Because of the dust involved with cutting, that prevented me from even going near anything made of raw wood for several weeks while I took strong antibiotics.
Number two came from the severe cold weather that hit Las Vegas. Have you ever worked in a meat locker? That’s about what my garage is like when the temperatures outside are sub-freezing. I DO have an electric heater that I can plug in. However, I’m not one to have a lot of faith in the electrical wiring in the garage, and even though I’ve used it in the past, since I have to use the same plug common to my scroll saw and vacuum cleaner, it tends to heat up the wall socket and sometimes trips the circuit breaker. So… I had to wait another few weeks for the temperatures to at least warm into the upper forties before I would suffer out there in heavy clothes underneath my heavy-duty coveralls.
Today was the day, and despite other potential projects, I hunkered down and finished the cutting of both top pieces. So, as of today, all of the scrolling for both jewelry boxes is done. Now, I just have to sand, glue and lacquer the boxes. Oh, and attach the lid hinges.
Now, a bit about cutting the two top pieces. They’re cut from the same piece of solid 1/4-inch aspen.
Aspen is a very light, almost white colored wood, which makes for a great contrast against the darker lacewood of the body of each jewelry box. The two patterns were taken from the designs and instead of cutting them into the lacewood, I separated them from the patterns and left their spot on the main lids solid so the aspen pieces could be glued on. This makes a great inset, or add on, since, these pieces are not actually sunk into the wood.
I may have covered some of the following before but it’s worth going over again.
These two pieces are both intricate and delicate. The wood is very soft, so great care must be taken when cutting.
Using a new blade, you have to be extremely careful! When cutting around corners either inside or outside, ALWAYS pull against the back of the blade when making turns! You do NOT want to put pressure on the cutting face of the blade until you are ready, or the saw is going to go wherever it wants to and your cuts are going to be a mess. Remember, especially with a new blade, it cuts like butter and the slightest pressure will glide right through. Trust me!
Once the blade has worn in after a few cuts, it’s not quite so bad, but get in the habit now (especially with soft woods) of always turning with pressure on the BACK of the blade. Soon it will be unconscious. This is why some scrollers grind the back edges of their blades to wear off the sharp edges to prevent burns. I don’t because it’s never been an issue for me.
Second thing is to ALWAYS cut the small cuts first. See the photo below:

You want to cut the small areas first before you cut the big ones. Work your way up to the largest cuts. That way you have less chance of breaking something off. You’re going to be twisting and turning that piece all around, and once in a while, the blade may grab it and jerk it up, or your fingers may get into the open spaces. The last thing you want to do is break off a delicate filigree while you’re cutting some small hole you could’ve done first.
Next, cut EVERY hole. NEVER, and I repeat, NEVER accept a drill hole, even if the hole is supposed to be round and happens to be the size of the drill bit! Notice the deer’s eye and nostril holes? The drill bit was almost the same size, but I cut them anyway and elongated them. I’ve had projects that required round holes and could’ve used a drill hole, but I’ll tell you what. A drill hole LOOKS like a drill hole. They don’t match the scroll cut at all. Trust me on this. A drill hole will be more perfect, but it will look unnatural.
Finally, On the large cuts, where there are long filigrees (or in this case, antler points, for instance), NEVER start and end a cut on one of those! Start and end your cut in a BLUNT spot! ALWAYS! If you wonder why, take it from stupid old Fred that found out the hard way. I used to start from the most pointed place because I didn’t want a seam or cut spot to show. Dumb idea. What happened was that when I came around back to the tip of that pointed “antler” which happened to be on one of these patterns, as a matter of fact, as soon as the blade came through the last part of the cut, it grabbed, jerked the waste wood up and broke the antler off! Yup, did you see that coming?
Start with a blunt area away from the delicate parts. Then, when you get back to where you started, place your thumb or finger on the waste piece, while your hand is on the work piece. Make sure NONE of it will jump, then cut through the final spot. As soon as your cut is through. Shut off the saw! That way the waste piece can’t catch on the blade, pull up and tear away any of the delicate filigree you’ve just so carefully cut.
I finally got both pieces done, pulled the pattern and painter’s tape off, and below is the result. Notice the stark difference in color between the two woods. It will show even more after lacquer is applied.
I have just the last three to do: Sand, assemble and lacquer.

That’s it for now.
Until next time.
I didn’t get anything done for a few weeks, this time because I got sick and it was just plain meat locker cold again in the garage. Today, I finally got back to doing a bit. Actually, after looking at the above photo, I DID manage to get a bit done since the last time I posted, before today. I assembled the sides of each box. The issue I had with them is that the 45 degree angles of each corner were not clean cuts. I thought they were, but when I tried to fit the edges together, I got a nasty surprise. I did a bit of sanding and refitting, but they still look like crap. Then I came up with a brilliant idea. Corner edging.
I’d used this stuff before on several dollhouses I’d made in the past. So… I rushed down to Dansey’s Hobbies here in Las Vegas, ready to pick up another strip of this basswood corner edge molding. I get there and the place is empty. The business went belly up! That prompted a quest around town for another hobby store that had such a rare and odd item. Turns out Dansey’s was the ONLY place in town that carried anything like it. They specialized in doll houses, with the exception of Hobby Lobby. After running by that place, I found out they don’t carry anything even remotely like that. So… to make a much longer story shorter, I was stuck with crappy corners and just had to do the best I could. I went for the obvious homemade look. I glued the box sides together as you can see below. I did NOT do a closeup of the corners! I did, however, sand the edges, top and bottom to even out any mis-fitting when I glued them together. I did this on my drum sander. Then I ran each corner on my disk sander to round them off. Unfortunately, it didn’t help with the gaps left by the uneven cutting. Oh well… home-made…

Next, I took the two base pieces and ran the glue (inside) sides with a damp paper towel. That not only gets them ready for the glue, but removes extra sawdust and crud. If you look close at the paper towel, you may be able to see stains from the sawdust.
Finally, it got to glue time. With the short-sided box, I was able to clamp it down. First I applied a medium bead of wood glue to the downside edge. Then I ran my finger over it to distribute it evenly over the wood surface. Then I cleaned my finger off! After that, I carefully laid the side assembly on the base, as centered as possible and fudged it a little to make sure it was as centered as possible. You don’t want to move it too much or you’ll end up smearing glue all over exposed areas. After that, I added the clamps, which were extended out almost to their maximum.
I wasn’t able to use the clamps on the deeper box. I just had to press down best I could, then hope the glue did the rest.
Here is a photo of the shallower box, clamped down.

The last step on each box was to take a common (or blade) screwdriver and go along the inside and outside edges of the glue joint and remove any glue bead that has oozed out. Swipe a little, then wipe the excess off on the wet paper towel.
Now it’s just a waiting game. The next step is gluing the overlays to the top pieces, then add the hinge and then attach the lid. Once that is done, remove the hinge again and apply the lacquer. I’ll describe these processes in as I get to them in the next few installments.
Later…
Finally got back to the boxes again. Finalized the initial assembly by attaching the lids with hinges and gluing the top pieces to the lids.
Attaching the hinges wasn’t as easy as it sounds. First, I was going to use a solid hinge piece across the back. However, it was one-inch hinge which would’ve left a huge gap under the lid, causing the back to be much higher than the front. So, with a trip to Lowes, the smallest hinge material I could find was 3/4-inch, which was only slightly smaller and came in the form of hinge pairs. Though the backs of each box now sit closer to the base, the biggest issue I have with these consumer hinge sets are the crummy brass screws. If you even breathe on them wrong, they either strip out the Phillips heads or break off. I had to drill the holes in the relatively soft hardwood very fat so that there wasn’t much bite for each screw or the inevitable would happen. I managed to get all eight screws into each box pair and only stripped one screw head out. Not bad.
Below are the two boxes showing the hinges mounted.


Unfortunately, I ran into another problem that I should’ve been more careful about. When I drilled the four holes in the lid, I went a little too deep and they poked through the front. As a result, the only wood putty I have is dark walnut. The tube has been sitting in the garage in just above freezing conditions so I had to really scrunch down to get just a small dab out which I then smeared on each hole. Once it dries, by tomorrow, I’ll sand over those spots and hopefully, the hole will be filled in and the tiny spots will hardly be noticeable. At least that’s the theory. Below shows the dark smudges where four of the holes are. Sorry for the blur, the camera I’m using right now doesn’t do close-ups very well.
From the back, you can see that the lid is raised up a bit. I may put some kind of bumper pads on the front edge to compensate for the tilt. Then again, maybe I won’t. Haven’t decided yet. With the 1-inch hinge, the difference was a LOT worse!

So, now we have both boxes assembled and ready to disassemble (hinges from the lids) for lacquering. My only issue now is to do that little trick without stripping those brass screws. However, I had to do a good fit before the lacquer job in case I had to make any adjustments or re-drilling and plugging, which has happened before when I broke off screws. I just hope I don’t break any screws off this time or I’m in trouble. It’s less likely now though because the holes are already worn down so the screws should go in easier next time. Besides, I have two spares. We’ll see.


That’s it for now. Just have to wait until it warms up enough to do the lacquer job.
Later
Finally finished everything. Removed the hinges and only messed up two screws. Had to remove them with pliers. I used spray lacquer and gave everything two coats. None of this rubbing out each coat with steel wool and all that fancy stuff. Yeah, there are a few drip spots, but what have I said so many times? Hand made!
Put all the pieces in the back yard on the pool deck to dry for a few days. Lacquer puts off some pretty intense fumes and they last for days. Trust me on this. In fact, a week later when I reassembled the hinges, the boxes still reeked.
Since the hinges raised up the back of each lid, I had the brilliant idea to put some Teflon pads on the front edges of each front side. So, I had some 1/4-inch left over from one of my older telescope projects and cut four very small pieces. Then I discovered they were still too thick! Now I have four small pieces, too small to cut down more, so I just said to heck with it. The lids are going to tilt a little.
Here are the two boxes. You can see how the wood grain really stands out with the lacquer. A job well done, if I do say so myself!

Next project will probably be some more thermometers. Except, this time you’ll get to see the step-by-step process.
Until next time…
It’s been a while and I am making very slow progress on the thermometer project. I’m still not ready to present anything yet but hopefully will be soon. Other priorities…
A BATCH OF THERMOMETERS
Okay… work finally commenced and I’ve had time to sit down and show some progress.
Because these thermometers require a rigid base of a good looking wood, the most economical and easy to obtain material is some form of plywood. To take an exotic or even common wood and plane it down to a thin 1/4-inch would be a huge waste. To buy the wood in that thickness and width would end up costing a fortune and then there would be rigidity and warping issues. The best material is plywood. The next issue is finding 1/4-inch that looks decent. To tell the truth, the popular hardwood plywoods like oak and poplar available at the usual suspects are rather bland. To compensate for that, I’d have to stain them. Another issue is that often, they’re fiber filled in those thin thicknesses instead of being true plywood. Pine plywood is out of the question. It never comes in a good enough grade to make something like this. I could go to the exotic wood store, but there, it’s the same situation. What they have is also light colored and bland… and every expensive. I just don’t like those choices.
Improvisation and inspiration is the way to go. It just so happens there’s a plywood that fits the bill. The only problem is that it comes in 1/8-inch (actually some metric equivalent). This material is used for roofing, as in decking underlayment. Luan mahogany. Can you believe that? Mahogany! Such a beautiful wood. In this case, it’s considered crap wood. However, get hold of a sheet and you can get some pretty decent results.
Since it’s way too thin, I make my own 1/4-inch plywood. Luan comes with a light and dark side. One is for gluing and the other for the weather side (I think). Anyway, sometimes I use the light side, but in this case I decided to use the dark side, with its rich brown shade.
Above is the light side of the sheet. Note the water stain on the left side. That will be on the inside so it won’t matter.
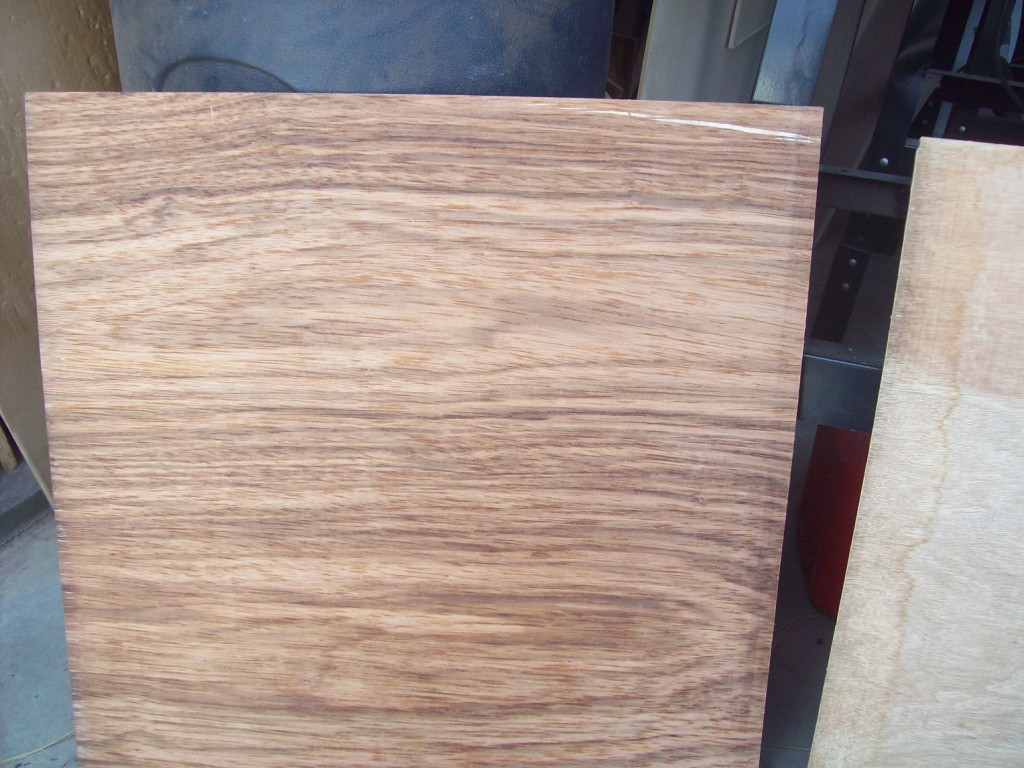
This is the dark side. Notice how much richer the grain is? The light side shows up much nicer once a lacquer coating is put on, but this side is even richer with that lacquer coating.

Now I’m about to glue the two light faces together to make an approximate 1/4-inch thick piece of plywood.
I’ve just used a paintbrush to add wood glue to the entire face of one half of the board. I’ll now lay the other one atop it.

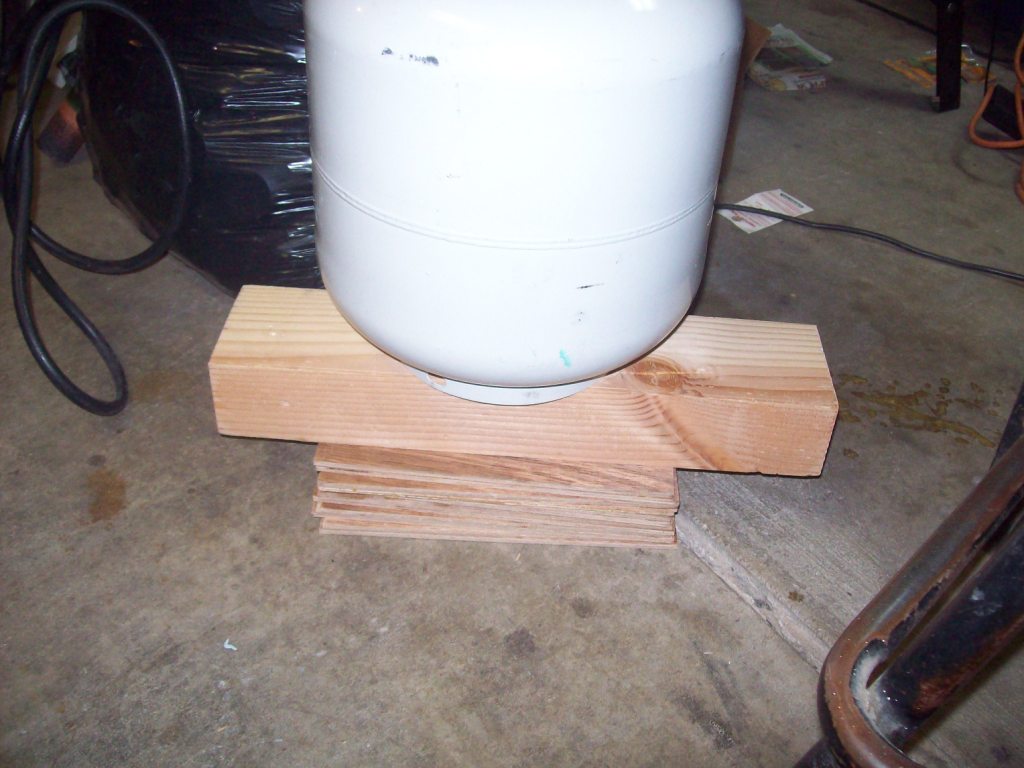
I’ve done that to two sets of boards, placed them together on the floor and added some heavy weight to the top. I let that all sit for a week.
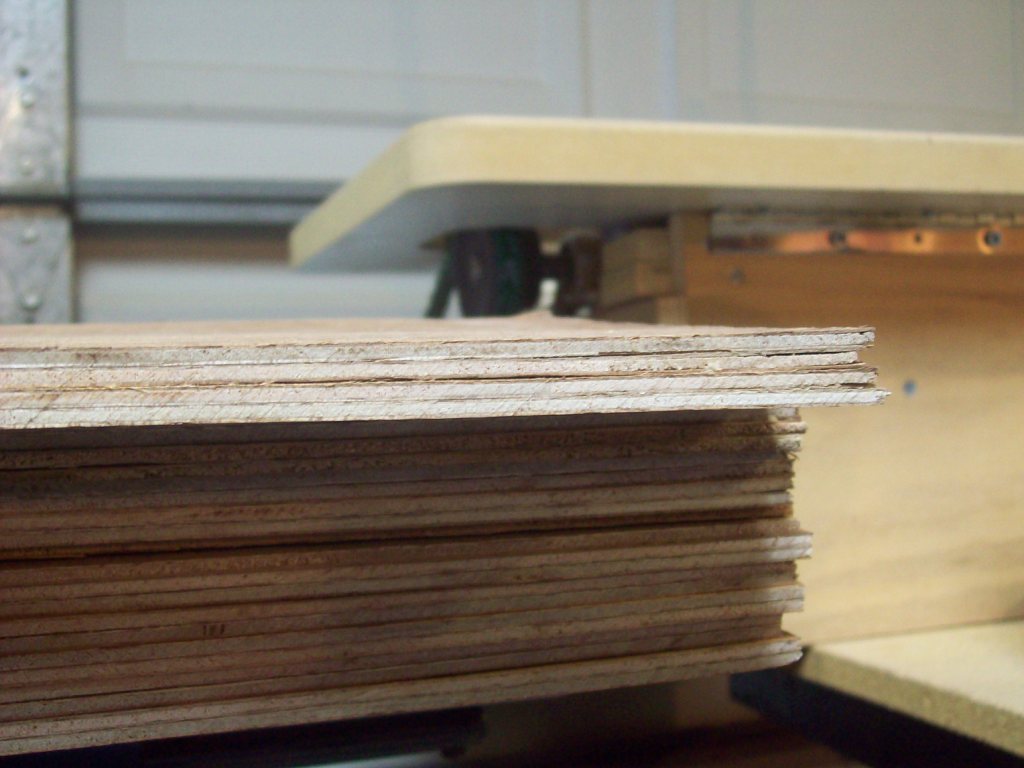
The next weekend, I cut those two now 1/4-inch pieces into twelve equal rectangles, larger than the thermometer patterns. Then, I stacked pairs together and placed a thin strip of glue around the outer inside edge, making sure the glue bead, even when squeezed couldn’t reach far enough inside to reach where the thermometer patterns would be. What I ended up with were six double stacked pieces of wood, ready for the patterns. That way, I could cut two thermometers at the same time. Above, they’re stacked and the glue is drying under another weight.
This is what they look like, glued together and ready for the patterns.
There are the wood pieces with the painter’s tape installed and ready for the patterns to be glued on.
The pattern backs being sprayed with glue.
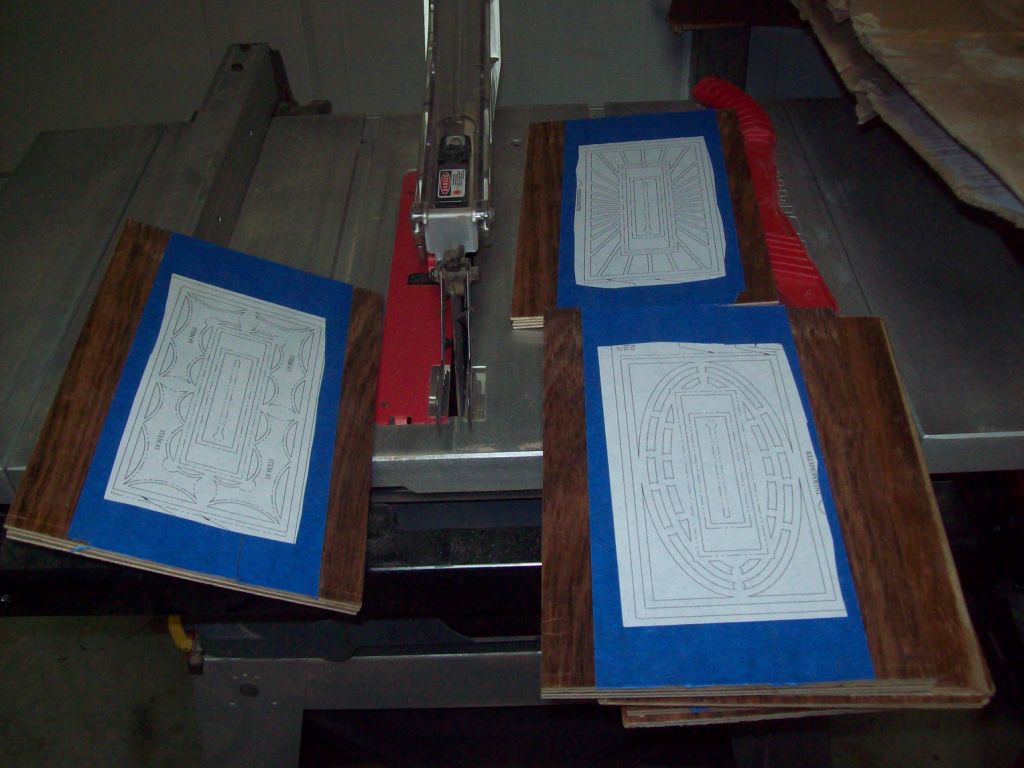
The pieces, patterns glued and ready for drilling. I can now cut two thermometers at a time. It’s called stacked cutting.
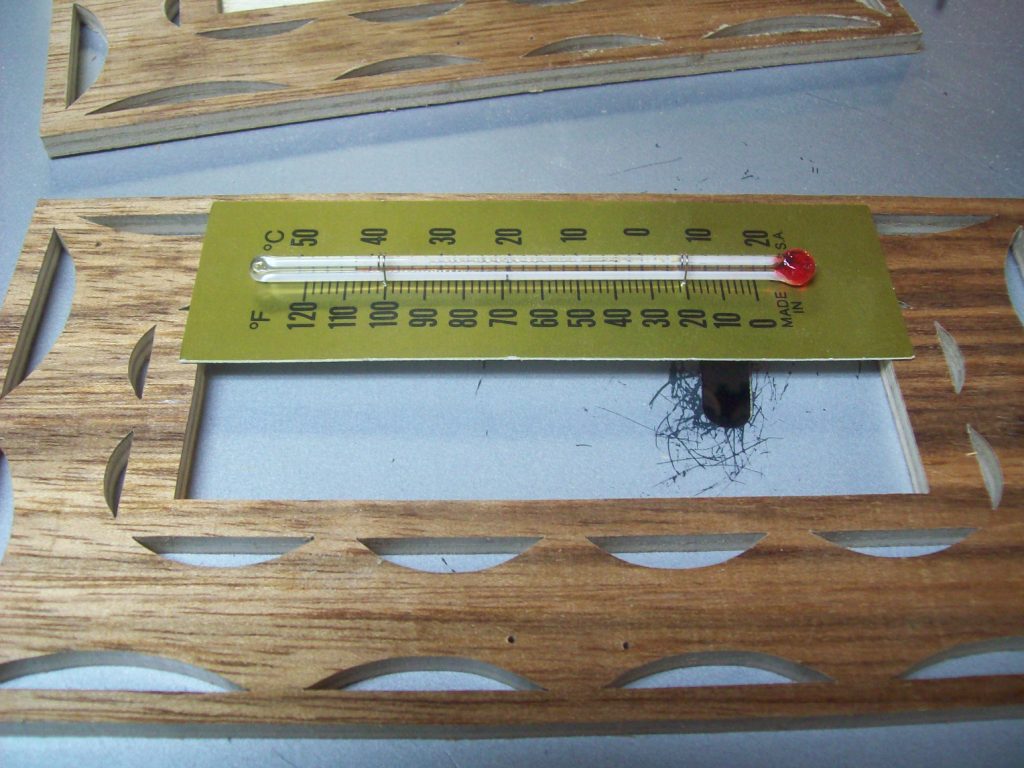
Old school! I’ve had this one lying around for years from an old batch. I did this one with 1/4-inch oak plywood that was actually oak filled. Unfortunately, the pattern was glued on the old fashioned way, directly to the wood, so I’ll have to use Goof Off to get the paper free.
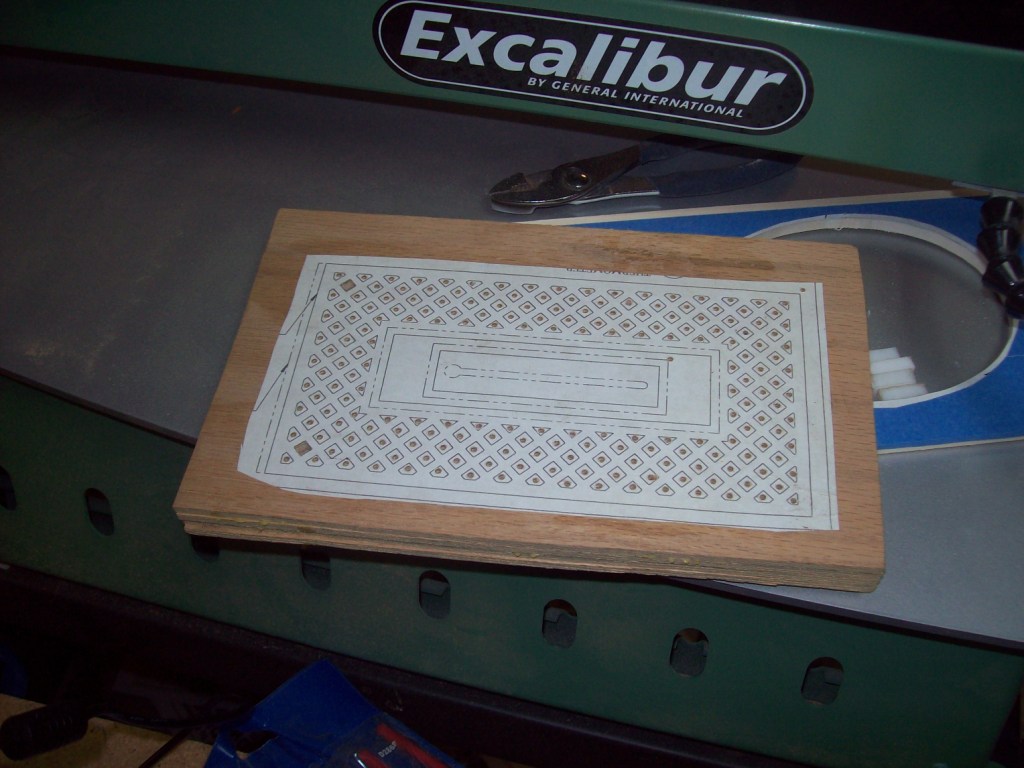
As you can see, this is a four stack, so I can cut four at a time. You may have to look closely to see the layers.
And finally… since this is the most tedious of all the thermometer patterns, I decided to start with it first. Maybe that’s why it was left over in the first place! Notice all the individual cuts! However, when I’m done, I’ll have four basic thermometer backs. Then I’ll have to cut the filigrees that mount on the face of the crosshatch pattern. I’ll use a contrasting wood, which unfortunately, I WILL have to plane down from an exotic since nobody locally sells anything that would make a good contrasting wood. More on that in a later installment. We’re not there yet!
That’s it for now.
06/21/14
It’s been a while… yeah, I know, but once again, life got in the way. I had a bout with bronchitis plus my pool caught a major case of algae that took a while to cure. I finally got back to where I’ve accumulated enough to post. I haven’t been completely idle as I DID complete that very tedious hash pattern. However, it came with a few surprises… a few nasty ones that come with the territory, both my fault, also.
First off, whenever you stack wood to cut multiples, remember, don’t let the glue drift into your pattern! Apparently… no for sure… I got sloppy with the glue on this four-stack and that’s exactly what happened. When I tried to separate the four individual pieces, guess what? I had to use my pocket knife and try minor surgery. With this being plywood, that didn’t exactly work out on certain pieces. This first example shows a chunk sticking up in the corner. The corresponding piece, of course, has that chunk missing. I’ll have to use the other side of that one.

In this piece, just the opposite occurred and a chunk is missing. I wish this were in the middle somewhere where I could cover it up with the overlays. I might have to fill this space with putty if I can’t use the other side. Or, seeing as how these are hand made. I might just leave it be and consider it part of the “charm.”
The next issue is another one I forgot about. The size of the thermometer inserts. Though these designs are supposed to go together, there’s one thing the design doesn’t take into consideration: The length of the thermometer. So, when I cut the hole, the thermometer backs barely covered at the top and bottom and left no room for any glue.
Unfortunately, I’d already drilled the holes in the next batch of two. Lucky for me, I never drill a hole at a line! Guess what? By accident, I drilled the hole at about the right distance to add clearance for a glue bed for the thermometer. Whew! As you can see from the line I drew, it goes right through the pilot hole. I had to cut on the outside of the line. On the other end, I cut on the inside of the line to compensate. It’s not enough of a difference for anyone to notice.
Here’s the result. Notice I have just enough room for a touch of glue. The width of the hole has never been a problem.
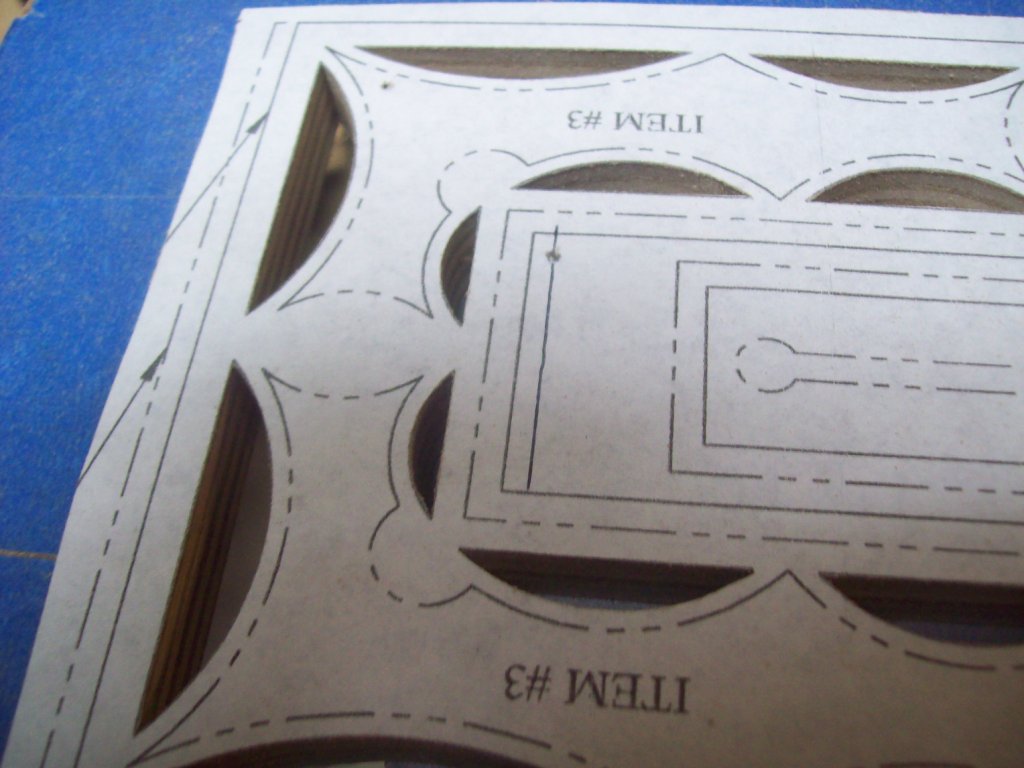
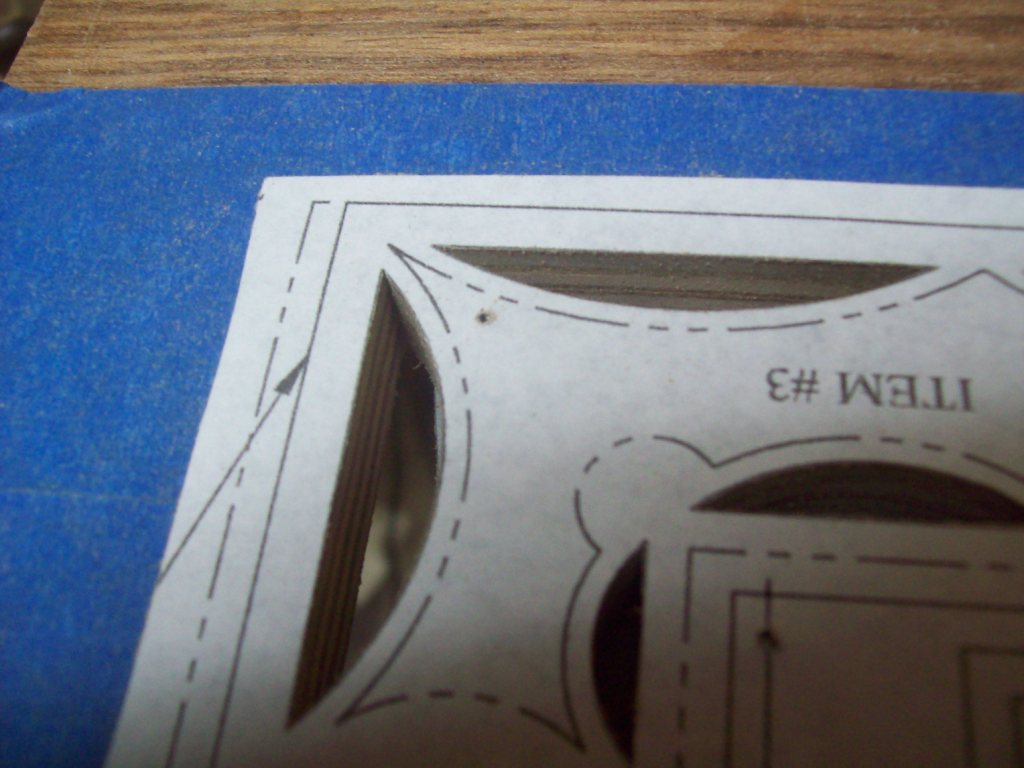
Oh, but I’m not done yet! I screwed up again. When I drilled my pilot holes, I forgot one important thing. Those dotted lines were there for a reason! They show where the overlays go, NOT an area that’s supposed to be cut! Now I have holes where there aren’t supposed to be any. Fortunately, I tucked they far enough into the corners, that the overlays, as narrow as they are, should cover them. If not, I may have to fudge their position a little or use a bit of walnut putty, the closest color to this mahogany I have. Notice the pilot hole in the corner of the dotted line design. Upside down you can see Item #3. That’s the other design on the sheet. I need to cut four for each piece.
I ran across two other issues that became show-stoppers… well, one is anyway. I reached up to my box above my work bench to see how many thermometers I had left. Uh oh… two left. Let’s see… I have sixteen on the bench… The math doesn’t add up! So, last Sunday, I went to my Favorites on the computer, tried to pull up the web site and the link was bad. Not a good sign. I went to the last catalog I got from the company, which used to be Wildwood Designs and is now Cherry Tree Toys. I found their new site was under Cherry Tree Toys. That web site was down. Double uh oh! I called the 800 number and got voice mail because it was Saturday but explained the situation anyway. Didn’t leave my name. One thing may be that my web browser automatically upgraded the day before.
I got hold of Dirk Boleman, the master designer who is responsible for a good many designs I use including these thermometers. He got back with me Tuesday and found them at Cherry Tree and the correct link and I ordered more and everything seems to be fine.
While I await them, I’ve also had an issue with overlay wood. I have enough Aspen for this project, I think, but that will probably wipe me out. I’d thought of using a bit if purpleheart, but I’d have to plane it down and waste a lot of wood.
Anyway, I’ve had to rely on family in West Virginia to mail Aspen to me from the Lowes there because they don’t stock it here out west. So, I decided to try and get it from Lowes web site. Right now I’m waiting for a call from a store in Florida that stocks the size I need. We’ll see.
That’s it for now. More, as things happen.
09/27/14
Okay, it has been a while, but things got in the way. I did manage to get all the basic frames cut. This is all 20 of them below. You’ll notice two of them still have their paper. They’re from an older batch. Apparently, either I used a glue resistant to Goof Off or the glue has dried to the point that it won’t work on it anymore. In either case, I tried soaking it in the solvent several times and my putty knife wouldn’t even budge the paper. Because of this I’m going to have to sand the paper off. This is going to be extremely tricky because with it being thin plywood, the top ply is probably only 1/64th of an inch thick. Not much to work with. I have to use fine sandpaper and take it really easy. If the wood is warped in any way, it will sand unevenly and might even wear down to the next layer in high spots before it even gets to all of the paper everywhere else. We’ll see.
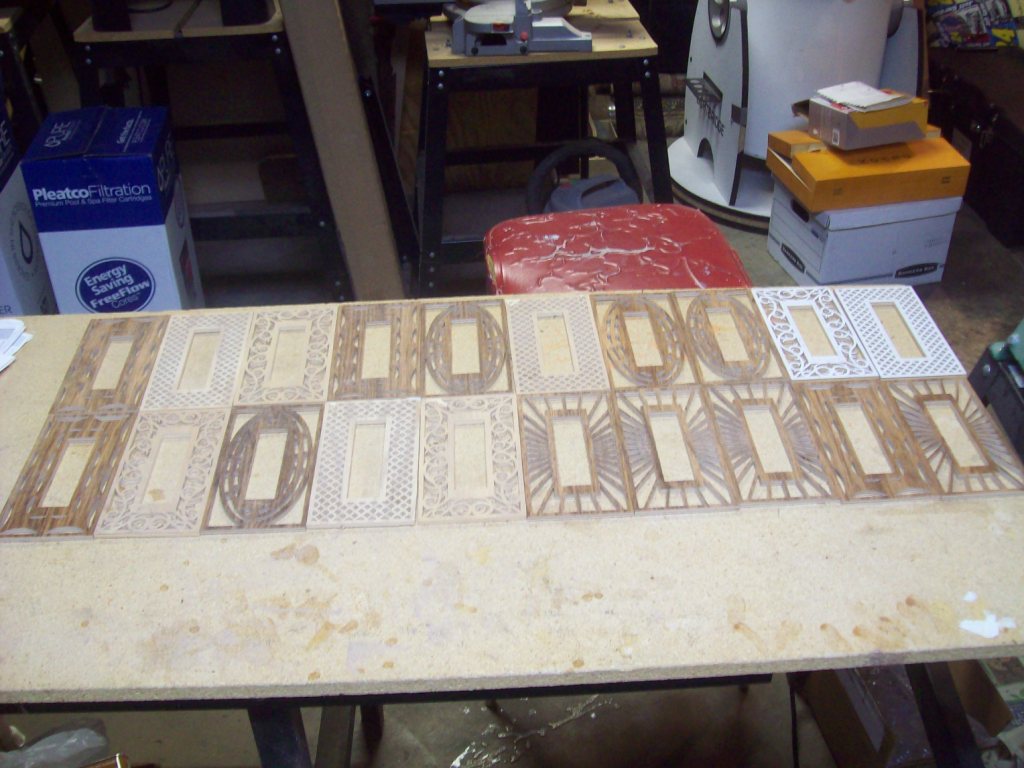
Next, I have to gather the patterns for the overlays. Some of the designs have overlays, in fact all of them except the most elaborate design. These I’ll be making out of contrasting wood, aspen, which is almost white. I’ll talk more about that in a minute.
The patterns are laid out on the table but you may notice the one in the lower-left corner. I’m not using that one because somehow, I skipped that design when I cut the main backs. Oh well, next time. Note that the overlays are in the lower left corner of each design, if you squint!
These are some leftover overlays from a previous batch, in fact, they were supposed to be for those original crosshatch ones that were already stacked and is one of the ones that still has the paper on it in the first photo (the one on the far right). After studying them, I decided not to use them because they are not only a different wood, plywood, but there’s not enough for more than one and I don’t want to mismatch this batch. Besides, one of them is stained and I can’t sand the stain off or stain the others or it will just not look right because I don’t have that color anymore and can’t remember which one I used. I know, I’m making excuses but I just want them all to be aspen. I might change my mind and stain the aspen so it will contrast more on the oak that the bases are cut from, but we’ll see.

Next I had to cut and stack the aspen boards so I can cut the individual overlays. Each piece that requires an overlay needs four each. Since there are four of each design that require overlays, I need sixteen of each design. So, I cut the boards with room for four of the cutout designs on each board. With four stacked 1/4″ boards, I can get 16 pieces off each stack. I really wanted to do fewer boards in the stack to get better resolution on the bottom pieces, but I keep forgetting I have an Excalibur scroll saw and I’m not using that old Sears saw, which would have made a four stack of this fine detail with only the top two pieces probably usable because of severe blade drift.
To make these stacks, I cut all four boards to length, and on the bottom three, I placed a medium dot of glue in each of the four corners. I wanted enough glue to hold, but not enough to seep too far into the board where it could interfere with the cutouts.
Another reason for the four stack was that I already had one cut to size for another project I never did. So, why not?
Here are two of the stacks drying.
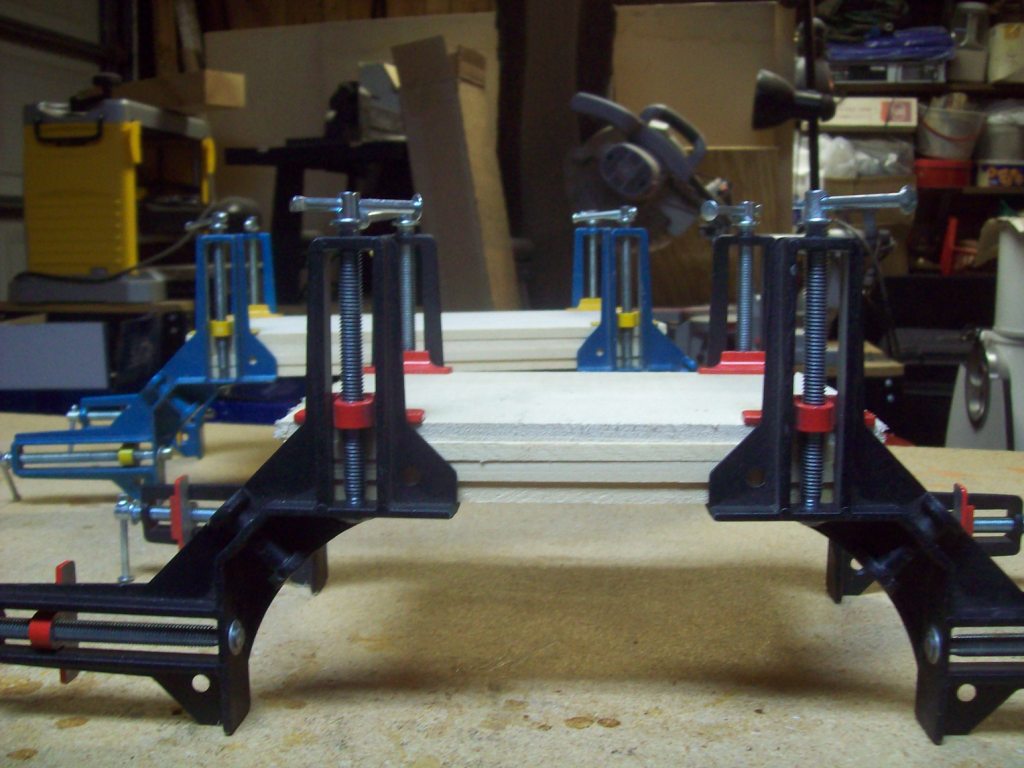
Once they were dry, it was time to add my painter’s tape, just to avoid sanding and/or nasty chemicals like with the two base pieces in photo #1!
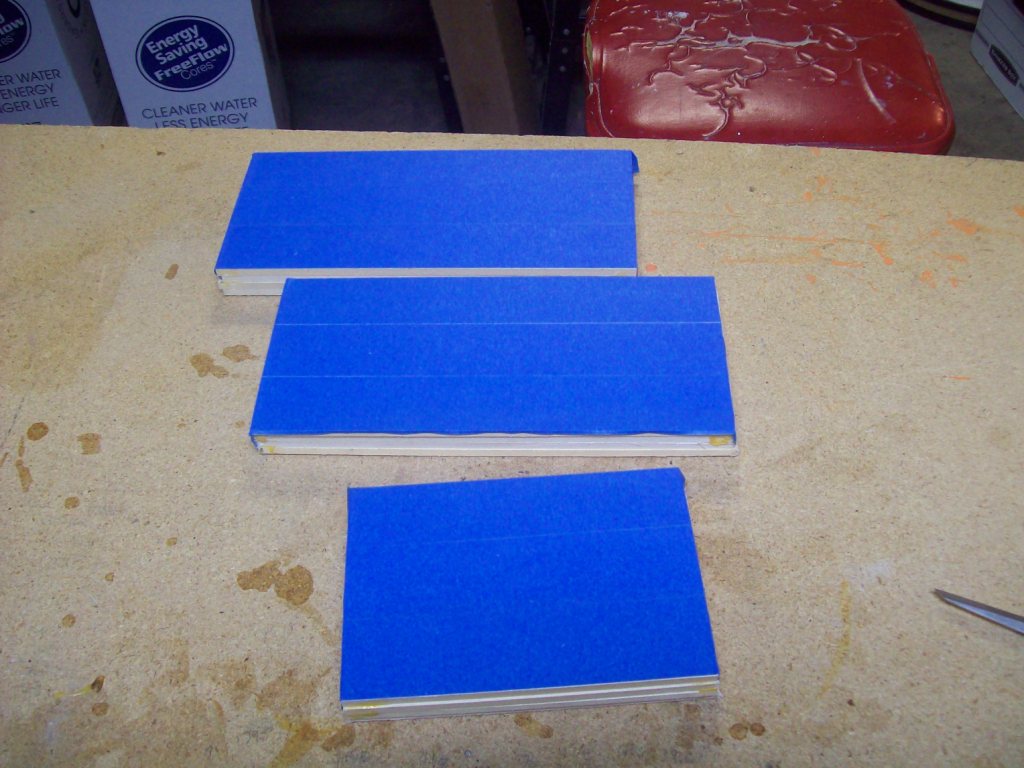
Next, it was time to carefully arrange the patterns on the stacks, not only to have them go with the wood grain, but also to avoid any glue drift from the beads. The one on the right also has the additional hazard of glue on each side in the middle (it was the one already glued). I used a smaller and curved large design after studying the three large overlays. I took advantage of shapes to try and avoid glue spread.
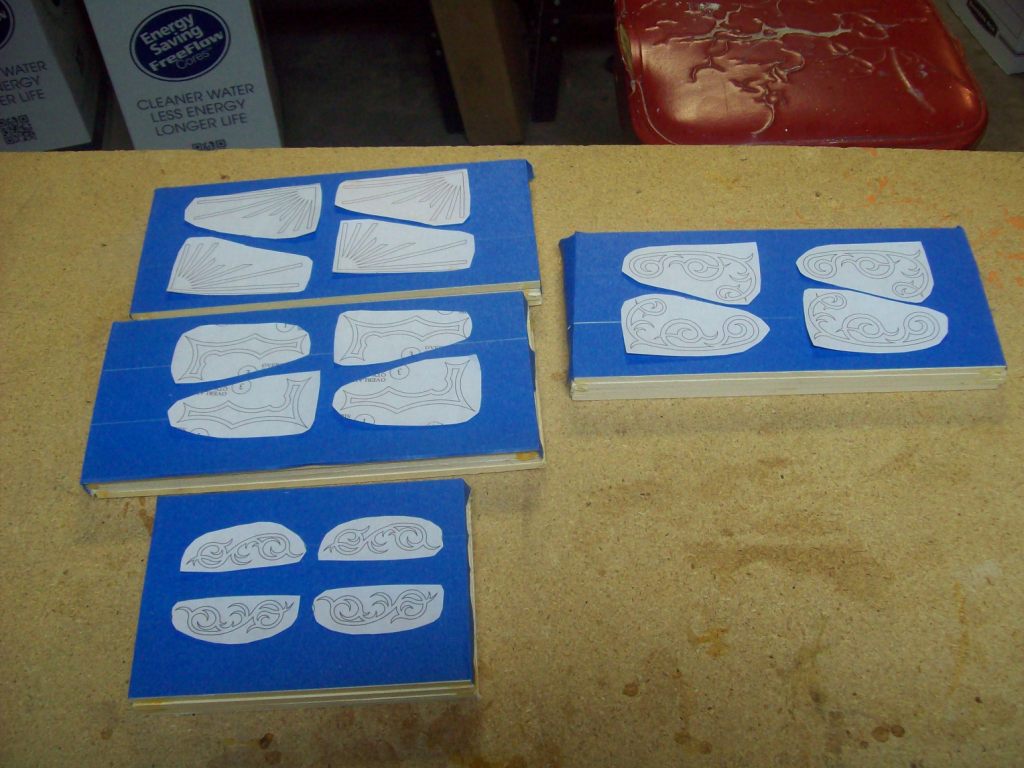
Now I set the designs on my spray backing (just a large piece of cardboard), put on my mask, and sprayed the glue on.
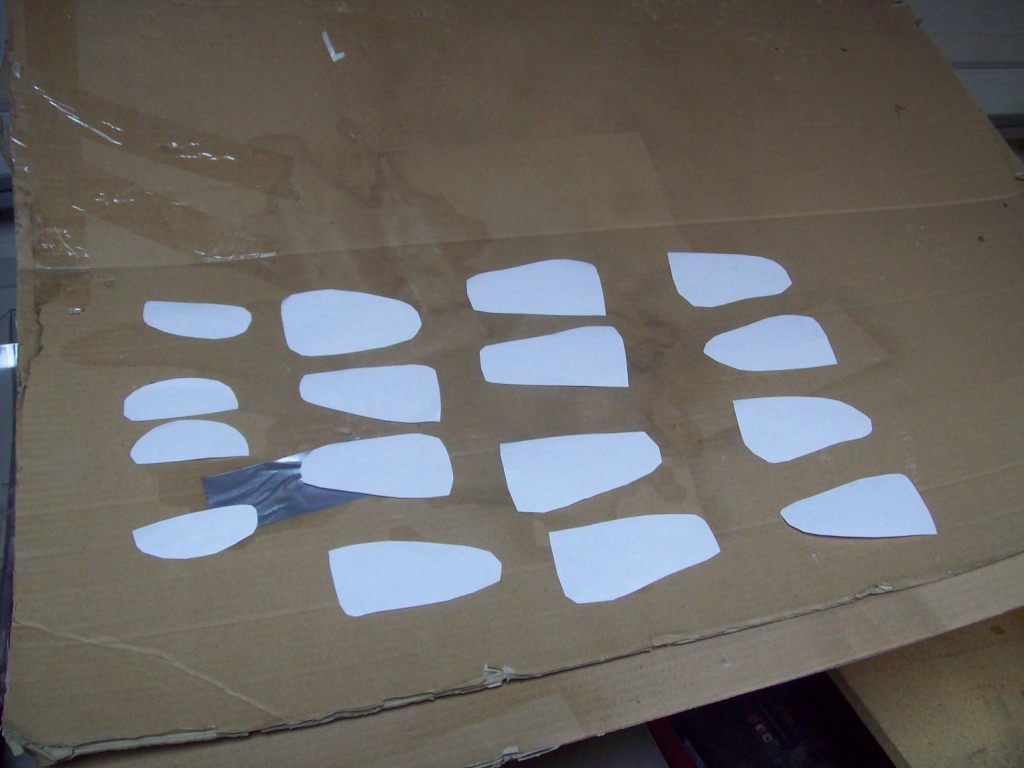
Here are the finished products. Now I just have to wait for them to dry for a little while. Then I can drill pilot holes and start cutting. The only caveat here is to take it slow because of blade drift. Despite the quality of the saw, rushing can lead to blade drift, no matter how accurate the mechanism. I’m still not sure how thick of a blade I’ll use as this is, after all, an inch thick wood. I’ve been successful with my usual fine double ott 2/0 blades, but might go for a little heavier one. That means being extra careful with the tight turns and fine detail which is another reason I prefer thinner stacks. Oh well, at least I’ll be banging out quantity, I just hope with quality. You’ll see the results in a little while, I hope!
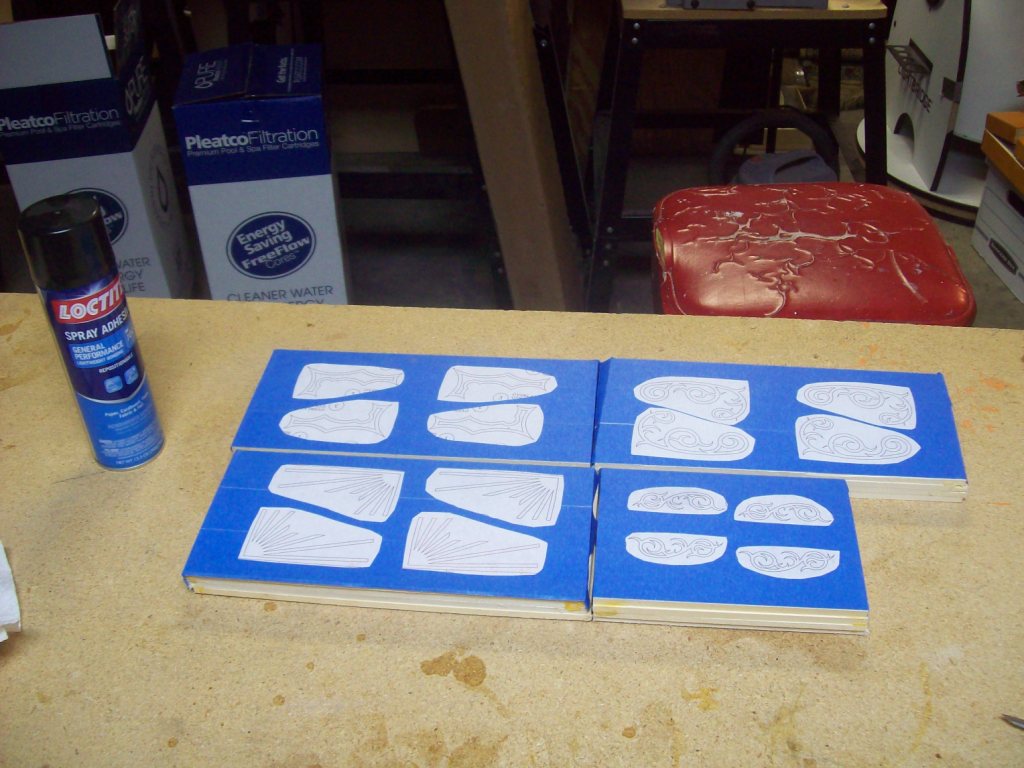
11/29/14
If you wonder what I’ve been up to the past two months, the answer is sporadically hard at work. Right now I’m cutting those trim pieces I stacked above. It’s quite a slow and tedious process, despite the soft aspen wood. I’m using a medium-fine blade with about 16 – 18 TPI and it’s still like cutting through cement, or so it seems. Plus, despite the high quality scroll saw, I still have to be quite conscious of blade drift on the bottom of the stack. Already I’ve noticed differences in the pieces. They’re noticeable but I can just mix and blend the pieces and chock it up to these thermo-meters being hand-made!
Here is a photo of progress and a visual of what I’m dealing with. Each stack will give me 16 individual pieces. I go through one blade for each board if I’m careful. Unfortunately, I had to use two blades on the first one because I bent the blade too much when it slipped out of the bottom clamp one too many times.
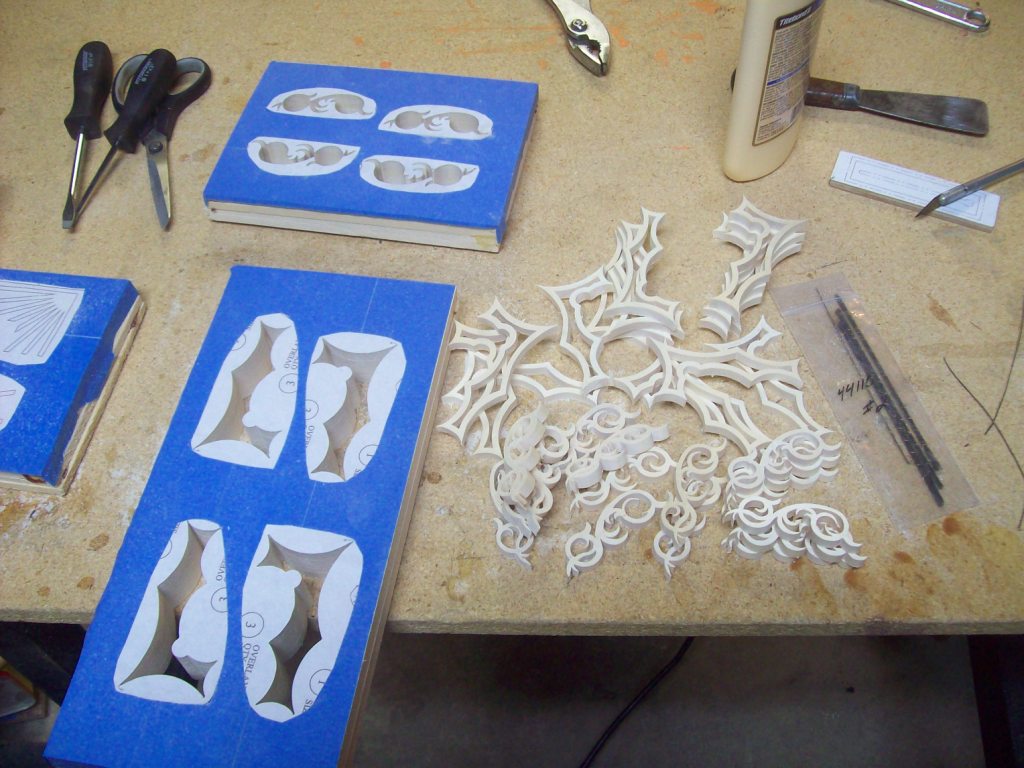
Until next time!
01/02/15
Quick update. Haven’t done diddly since the last update. Well, not true. I DID manage to cut a few more of the next design but discovered that I’ll be short the little squiggly designs. After getting a thermometer out to give away for something (I already forget what for), I discovered there’s supposed to be six of them on the unit instead of four! Aaagh! I now have to sandwich another set of pieces of aspen together and cut more of them. Oh well. I do this for pleasure but sometimes, the slow tedious cuts can get to be a bit much. Also, I had planned to do some cutting over the holidays, but we had the “blizzard of the century” in Las Vegas. Yeah… we got a few random flakes that flew around in the air and never even touched the ground. However, what it DID do was blow like crazy and the temperature dropped like a stone. And… I don’t care if they’re clichés. Sue me.
The point is that the garage was like a meat locker and if I used my electric heater, it would probably blow the circuit breaker with the new and improved scroll saw on the same circuit.
So… I’ve been sitting idle, just thinking about it.
Soon Grasshopper… soon.
Until next time…
02/08/15
Finally!
Yesterday, right before heading out for a rained out public star party, I managed to complete all of the filigree pieces for the thermometers. Whew! What a tedious but hopefully rewarding process. To top it off, even the bottom of the four pieces in each stack turned out just as good as the top pieces. This Excalibur scroll saw is a whole different animal from the old Sears and even the Ryobi saws I used to cut with.
In the photo, notice the small squiggly pieces in the lower right. There are sixteen. Well, after I cut them and then looked at the actual completed thermometers, it turns out there are eight instead of four on each one! Aaagh! Okay, I’m making a modification. There are only going to be four on each instead of eight. Oh well, artistic license. I don’t feel like cutting even more of them and besides, I’m not sure I have enough Aspen left to do it anyway. I think those thermometers will turn out just fine.
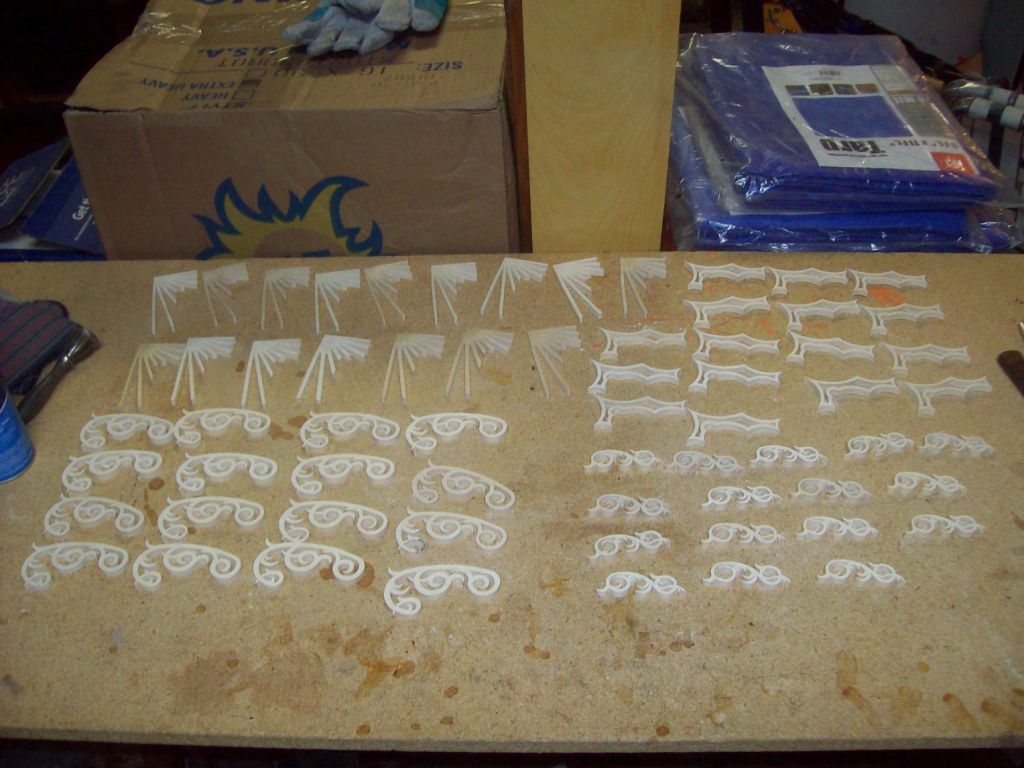
Next is the intricate filing and sanding of all the individual pieces, then gluing and lacquering and all the trimmings.
Until next time, which may be later today or later later…
03/01/15
I spent yesterday and today cleaning up all the wood bits, well not quite all. I mainly worked the wood backs, which are the most intricate pieces. They all needed to have the kerf filed down, especially on the backs. Even though the backs are going to be hidden from view, that kerf (flakes and chips of wood hanging from the cut edge) needs to be removed because it can show up when anyone looks inside the design, it will make gluing the felt on the back harder, and face it, it’s just plain sloppy to leave it. Not only that, despite careful cutting, stacking and using the tape-then-pattern method, there was still some kerf on the front sides of each piece, here and there, and that has to be removed.
So, with jeweler’s file in hand and a piece of sandpaper lying flat on the bench, I got to work. Another issue that delayed me was that I ran out of Goof Off, the solvent I use to remove the patterns I used to glue directly to the wood. Well, two of them were so old, the glue set and wouldn’t come off with the solvent. I saved those pieces for today, fired up the drum sander, and very carefully made a few passes with fine sandpaper to remove the paper and glue. It took more passes than I’d like and I was afraid of sanding off the top very thin layer of plywood. However, I got it done but still had a few bits of paper lying in micro-depressions in the wood. I decided to just leave them and hopefully, either one of the overlays with cover them, or I’ll just chock it up to homemade and “to halibut,” if you know what I mean.
When I finally got all the back pieces filed and sanded, I started on the overlay pieces. Holy tedious, Batman! I only got through a few of the small filigree pieces and gave up. I’d been doing it several hours both days on the back pieces so I’d already had enough. Tackling that soft aspen and already breaking two small pieces off and having to glue them back on did me in for the day!
Back at it in a few weekends. I’m committed next weekend so I doubt I’ll get much done, if anything.
Still, I’m almost ready to start gluing.
Later…
03/21/15
When you see the next few photos, the word tedious may come to mind. However, let’s try something different. How about “meticulous?”
In this one, I’m using a jewelers rattail file to get off the kerf. For those of you that don’t know what a rattail file is, it’s a round file.
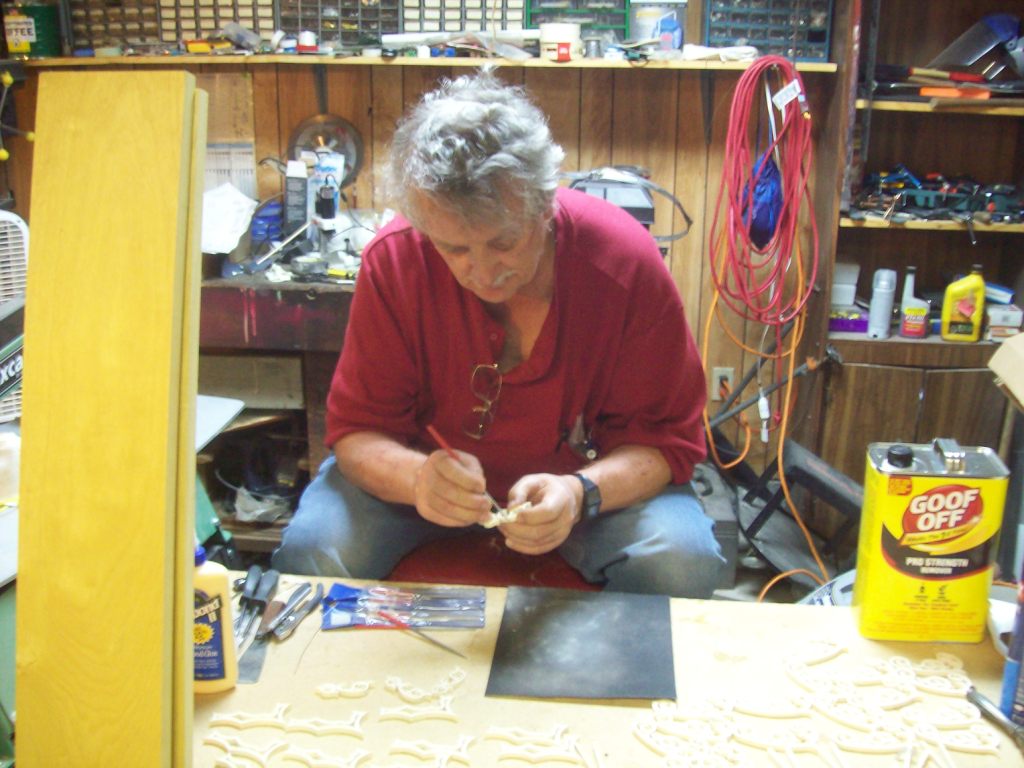
In this one, I’m sanding it on a flat surface. I can’t use any kind of machine because the pieces are way too delicate. As it is, I’ve already broken several, which I might’ve mentioned earlier. I’ve had to glue several busted filigrees and will probably have to glue a few more before I’m done. Aspen isn’t exactly steel, plus these are small and delicate.
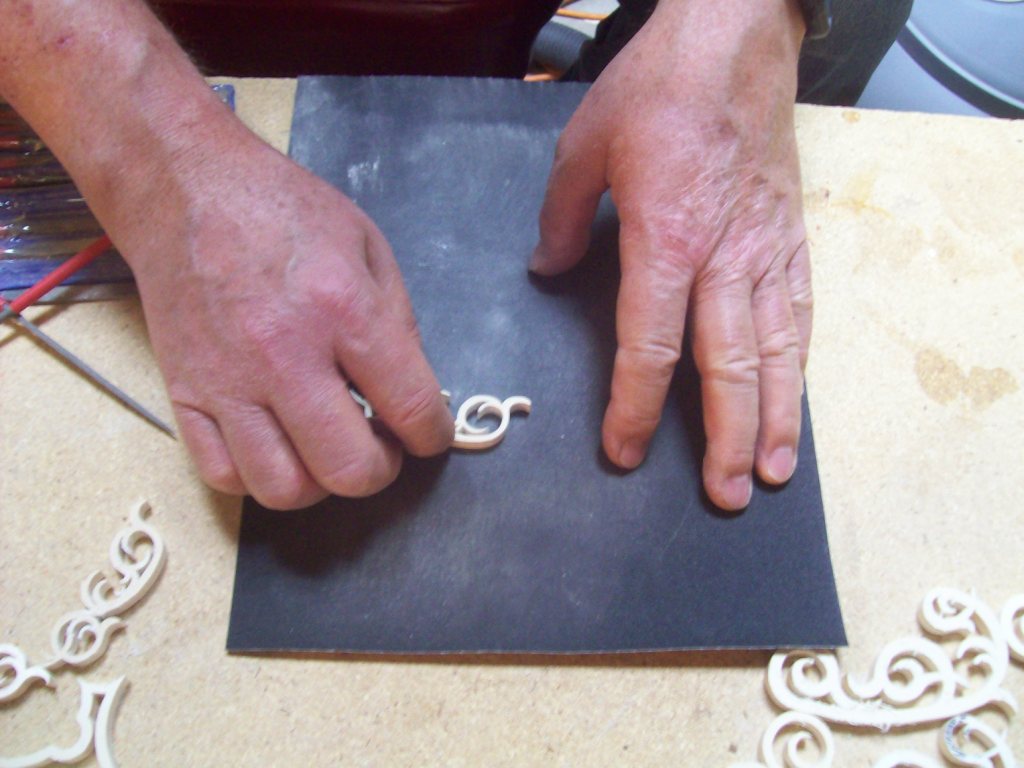
Here’s a close-up view of me filing. Some of the pieces are pretty clean but some, especially if there were gaps between the wood pieces, left plenty of kerf (jagged edges, fuzzy appearance, frayed like a rope).
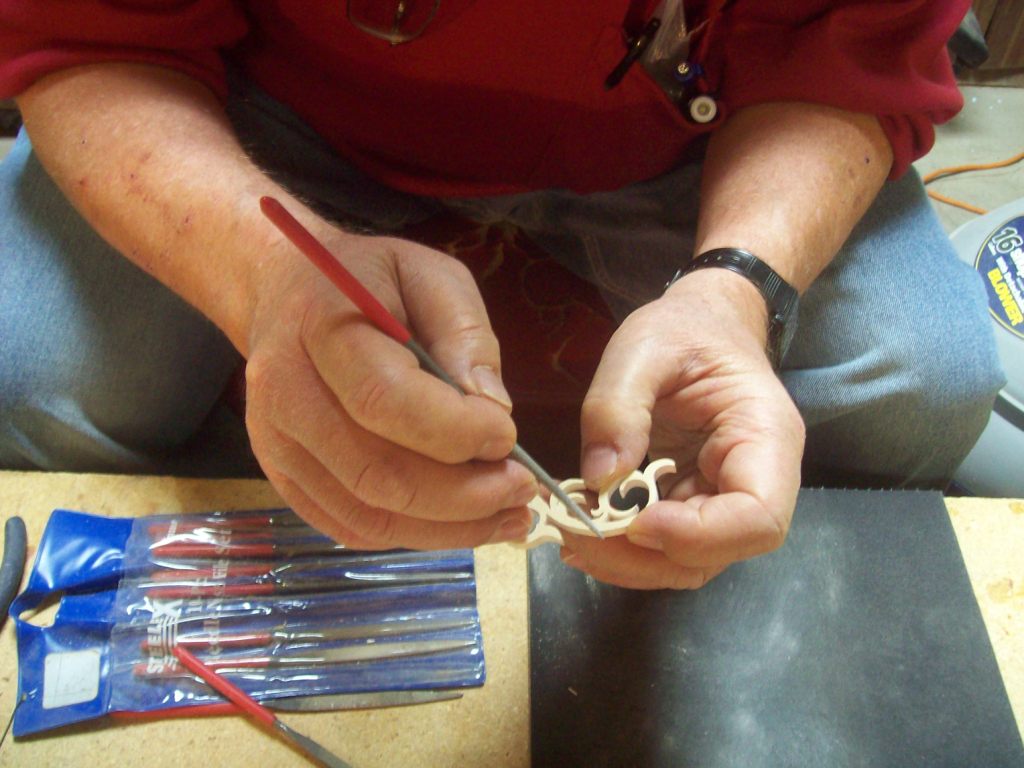
Of course, I still have a long way to go…
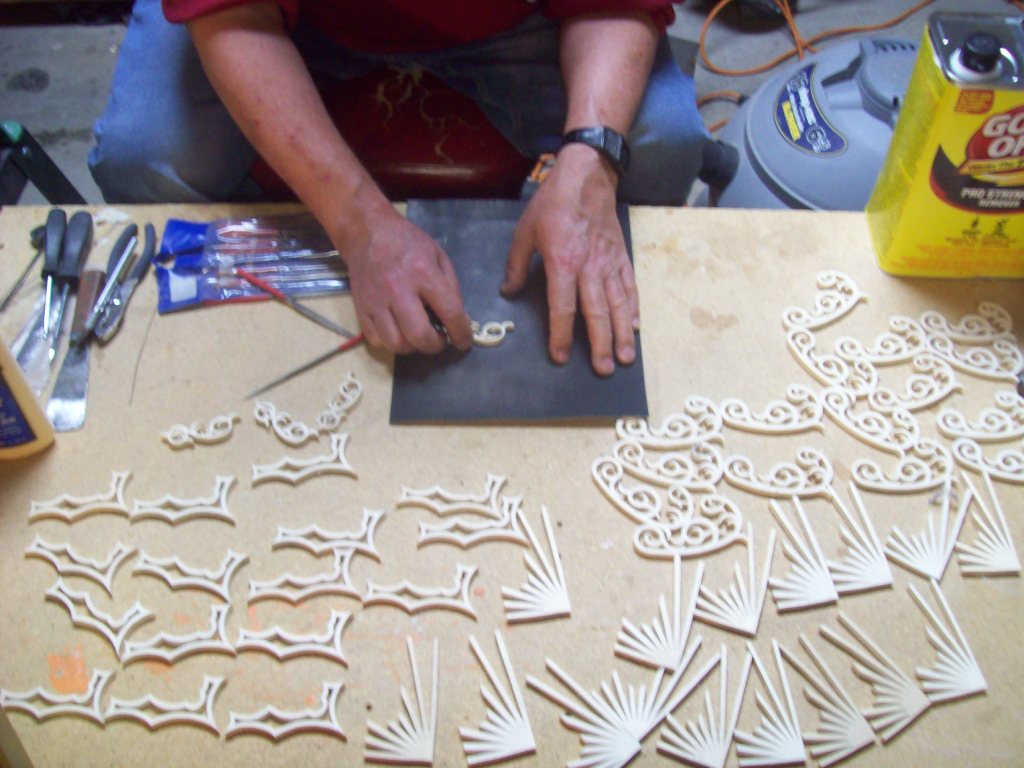
However, at least I’ve finished a few of them!
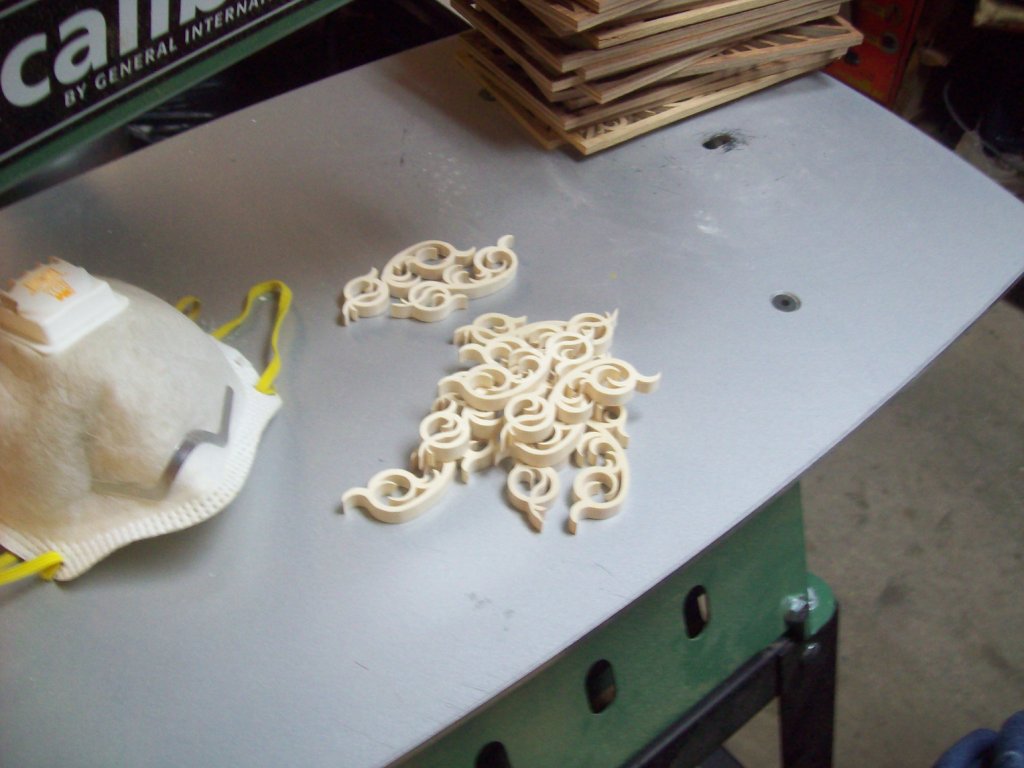
Maybe next time I’ll be ready to glue.
Later…
05/10/15
Since I last updated you, a lot has happened. I managed to get all the filigrees cleaned up and glued onto the backboards. I was going to get a photo of all of them spread out but never got around to it because life got in the way. Long story, which I went into detail on Facebook.
Needless to say, that caused a jump in time of about a month. That took place in early April and what happened next should’ve been complete weeks ago but as of today, is still in the final stages.
Today, Sunday May 10, 2015, I tried something different. In the past, I either lacquered both sides of the wood, or I’d just lacquer the front and sand the slop off the back. In both cases, the felt and paper-backed thermometers have always stuck in place. This time, to ensure a better glue surface, I employed the blue painter’s tape I use on the patterns. That new technique I learned from Popular Woodworks and Crafts magazine.
A little side note. I loved that magazine and have been haunting Barnes & Noble for it, especially since the magazine section at the Nellis AFB Base Exchange stopped carrying it last year. When I’ve asked the people at B&N if they could get it, they said they couldn’t even find it listed. I finally did the diligent research last week on good old Google and guess what? The magazine folded last year! Aaagh! The only scroll sawing magazine left is Scroll Saw Woodworking & Crafts, a completely different outfit. I haven’t made up my mind if I like it as well. We’ll see.
Back to the story. Using the blue painters masking tape, I carefully masked off the back of each thermometer, then trimmed the outer edges. The reason I trimmed the outer edges is to prevent the sticky extra from catching on things and pulling off, or collecting stuff that would stick to the wood. I didn’t bother with the inner hollow places because that was just going too far.
Here is a photo of the stacks, masked and ready to go.
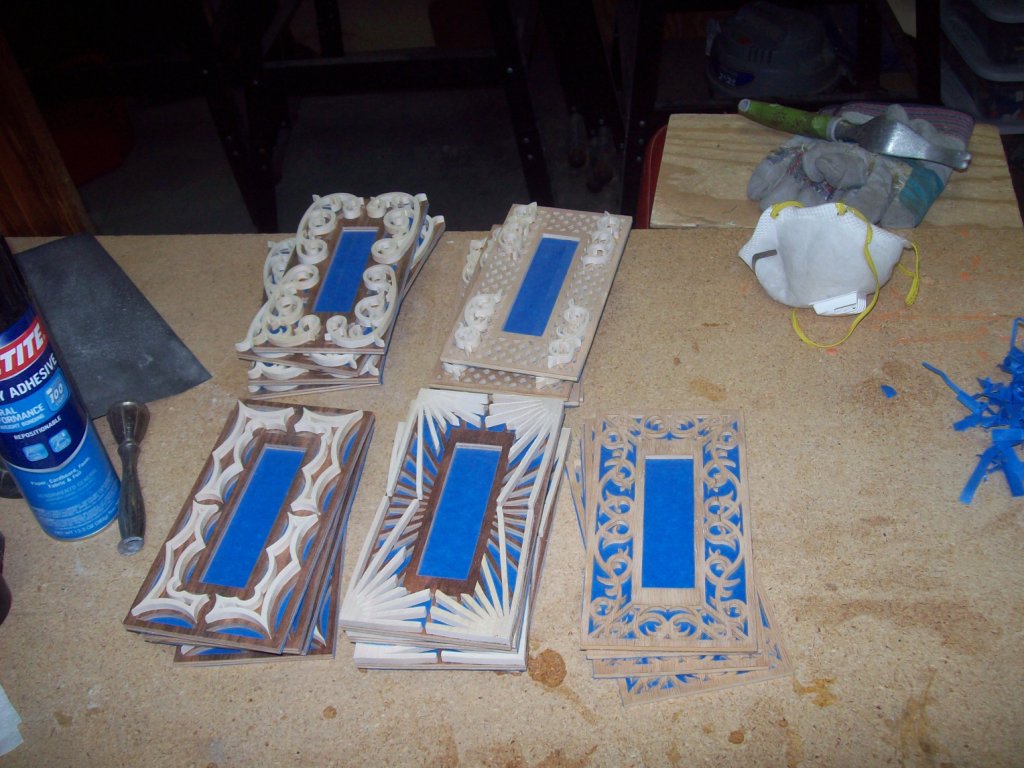
Next I took them out to my “paint booth,” which is actually the back end of my camper trailer on an old piece of cardboard. I first sprayed everything one way, then rotated all the pieces upside down and re-sprayed them from the other direction. I’ll admit, I wasn’t too worried about drips and such. It’s part of what makes them home-made. Also, I have a bunch of cans of different brands of lacquer, some half full. My only requirement was that they were either semi-gloss or gloss and I matched them up based on that and their chemical makeup (ketone, etc). I didn’t mix polyurethane with lacquer. I ended up using up one can and most of another. I’m not bothering with a second coat. As much as I sloshed on there, that should do the trick.
Here is a photo of them all freshly lacquered.
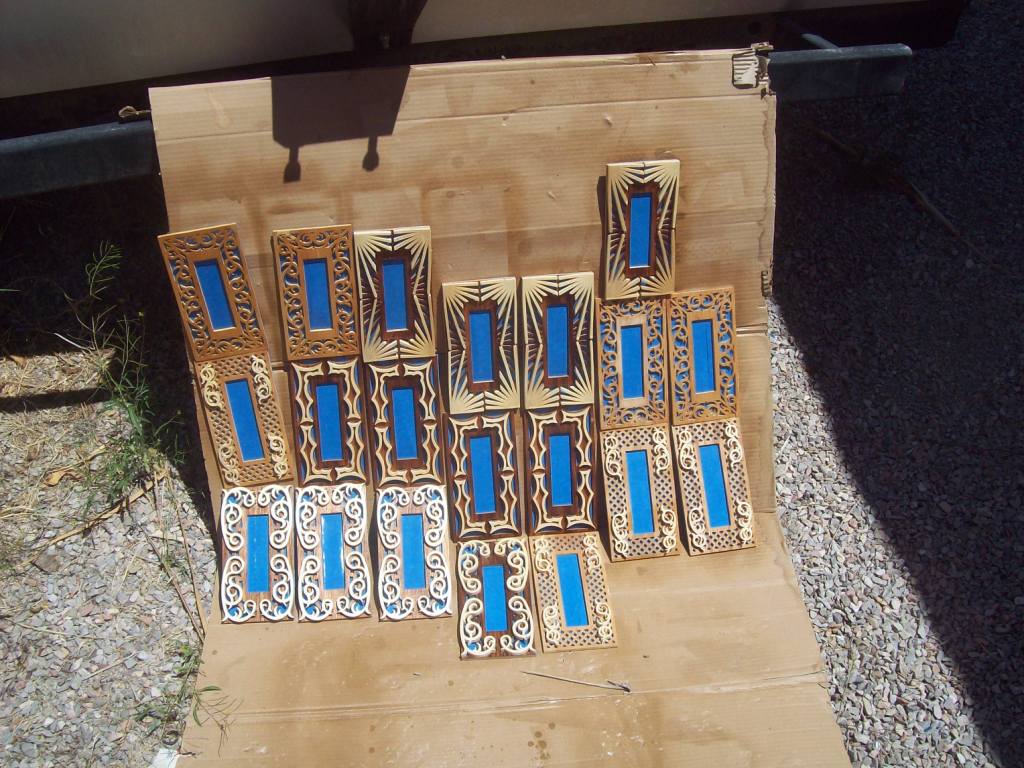
Next weekend, hopefully, all I have to do is peel off the tape, then glue a thermometer onto the center of each one (facing the right direction, of course). Then glue a piece of felt to the back, on top of that, trim the edges and I’m done. I have a plastic bag full of multi-colored felt squares ready to go.
Until next time!
05/31/15
Okay, I’m a little late here. Two weekends ago, I glued the thermometers in place. I’ve been busy doing very detailed edits to my upcoming fantasy novel, Meleena’s Adventures – Treasure Of The Umbrunna and it’s taken up all my extra time. Now I’m back.
This is a shot of the painter’s tape I used to mask the back of each piece so I’d have raw wood for the glue to stick. I can say that this method worked better than I expected. The tape stuck very well and very little of the lacquer leaked under it onto the raw wood.

Next, I added a rim of glue around just the area where the thermometer piece goes. The rest of the bare wood is for later. The trick was to add enough glue for the paper backing to stick but not so much to have it ooze out on to the gold faceplate of the front side. Unfortunately, some of it did, but I cleaned it up the best I could. Oh well… hand made…
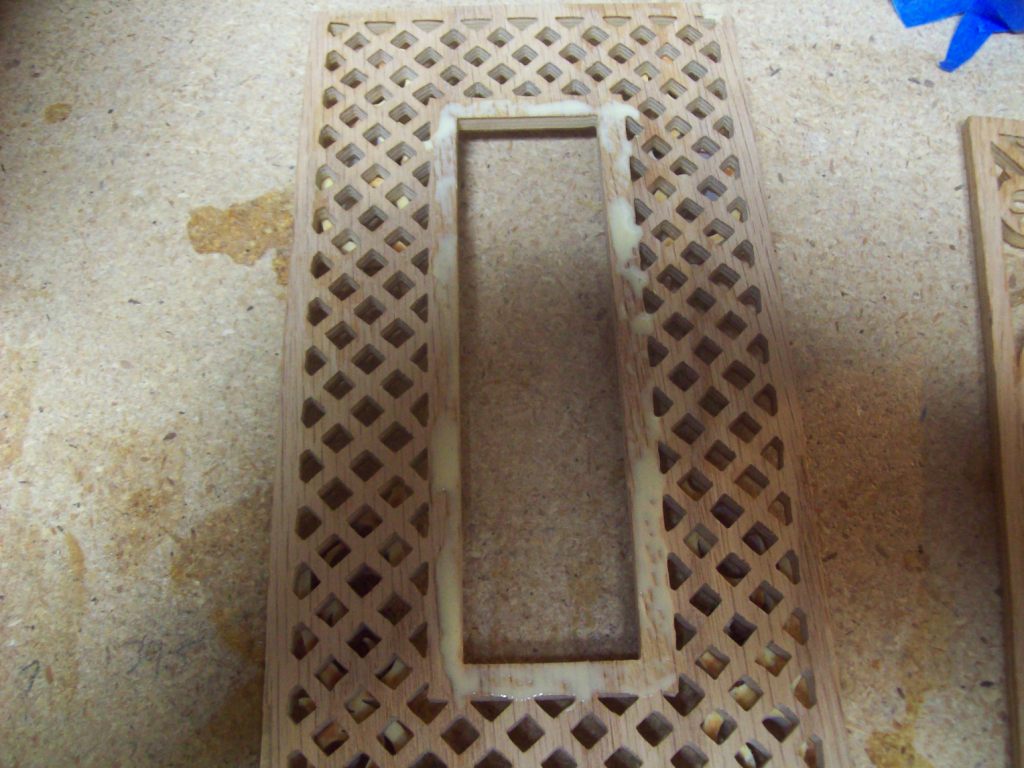
This is all of them, glued and stacked.

Next comes the felt backing which goes over all of this. Maybe today… we’ll see.
That’s it for right now.
06/03/15
Sunday, May 31, I put ALL the felt backing on. I almost didn’t get it all done, either. Everyone wanted to swim, so I was in the middle of a huge batch of glue and didn’t want to waste what I’d poured… I’m getting ahead of myself.
With everything done except the backing, it was a simple matter of figuring out how to glue the felt to the raw wood. In the past, I’ve done it by using the same spray glue that I use to glue the patterns to the wood (now the blue masking tape). The only difference was that I’d spray a bit heavier and let it set longer so it would stick harder. What I didn’t like was that the felt showing would be sticky for a good while, though the glue didn’t really show up.
This time, I tried a different approach and decided to paint the raw wood with the same carpenter’s wood glue that I used for the rest of the wood. What is it Ahnuld is famous for saying in some of his movies? “Beeg meestake.” To tell the truth, the jury is still out and I don’t care if it’s a cliché. The end result is still going to have to be put to the test, but I may never do it that way again. More on that in a moment.
This is a shot of a piece of the felt with two thermometer backs ready for glue. I used multiple random colors because that’s what I had in the bag. I think I used all but two of the useful pieces. I’ll now have to get another batch if I ever decide to do more of them. I probably will since I have at least 30 more thermometers.
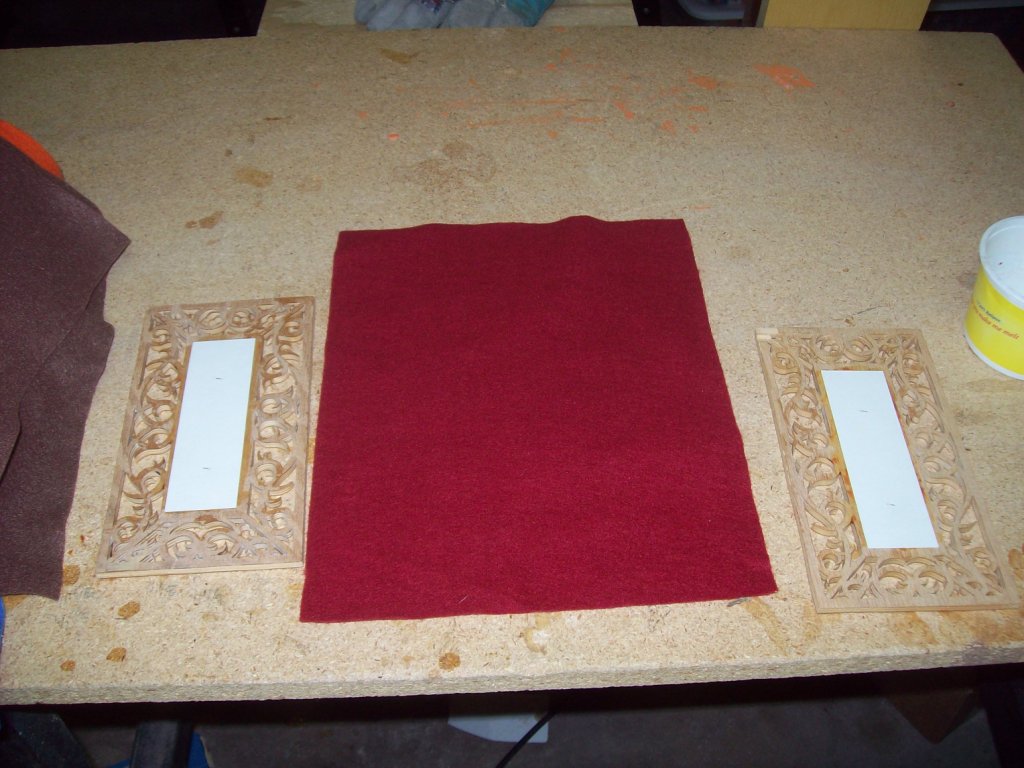
This is my cup, with a squirt of wood glue in it.
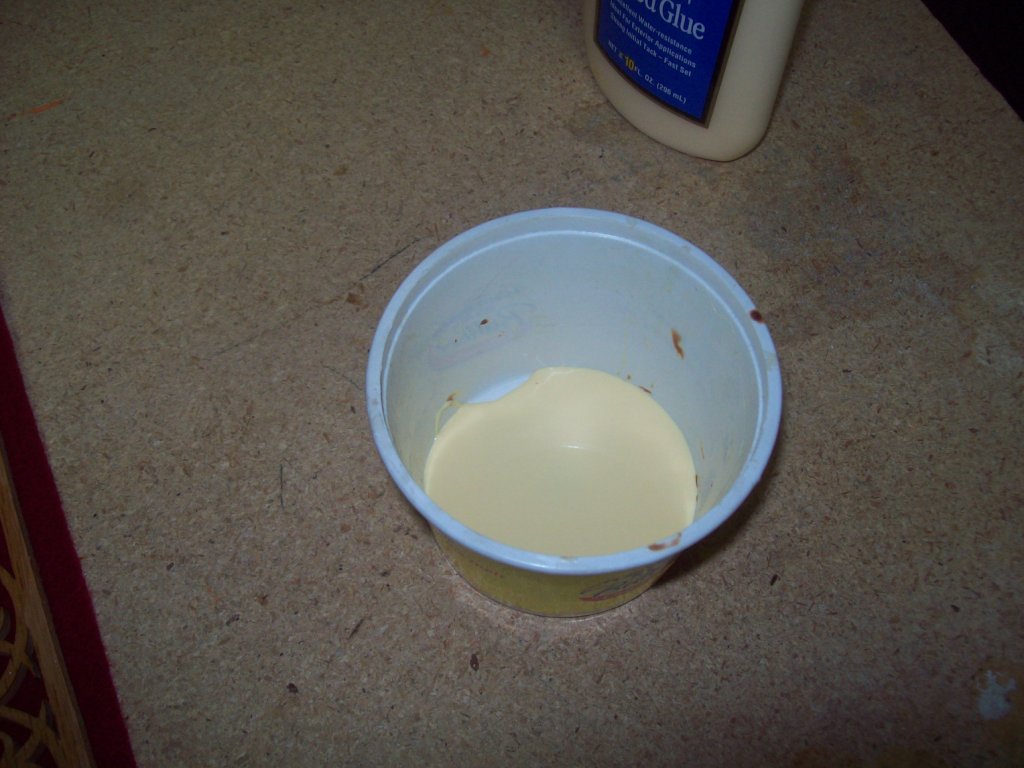
Okay. The problem with painting the glue on the back is that it’s a very sloppy process. I used an acid brush, but I can guarantee that there IS no brush that will work well for this application. The excess and slop is going to rub off the edges of the design and run to the front. When I finished each piece, and turned it over before sticking it on the felt, I had glue oozing through. I had to take one of my old scroll saw blades and poke the glue back through. The result? Glue all over my fingers, which was no big deal, but also it stretched the time. In the furnace-like heat of my garage, the time and heat equaled up to half the glue drying. Guess what? When I set it on the felt, it didn’t stick all that well. I had to press hard before it tacked. When all is said and done, I may be doing a lot of patch work. We’ll see.
This is two pieces glued to the felt.
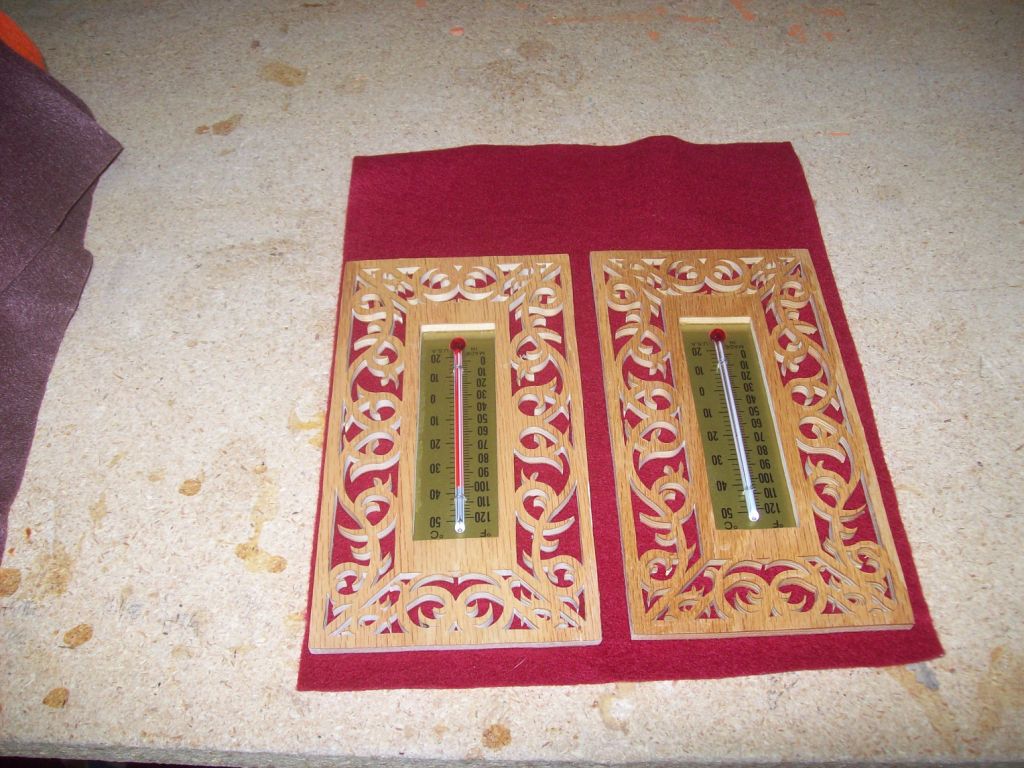
This is the complete stack, of all the colors.

I did this very tedious job in three sessions. It was during the last one that I went for broke and filled the cup with a lot of glue. That’s when I got the call for the pool. I said I’d be out in a minute, which turned into twenty. However, I wasn’t going to wash all that glue down the sink! Then again, the closer I got to the finish, the tackier the glue became. The temperature outside was around 102 and in the garage, it was probably around 120. Maybe I should’ve just used the spray!
Anyway, the next step is to trim the felt sharp to the edges and dab some glue where it didn’t quite take. Also, if you look close, you may see the paper backing on the thermometers warped from the water-based glue. Another reason to just go with the spray glue.
Lesson learned!
Next time, the trimmed, final products and any other glitches.
06/13/15
I actually finished these last weekend but just got around to posting the final products. All dried now, touched up and ready to stash in the completed box with the two others I have left from my last batch. Yup, I’ve given all the others away. The last three were raffle prizes at the 2015 Las Vegas Writer’s Conference in April.
Here is a photo showing all 20 of them spread out for you to see.
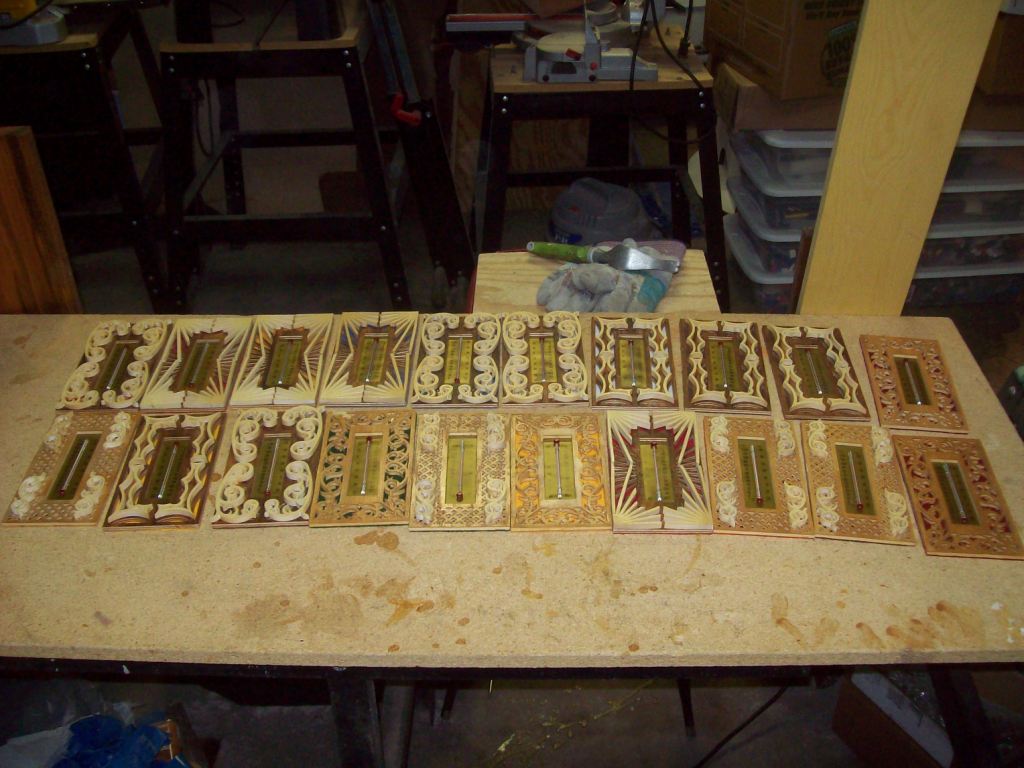
That’s it for this project. Time to move on to a bunch of hanging Christmas ornaments.
You’ll see how I mass produce them, just like the thermometers.
Until next time, which will probably be very soon…
10/17/15
For those of you wondering…
My next major project is still the Christmas ornaments. However, life has once again got in the way. Summer heat, a crowded garage, other projects and major surgery have kind of put a crimp on my woodworking activities for the time being. I still have that poplar wood sitting, buried on the workbench along with way too many patterns to ever fit on the meager four pieces I originally bought.
I WILL be starting that project soon, I hope. From the hits I get on this particular page, I see that you have plenty to peruse anyway. However, I like to keep things fresh when I can, so please stand by. I have not retired the scroll saw just yet!
CHRISTMAS ORNTAMINKS (THAT’S POPEYE SPEAK FOR ORNAMENTS)
11/29/15
Okay, I finally got done with other projects and at least made an attempt to get started on those Christmas ornaments that by now, won’t be ready at the earliest until the 2016 season! Oh well…life goes on.
So…the first step is to prepare the wood. What I’m going to do is stack cut. In case you haven’t read through page after page of my previous ramblings, what that means is that I’m going to fasten several layers of wood together and cut multiple pieces at once. In this case, I’m taking 1/4″ poplar, stacking four together and cutting four at once. This is going to get a bit dicey, cutting fine detail through 1-inch of wood, but I have the best scroll saw, hands down, and at least a bit of skill, so if it can be done, well…I’ve done it before with much more rudimentary saws and most of the pieces turned out okay. Maybe this time I’ll get four out of each one!
There isn’t much in preparing the wood except the stacking part. It’s all about the glue…what I mean by that is it’s all about where NOT to put the glue!
The idea is to get the most bang for the square inch. What I have is four four-foot long pieces. I’ve got a lot of ornament-sized patterns already cut out. I’m going to lay them out on the board top, far enough in from the edge so as not to get into any glue that might drift in from the glue bead. Now, look at the first photo and I’ll explain more as I go along.
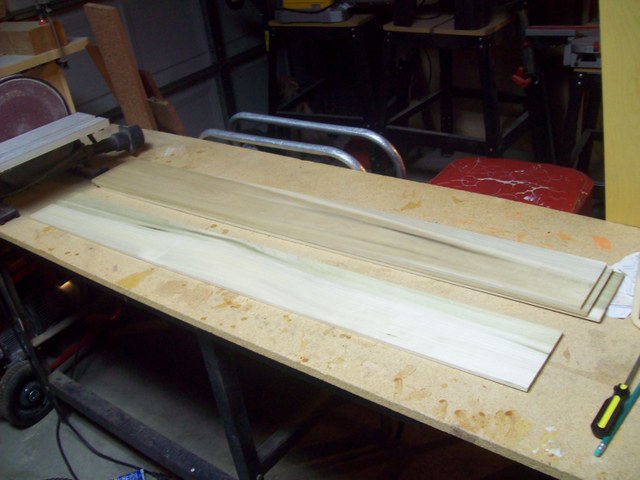
Here are the four boards, ready for gluing.
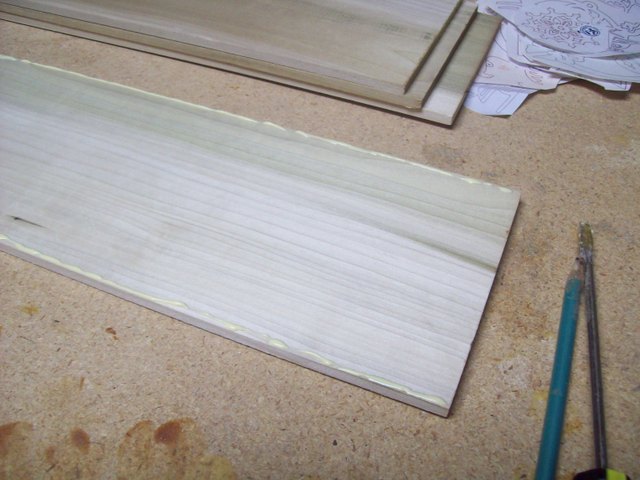
Now, notice the very thin bead of glue along the edges. The less glue that does the job the better. That means the less glue that can leak into the heart of the wood and possibly glue the ornaments together. I need maximum space in the middle to spread those patterns.
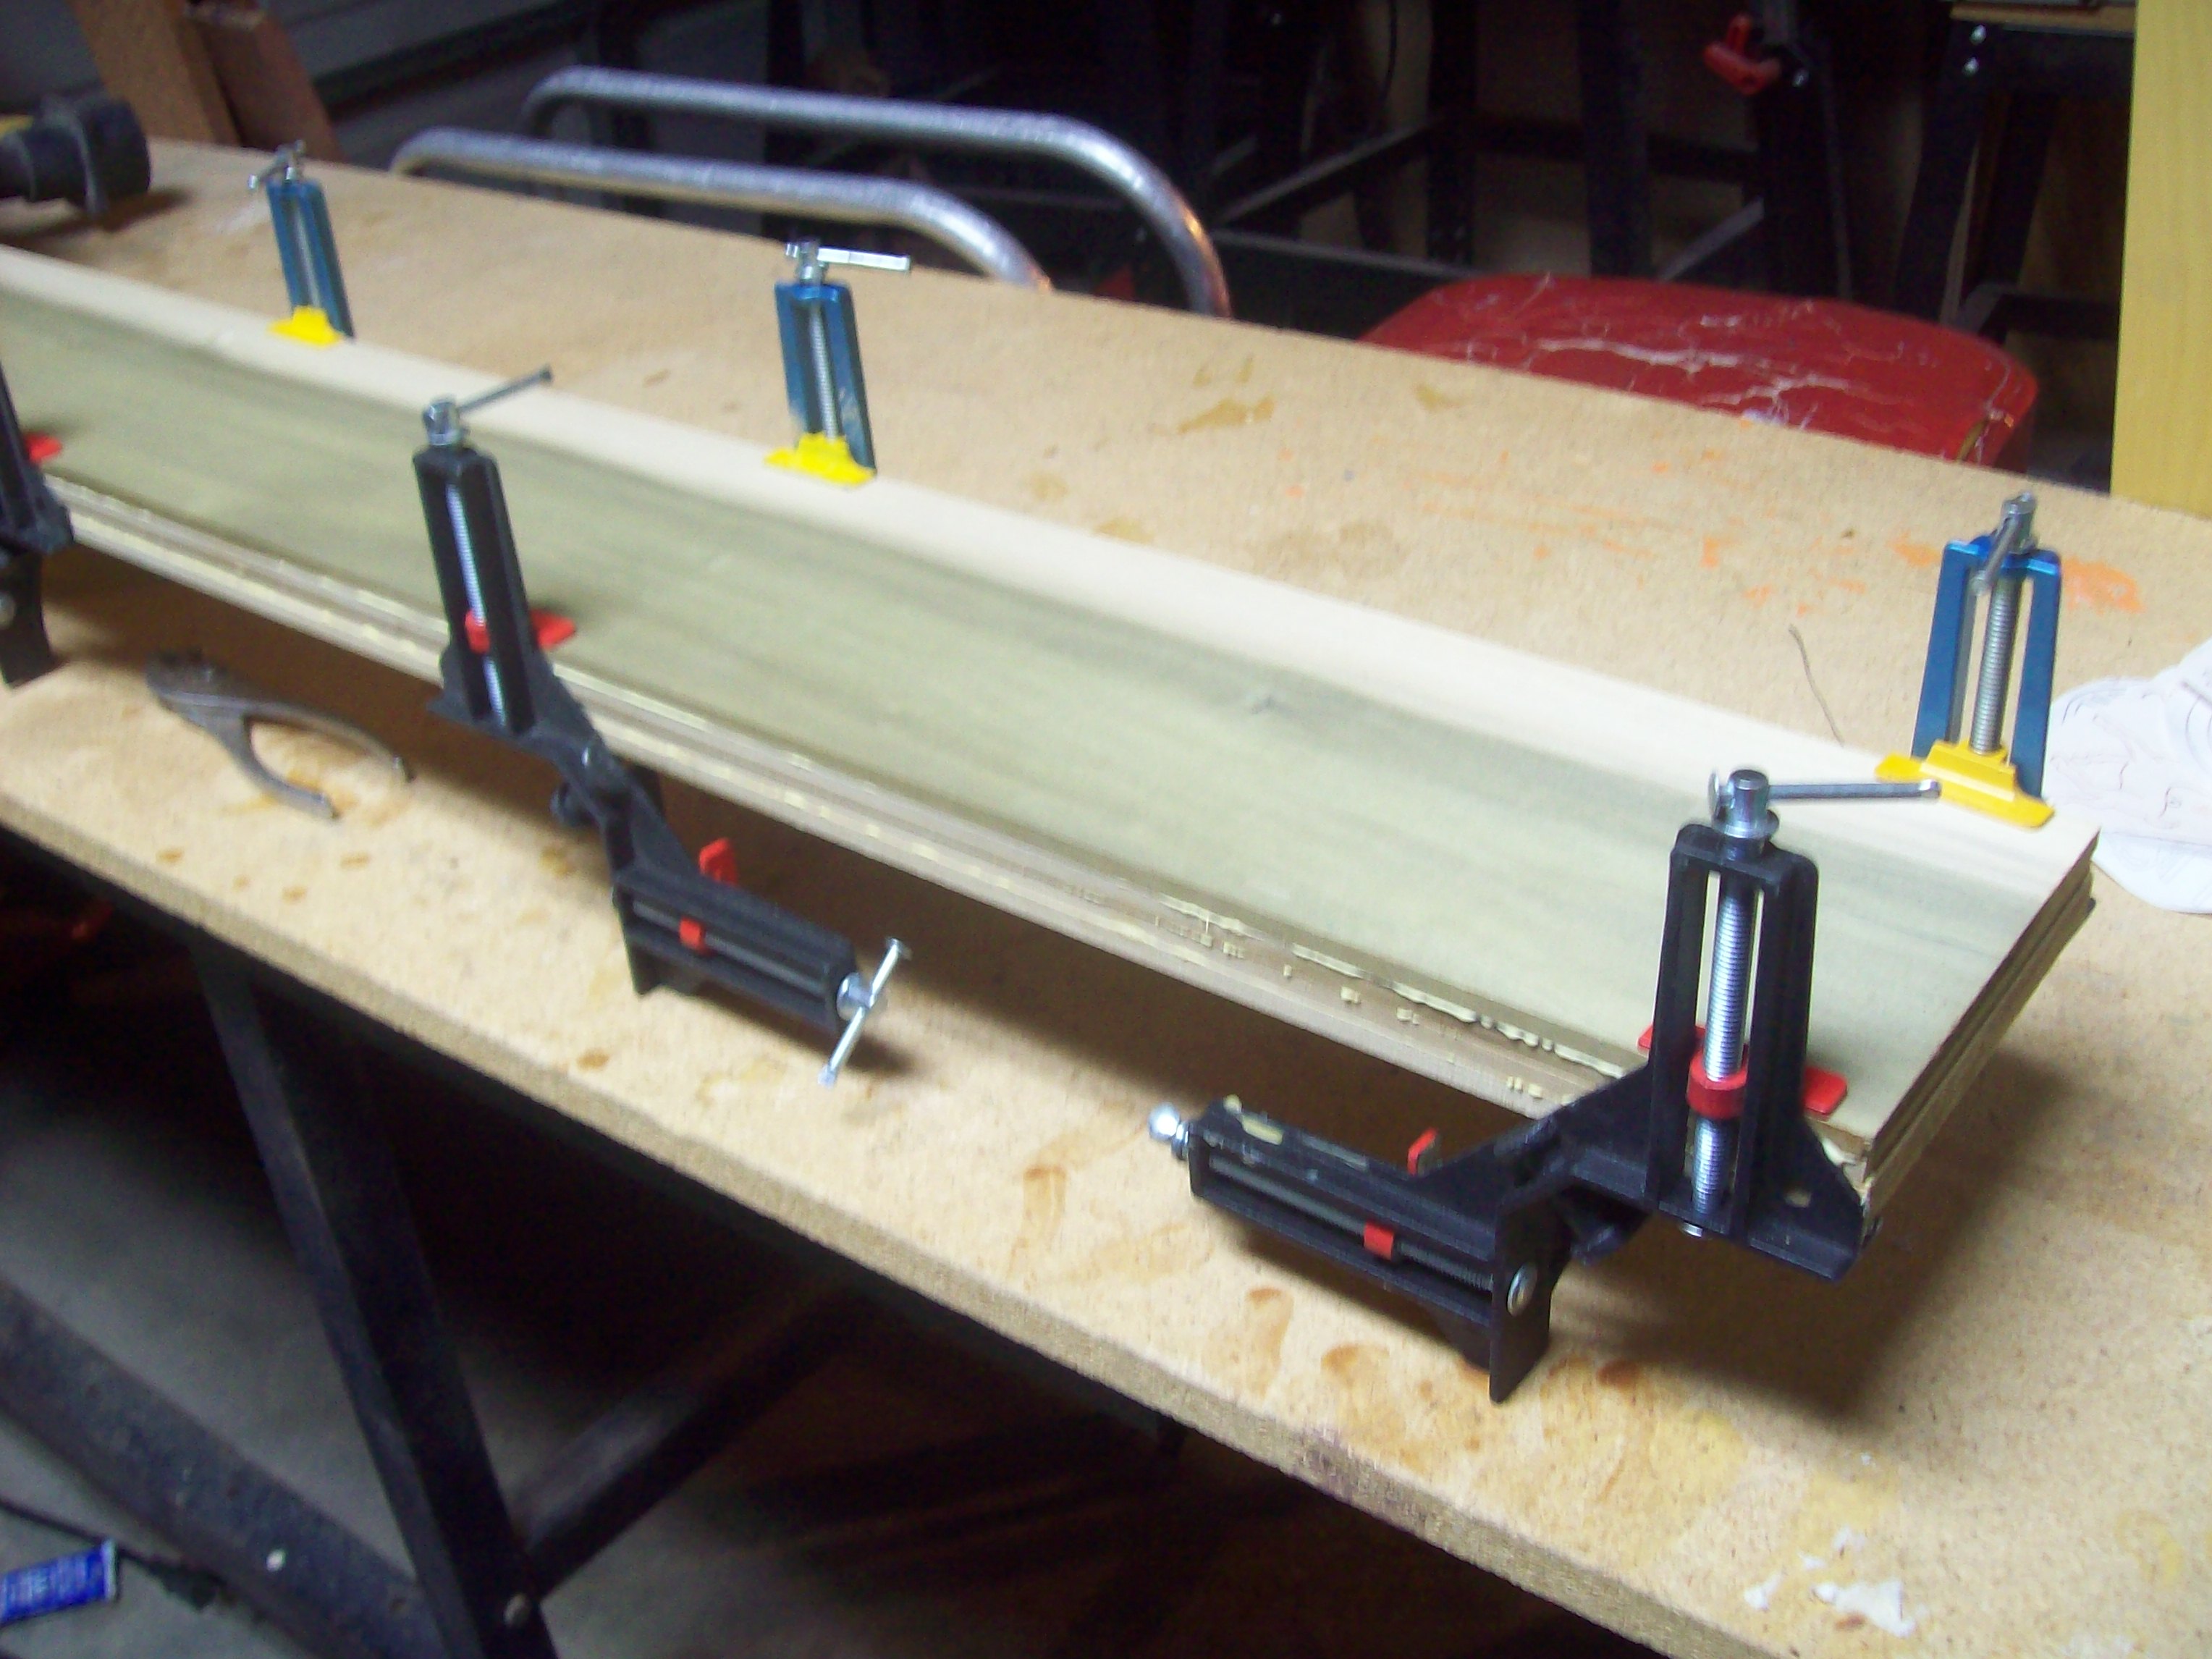
Notice how I clamped it securely with edge clamps all along both sides. First, they must be approximately even. Second, the wood must be relatively flat and not warped, otherwise, there will be pockets in the middle that might cause the pieces to flap around when cutting fine detail which will make them break. I’d hate to pull out an intricate ornament only to find all the details broken out!
Now, the reason I glued a thin bead along the extreme edges was not only to give maximum use of almost the entire middle of the wood, but also so when I arrange the patterns on the length of the top piece (once they are glued and it is all dried), I can now cut the four-foot long board into manageable chunks to work with in the scroll saw. Though my saw has a 30-inch reach, I have no intention of trying to maneuver a super-long section of board while trying to cut fine details! More than likely, I’ll cut this board into foot-long lengths or thereabouts, depending on the arrangement of the patterns. With only gluing the extreme edge, I don’t have to worry about any junctions along the middle somewhere.
Well, that’s it for this stanza. No telling when I’ll actually get to the next step. I have a book launch coming soon, plus I’m doing a major editing job. Life!
Until next time…
12/12/15
I was able to sneak some time in the garage this Saturday afternoon. The boards are now glued into one solid piece, at least along the extreme edges on the long sides. That means I have the freedom to place my patterns anywhere along the boards I choose as long as I stay away from the edges. This is it.
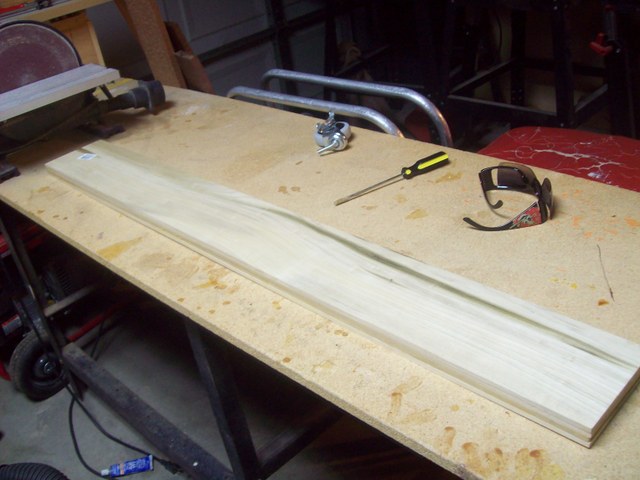
Next, I put on the painters tape. As I’ve said above many times, by doing this, I can now glue the patterns to the blue tape and not have to worry about removing the glue directly from the wood, which had issues with sanding and solvents and could be a big mess!
Notice how you can see slight gaps between each strip here. I highly recommend you do not layer the tape. It causes bumps underneath the patterns so they don’t lay flat. A slight gap in the tape won’t make any difference with the pattern lying on it, unless you leave big gaps. I mean I tried, but couldn’t quite get a perfect matching edge for each piece, considering the length I had to run the tape.
NOTE: Don’t forget to dust off the wood BEFORE you put on the tape! Every little bit of debris will create a bump in the tape that will cause a bigger bump by the time it gets to the pattern glued on top of it!
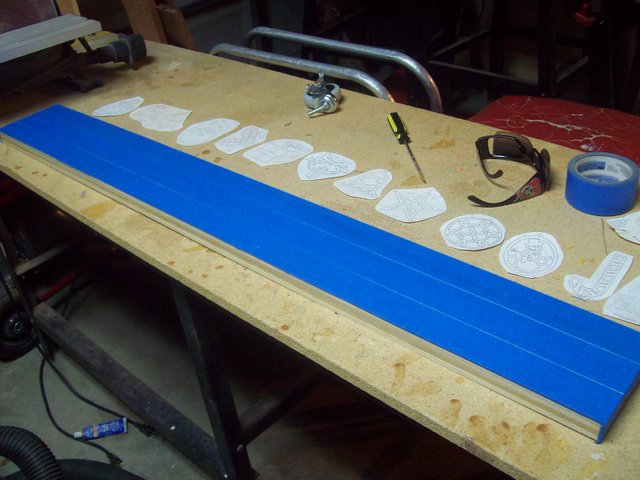
Now I arranged the patterns approximately how I wanted them to sit on the board. I also had to choose which out of the bunch I wanted to cut this time around. Since I have way more patterns than wood space, I had to pick and choose from the pile. The rest will have to be from another set of wood planks. I’ll also see how bad cutting through an inch of poplar is going to eat up my blades!
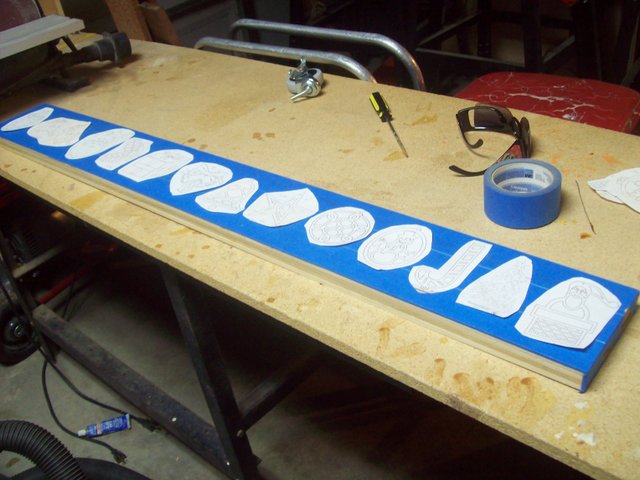
Finally, I set the patterns face-down on my cardboard spray board and applied the glue. I let them sit for just a moment, maybe thirty seconds to a minute, then, I took them and pressed them flat onto the tape. Of course, I got the order completely different, but it didn’t matter. The main thing was to get them all in the center of the board to avoid any glue spread at the edges. Also, I made sure to leave gaps between each one so I could run my miter saw anywhere I choose to cut the board into manageable lengths.
NOTE: Even though you can see some of the patterns appear to be touching, there is a border between the cut paper and the actual pattern printed ON the paper. The gaps are larger than they seem.
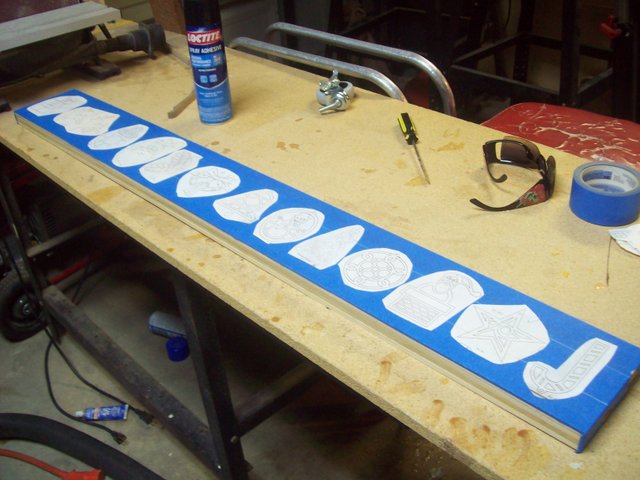
That’s it for today. I may or may not get to the drilling tomorrow, depending on what else I have to do.
Until next time!
01/01/16
You may have noticed a distinct lack of progress lately. Well…editing a manuscript can be very time consuming. Not only that, how about trying to work in an icebox? With an ambient temperature of around 38 degrees, and me none too thrilled to try my electrical wiring with my electric space heater this year, I’ve let things sit for a while. I have the patterns ready to drill and start cutting. I just have to drag out my compound mitre saw, cut that long board into sections, drill the pilot holes and then sit down at the scroll saw. Simple enough. However, if my fingers are frozen as well as the rest of my body, well…things just don’t work like they should! That’s even if I can squeeze in the time.
Enough whining.
Patience Grasshopper.
Until next time! Maybe even in time for Christmas 2016!
01/23/16
I finally got out into the garage on a relatively warm day. I pulled out the compound miter saw and cut the long piece into manageable chunks. I went completely by instinct and no special pattern. I either used a good gap between patterns, or where I wanted at least two patterns per piece of wood. That’s it.
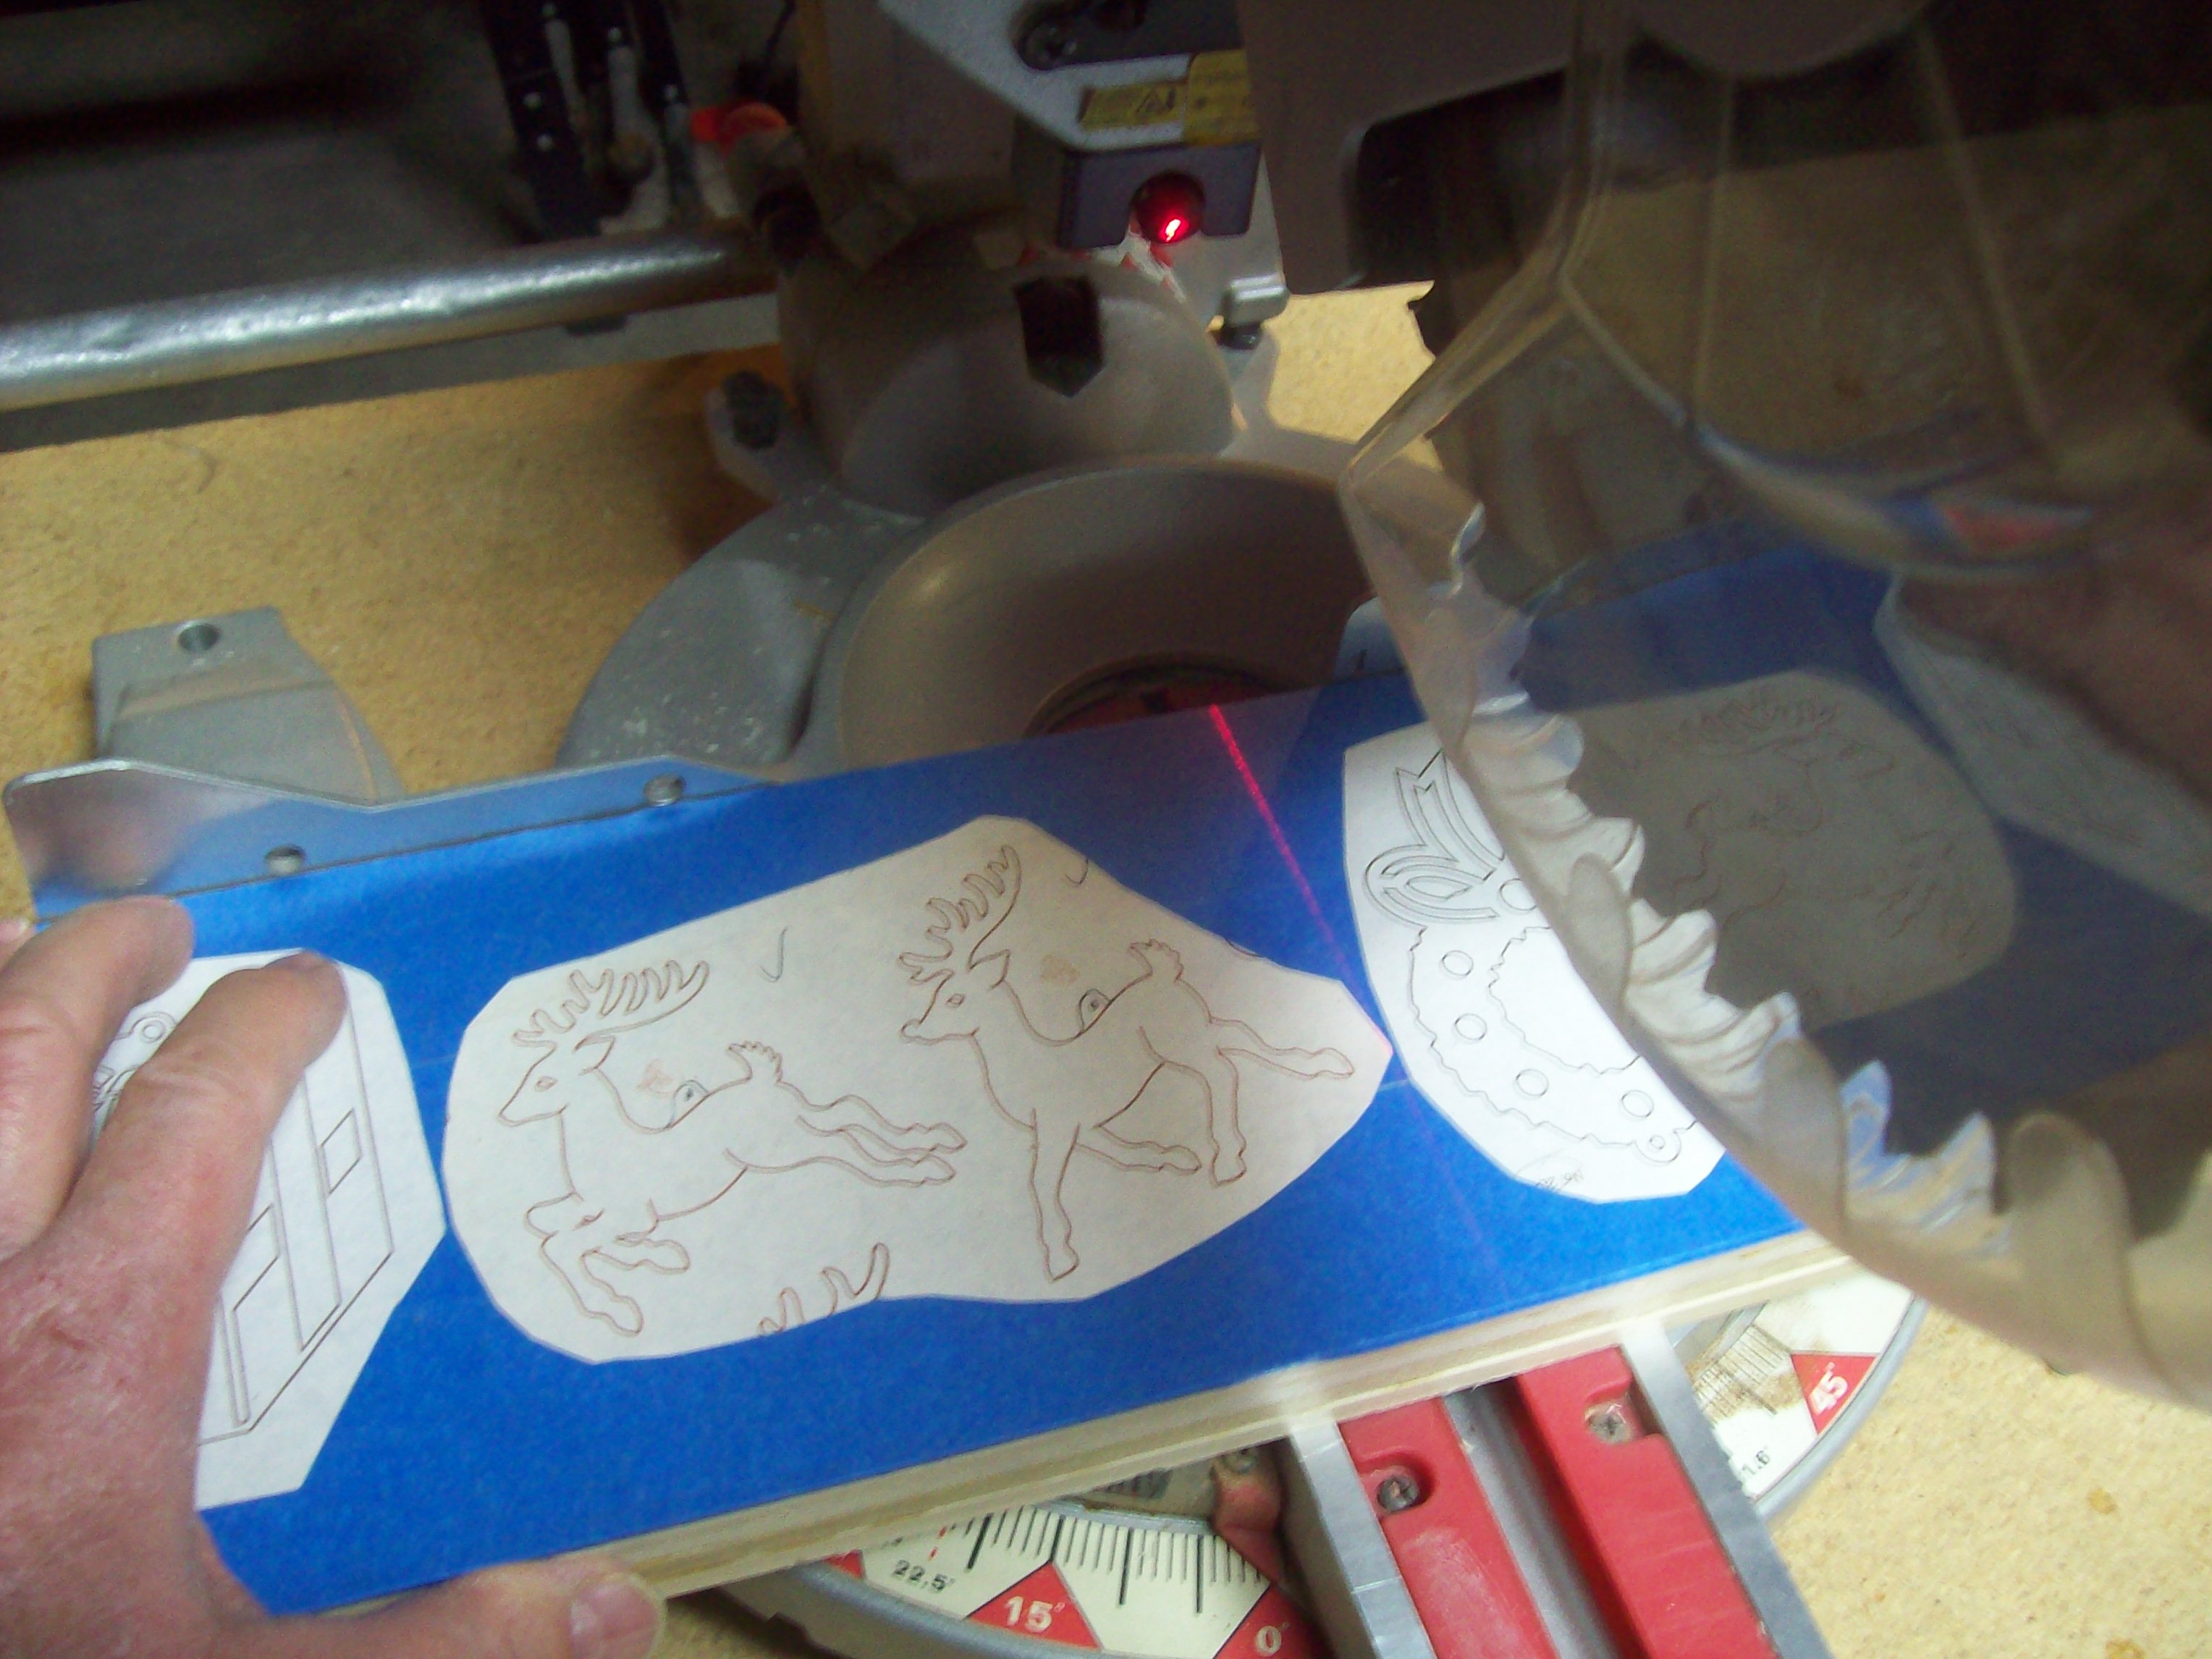
Here’s the saw with the laser mark showing between the first two patterns. I’m sure glad to have that laser line. It’s not a perfect match to the blade, but pretty close. I still lower the blade and use that as the ultimate guide which also takes into account the thickness of the bade, rather than just the “guidelines” of the laser.
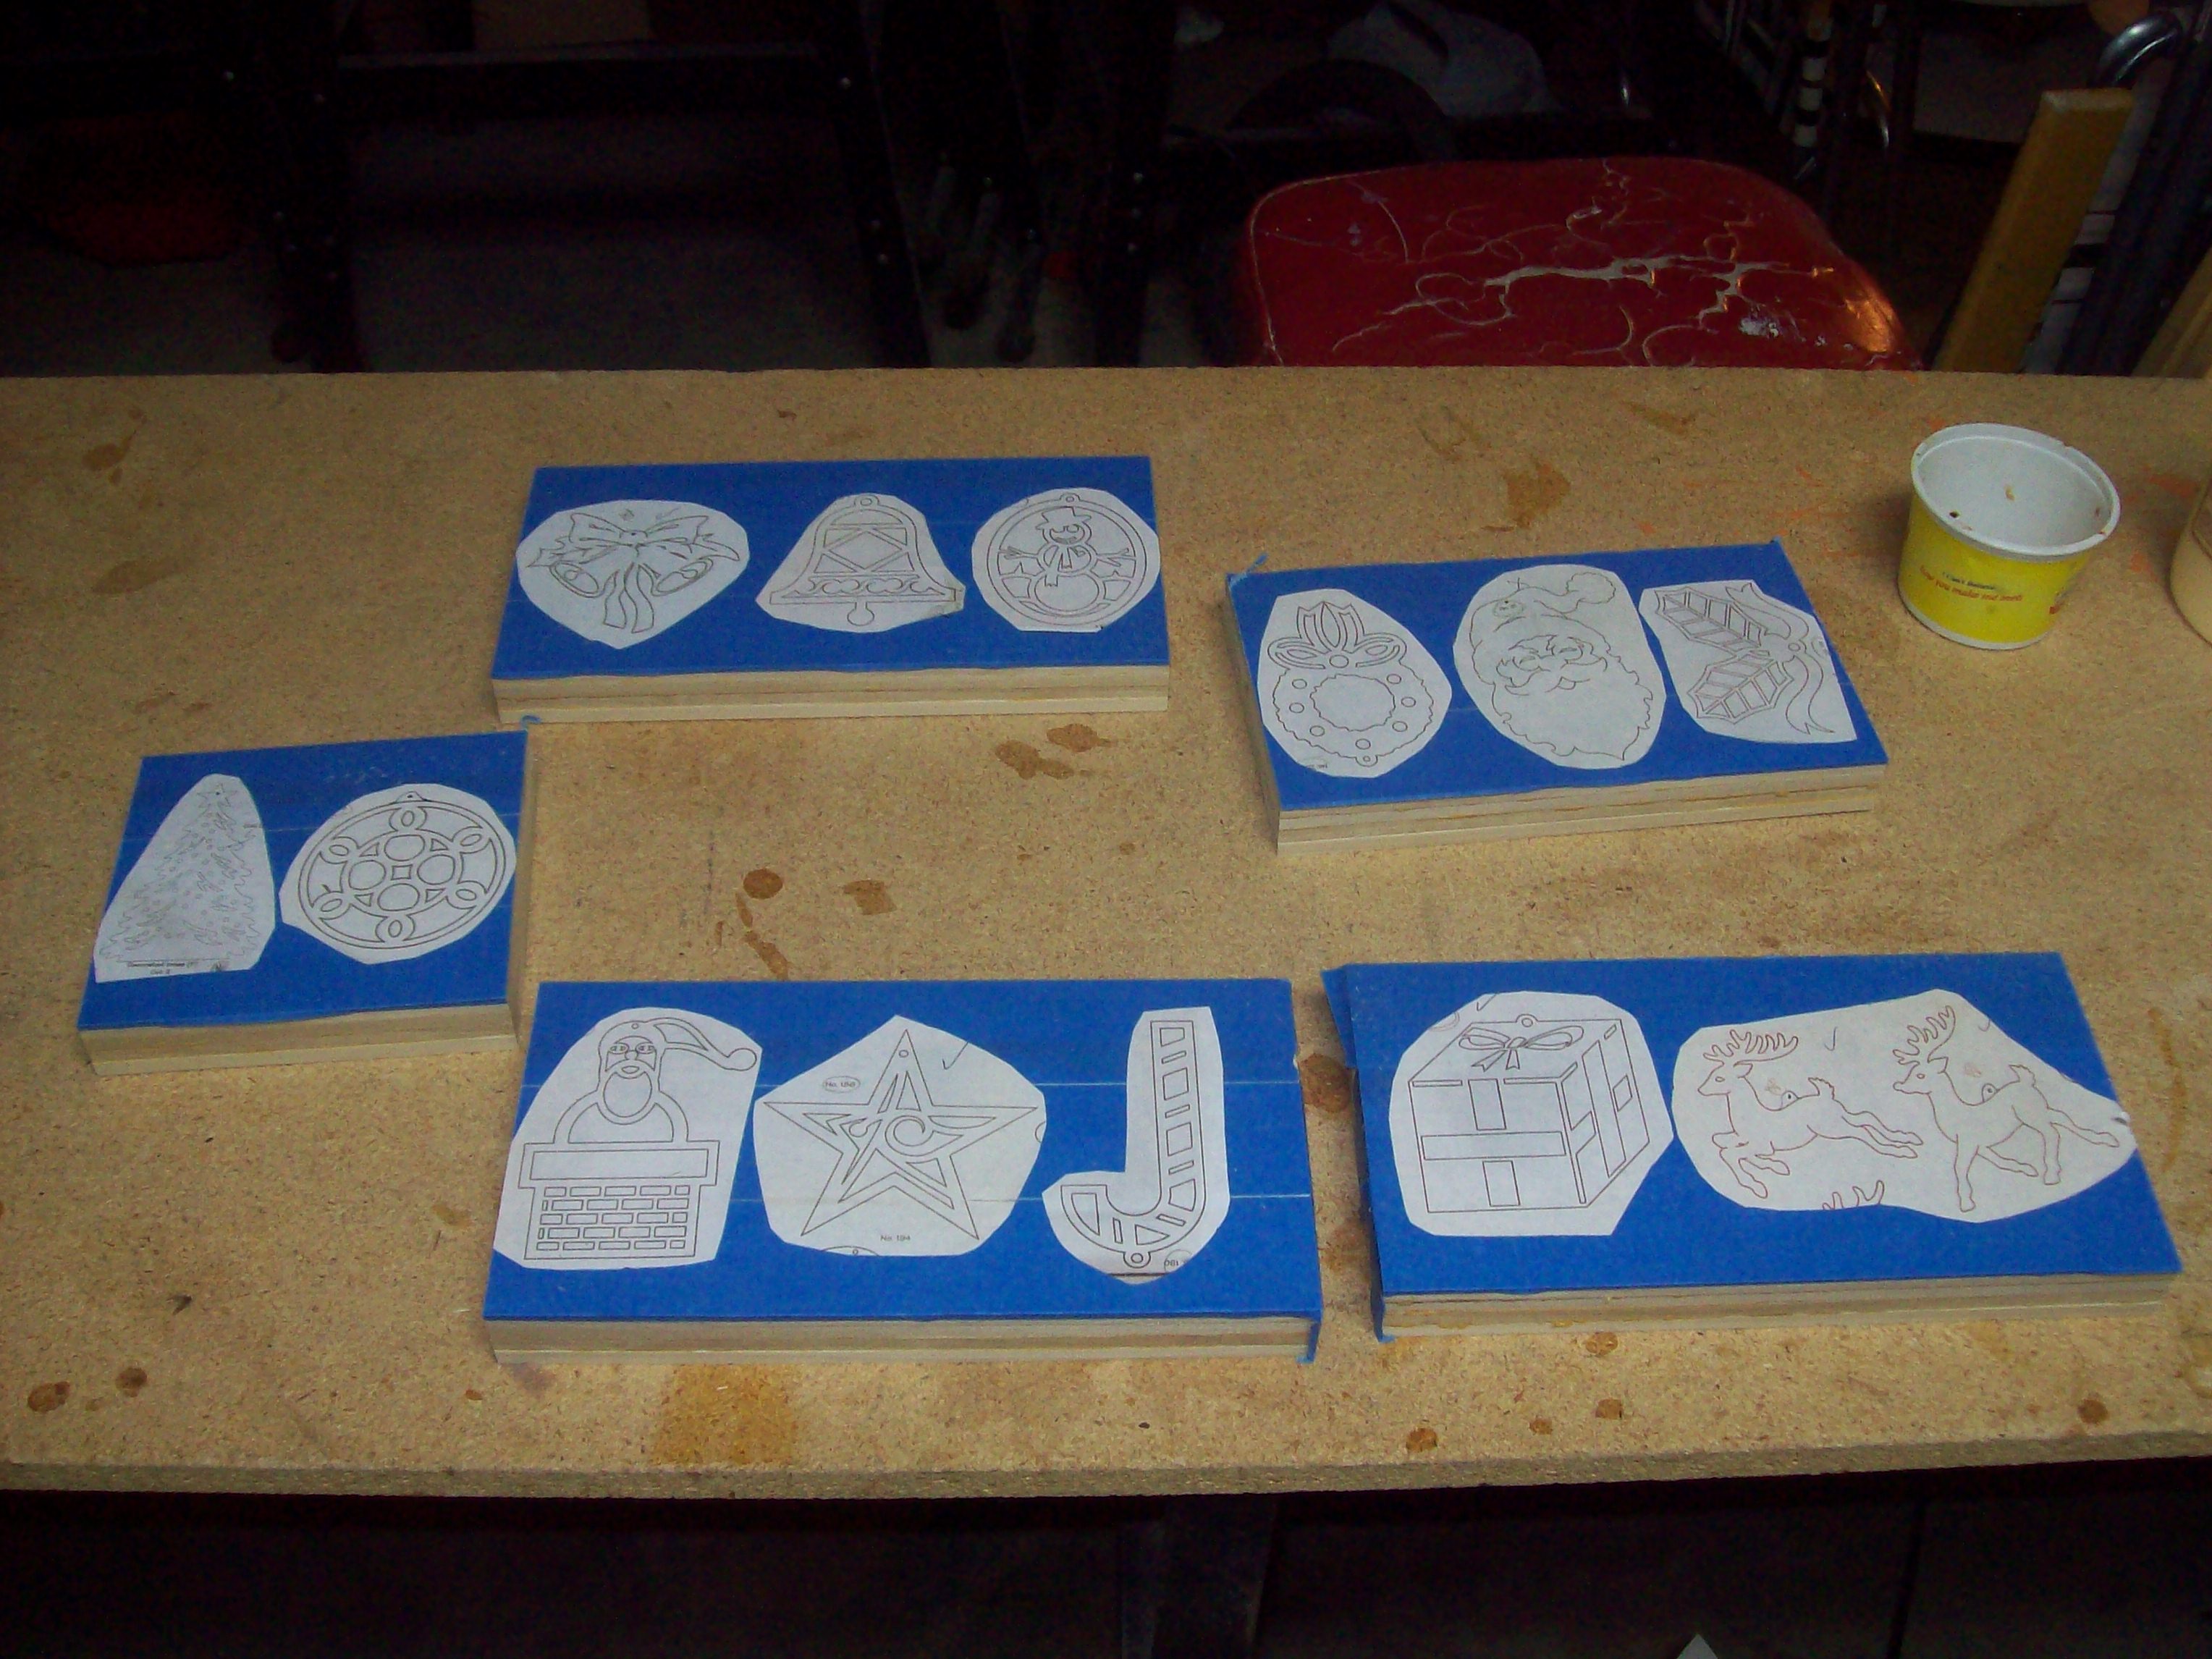
This is the five chunks cut to manageable sizes.
The next step is to drill the pilot holes. A word of caution when drilling holes on a complex project with multiple patterns. DO NOT drill the holes in each piece until you’re ready to cut! I say this from hard experience. The patterns sometimes have a tendency to peel up, once in a while all the way off! What if you drill the pilot holes, leave it for a while and then come back to find the pattern lying next to the piece of wood? What are the chances of gluing the pattern back in the same place again? While not impossible, it doesn’t usually go well or at best, is a major pain. Trust me on this. I’ve been there and done that, especially in wetter climes like back east where humidity can leech under the glue. Out here in Las Vegas, it isn’t such an issue but call me paranoid, plus it still DOES happen on occasion. Spraying glue, plus no matter how well you shake the can, plus whatever might bubble up from the wood or fingerprints or whatever might get on the tape can all add up to problems down the road. Just be patient, let those things sit and don’t drill until you’re ready!
That’s it for today. I may or may not get out there tomorrow to drill the first group. We’ll see.
Until next time.
01/02/17
Well, well, well, it’s been a while! Thought I’ve thought about it numerous times, I never quite got around to actually doing much work on those pesky Christmas ornaments! Okay, so I DID drill a bit on this first set of three patterns, but never even finished that until December 2016! Then there was the issue of actually cutting something. Well, guess what? The friggin’ patterns were starting to peel off the blue tape! That right there told me I needed to get busy.
Finally, with two three-day weekends in a row, I found time to get out in the “gerridge” and do some cutting. Now that this set of three was already drilled, I kind of had to cut soon or the entire patterns would peel off and I’d never get them glued back down over the pilot holes again. Trust me, I’ve been there and done that!
Now, for a little technical problem. Though Poplar, my wood of choice in this case, is classified as a hardwood, it’s not by far the hardest of the bunch. At the same time, when you stack four layers together, accumulating a full inch plus of material, it’s going to put some major wear on a scroll saw blade, especially the “standard” blades I normally use.
My go-to blade is the 00 28 teeth per inch that I usually get from Cherry Tree or what used to be Wildwood designs. I’ve also been known to get them from Lowes of all places! Now, that blade is just not hefty enough to cut through an inch of hardwood for multiple repeated cuts unless it’s balsa, which by the way, is also classified as a hardwood, though I don’t know why.
So, I happened to have some slightly thicker 20 teeth per inch blades I picked up at Woodworker’s Emporium.
Oh…kay.
Turns out, I got through one design, in this case, the candy cane, and burned up the blade. I barely made it through the final few millimeters of the outer edge! Let me tell you, it was smoking!
When I got to the star design, the second blade was smoking before I got to the last inner cut! I had to drill a larger pilot hole for the outline cut and use a hefty 10 teeth per inch, big honkin’ blade just to get the thing finished. And guess what? It started smoking at the end!
Geez!
I’m just glad I didn’t opt for oak.
On the other hand, I got four of each one at once, and given the precision of the saw, they all turned out pretty good!
Here’s the three designs, with two of them cut out.

Now, here are the designs cut out. Mass production!
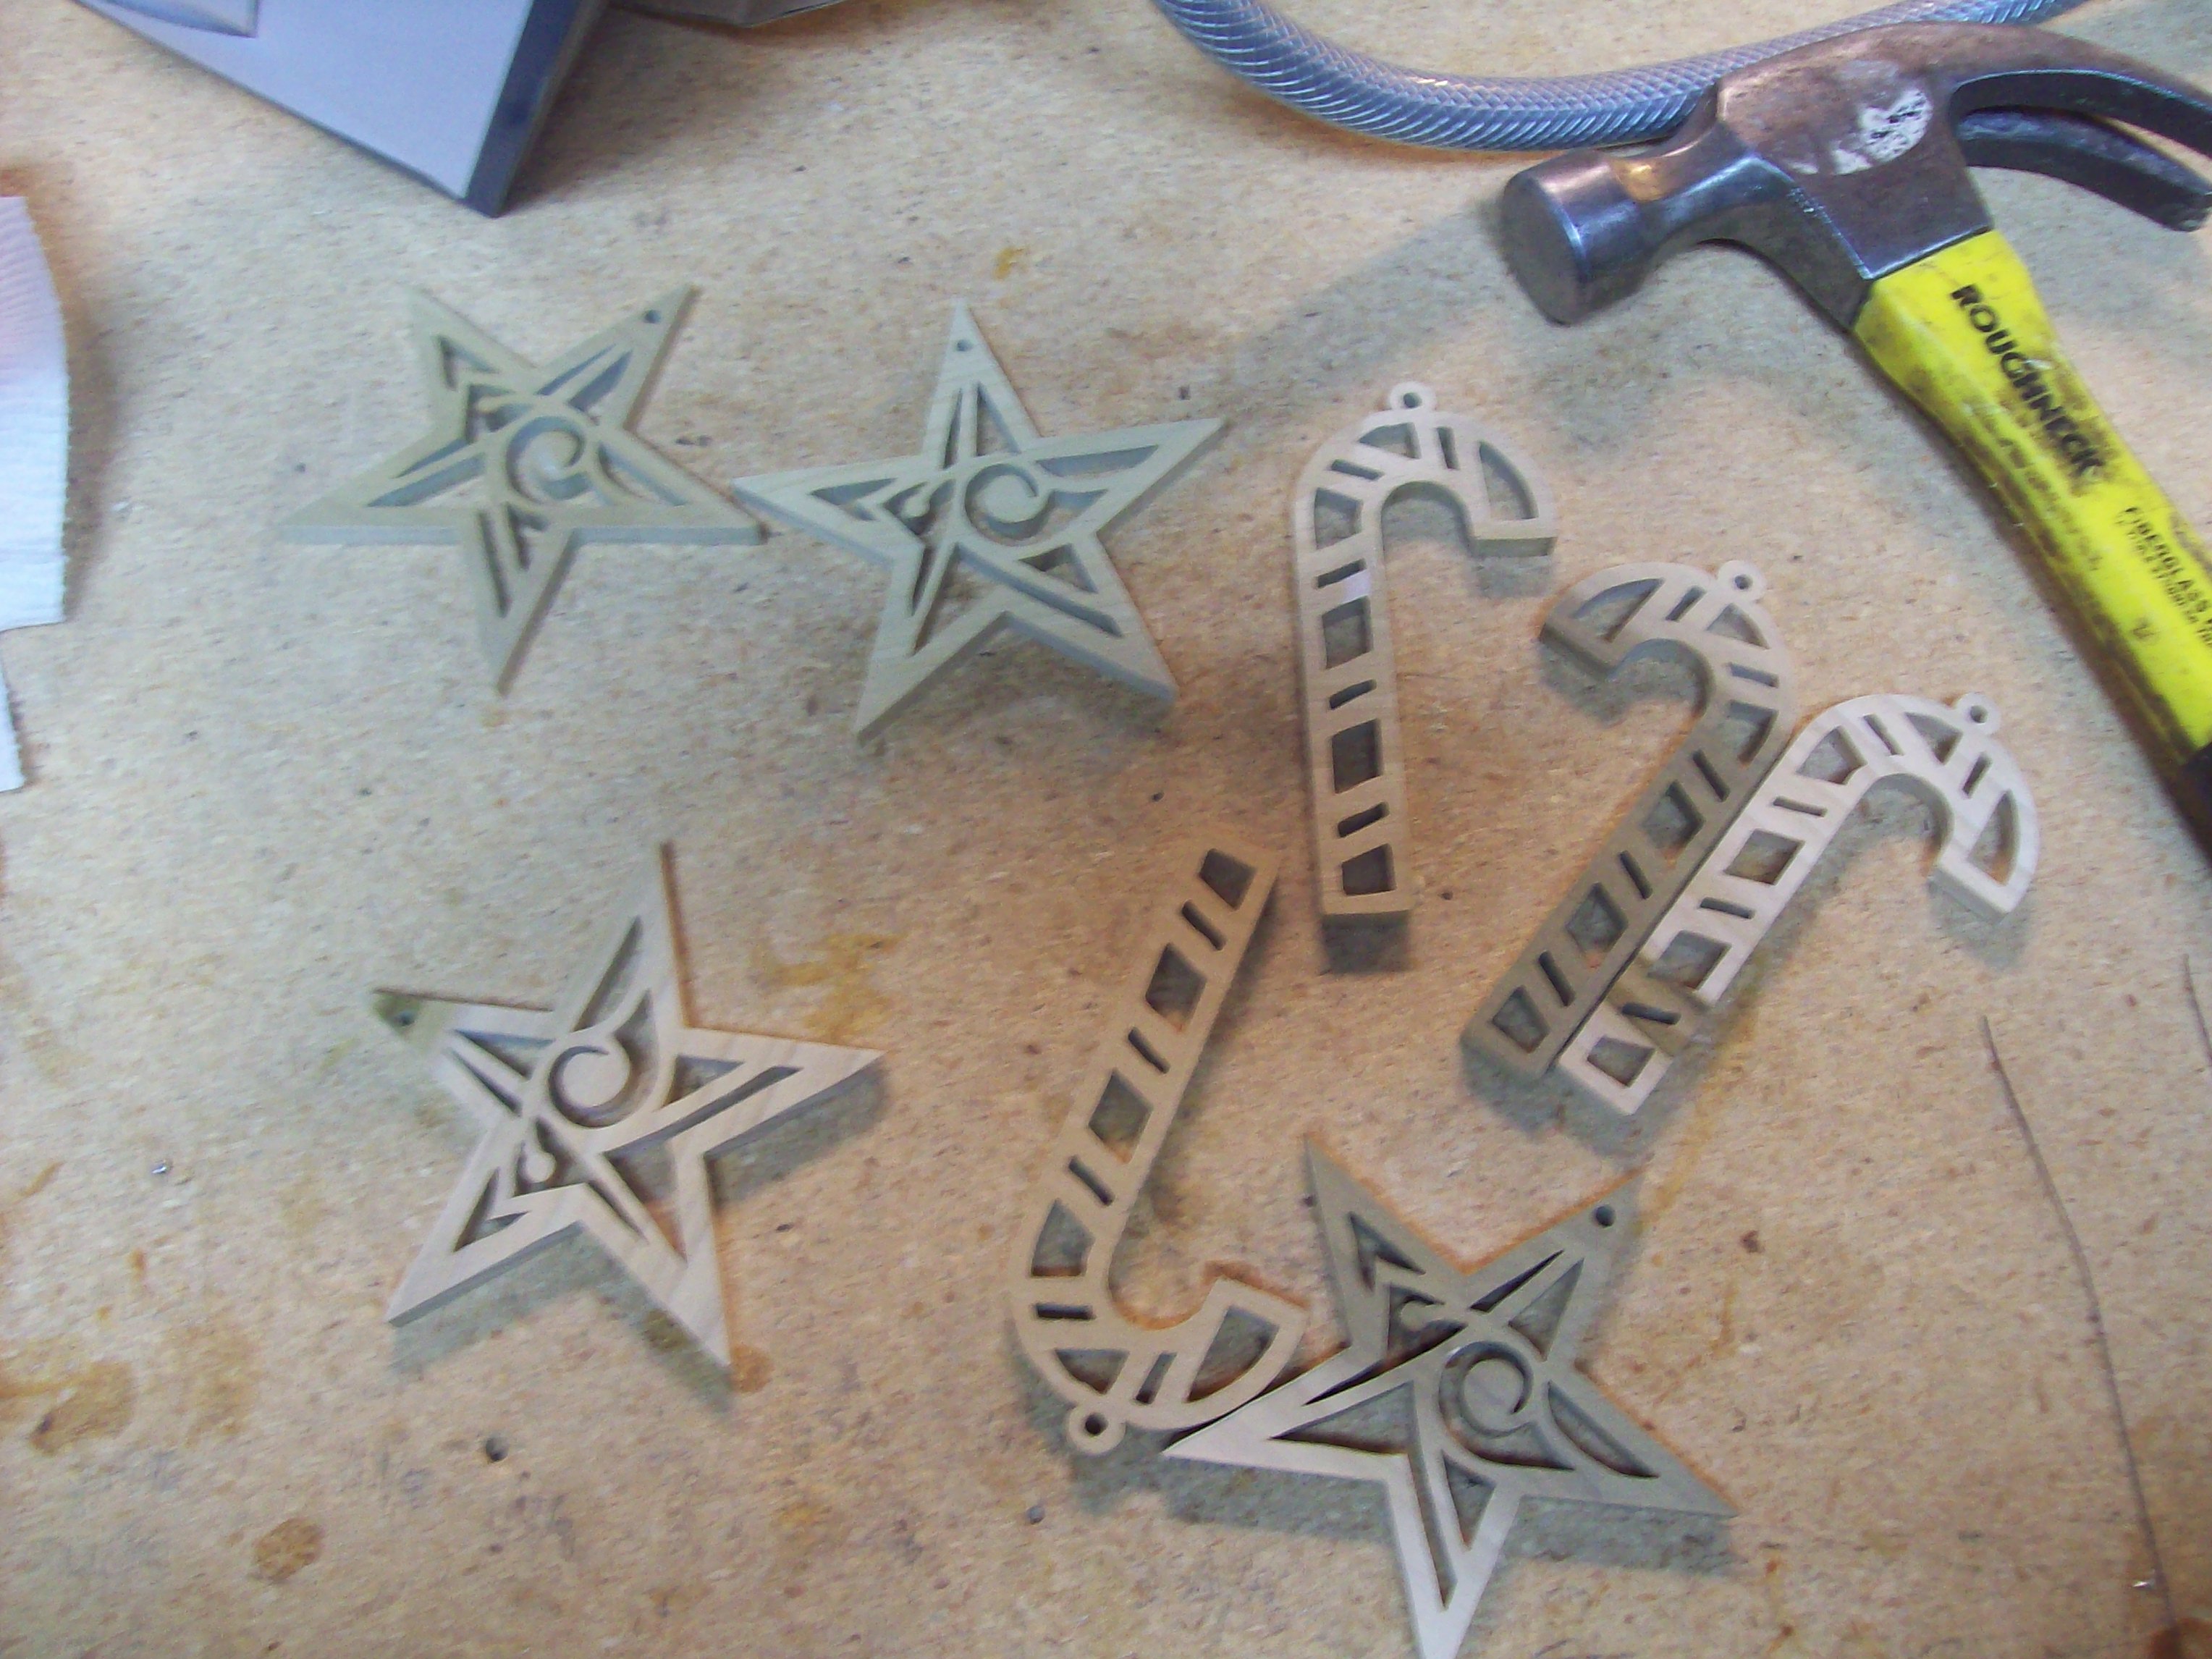
Until next time!
10/11/17
You’re probably wondering where I’ve been all this time. Well, life and writing have been getting in the way, plus the garage has been more like an Easy-Bake oven for the past few months. Now that things are cooling off a bit, I may get back to those Christmas decorations. Then, maybe a few other things.
Life moves on…
12/30/17
Okay, still here and still no more progress lately. I should be getting back to the orntaminks soon. Well, I hope so!
01/27/18
Okay, finally! Me gots back to work, at least a little bit.
I just finished another batch of four orntaminks. These were a set of four Christmas bells.
Here you go.
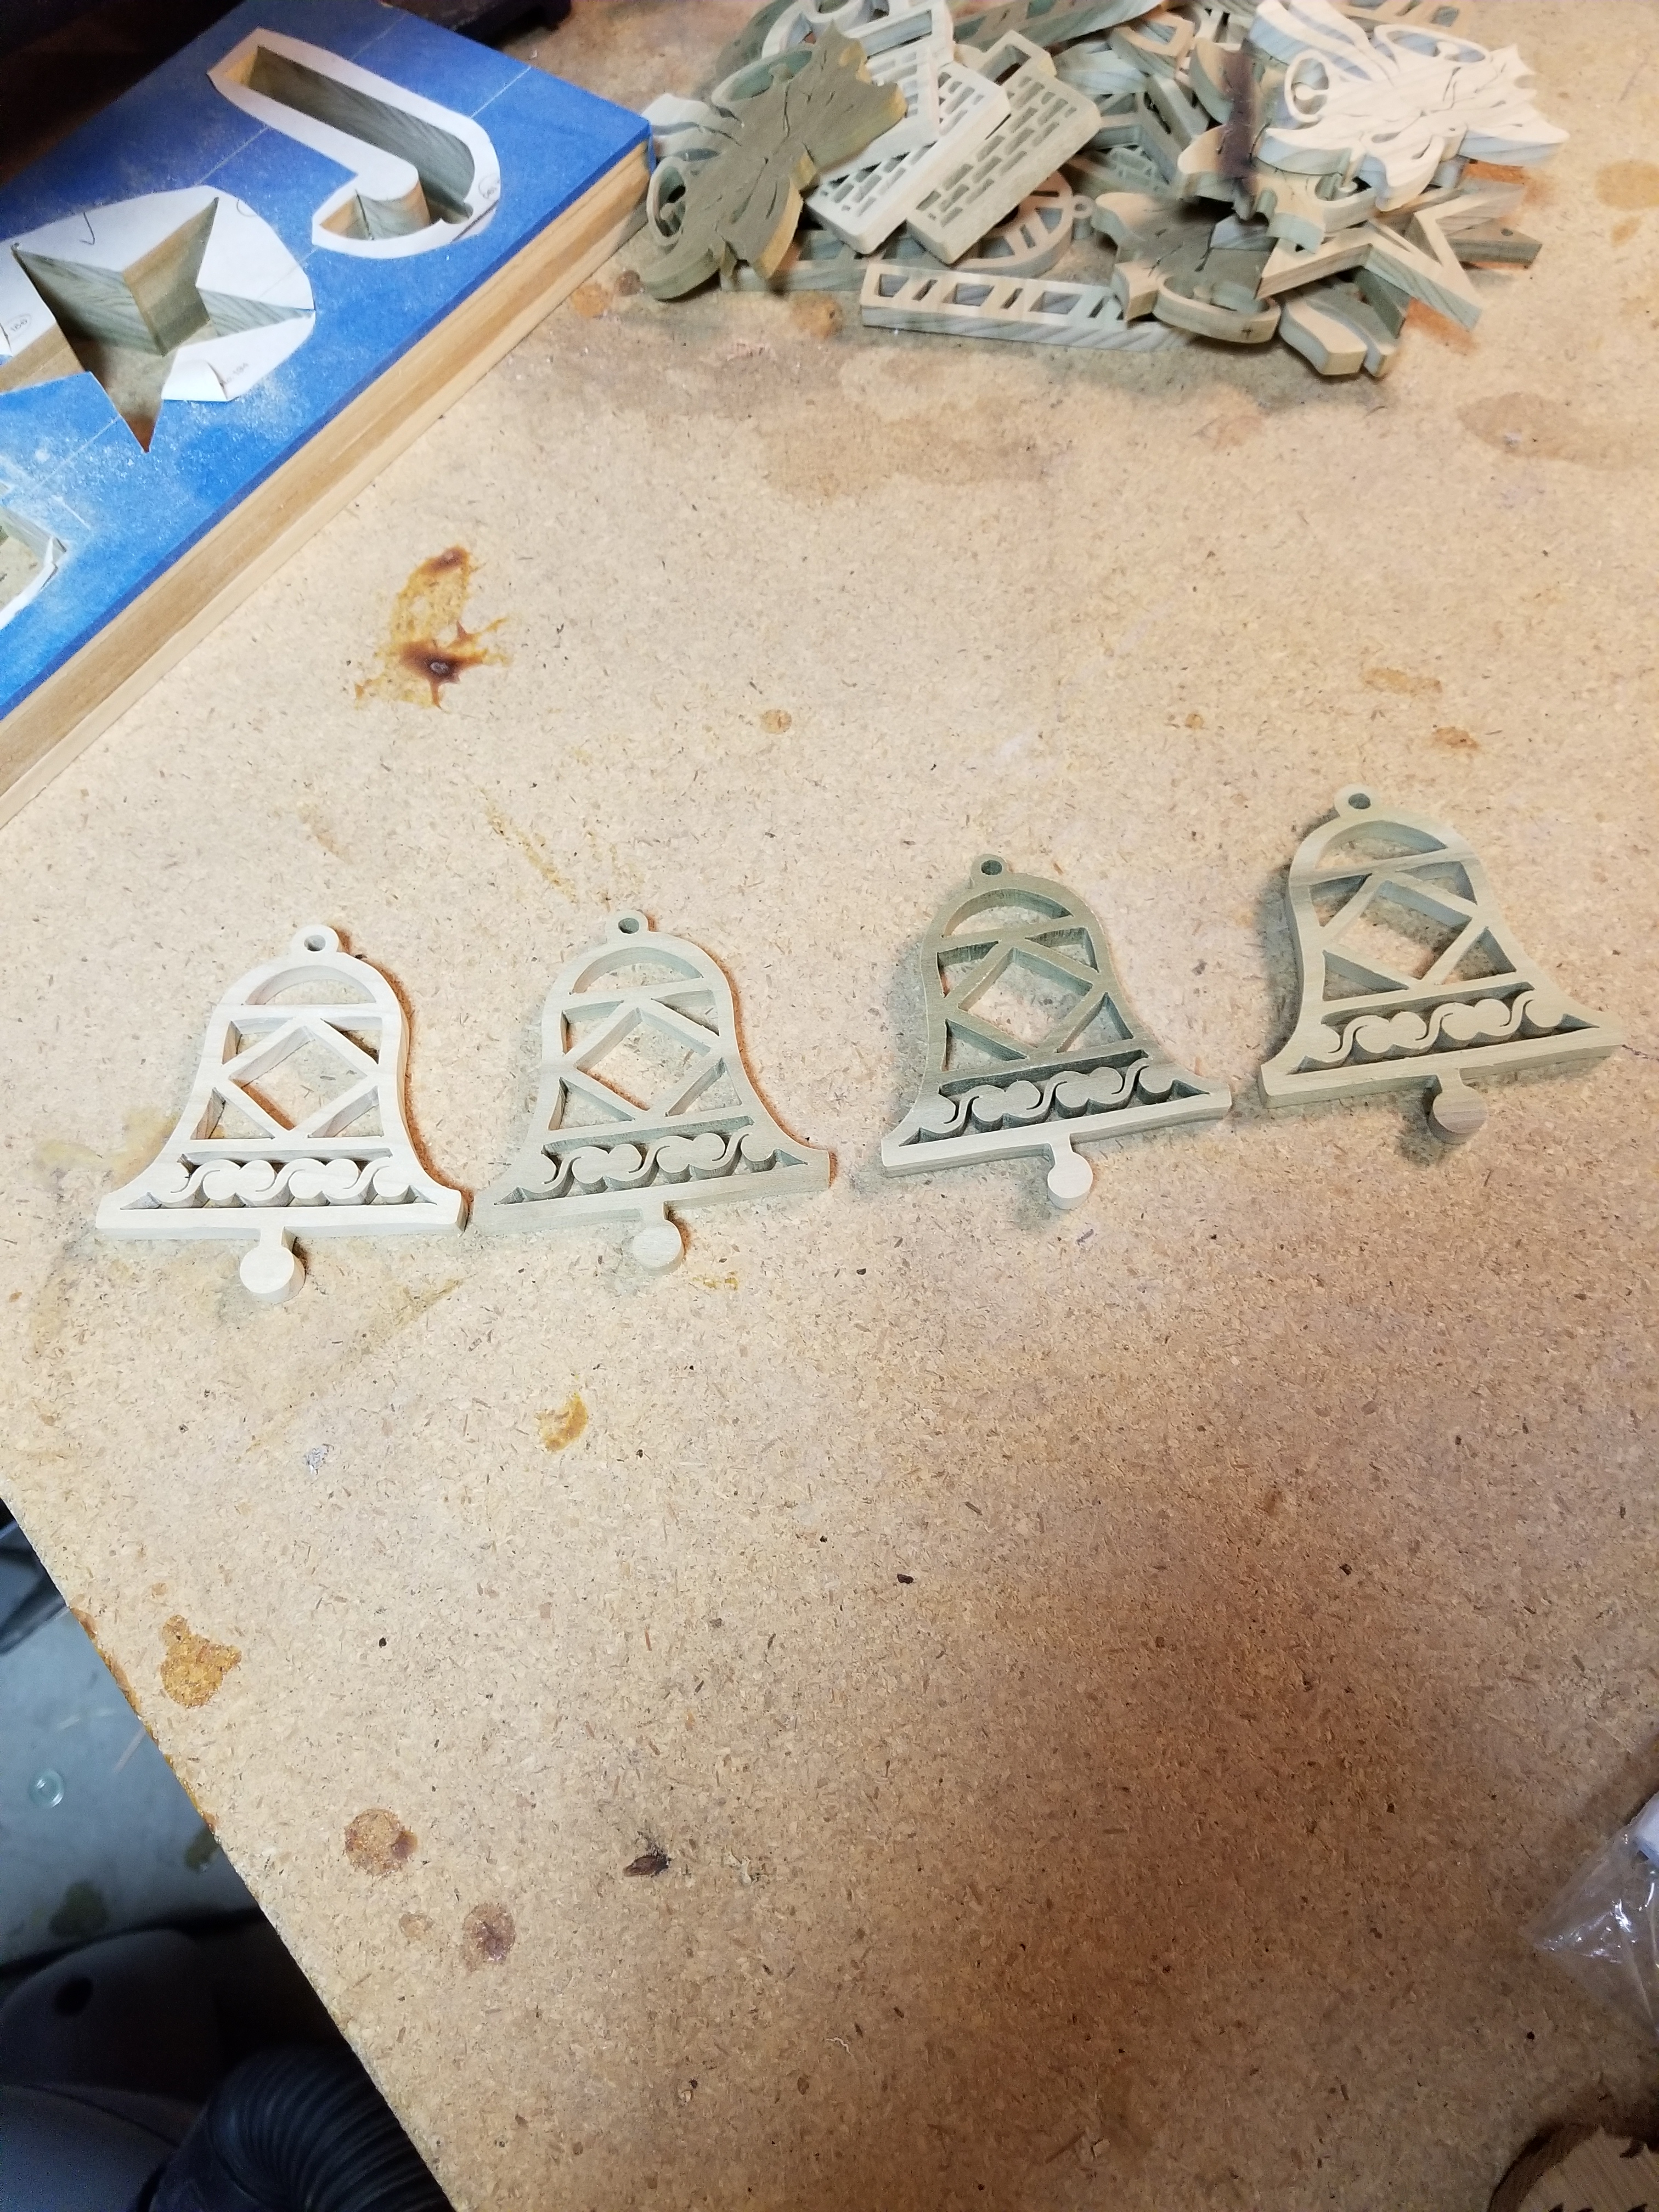
06/23/18
I got back in the garage and cut a few more decorations. This time it was snowmen. It was very hot but I managed to stick it out and got the job done! Snowmen in June in Las Vegas…go figure!

09/22/19
Geez! It’s been over a year already?
Time flies.
Anyway, here’s the latest batch I did just today.
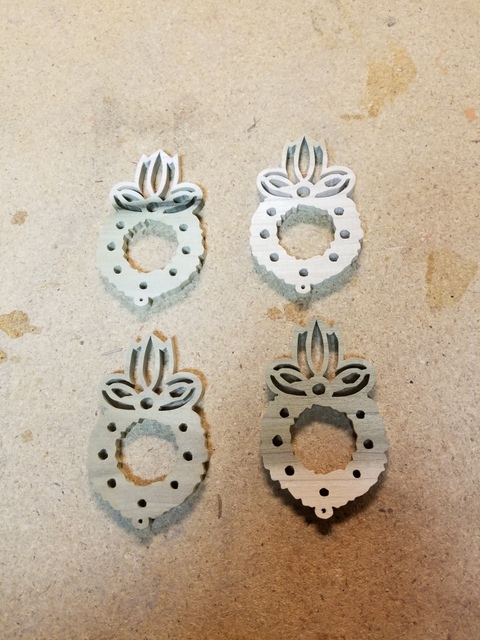
09/26/19
Had some time off and instead of going up north to a star party, I did some work in the gerridge, once again.
This was the result today.
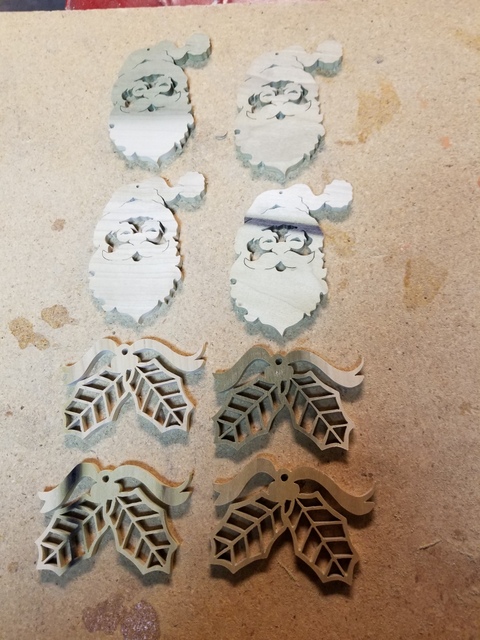
After all this time, I’m gathering quite an accumulation. I still have a few patterns to go, but should have enough to keep me in the black for a while with gifts. Then I can concentrate on my special projects. More on these little “orntaminks” as I progress…
10/05/19
Cut a couple more today. Only have three to go from this batch, then I can start lacquering them!
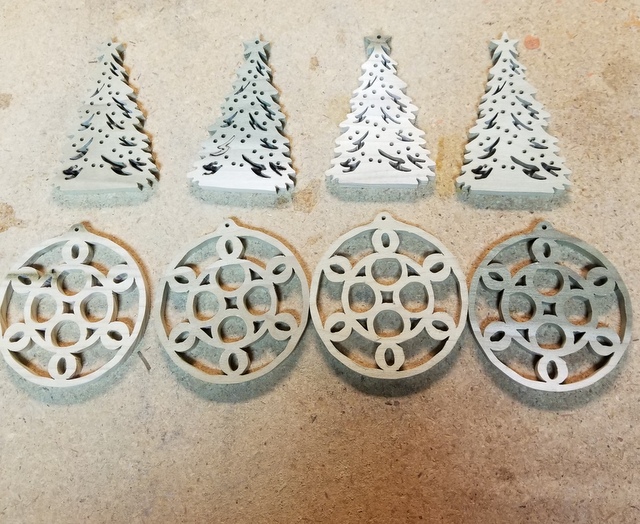
10/23/19
Okay, last Saturday, October 19, 2019, despite recovering from a rather nasty surgery, I managed to finish up enough of the ornaments to start finishing and lacquering them (please don’t refer to it as painting!).
I still have three designs to cut, which will be a total of 12 more ornaments, but sorry, that’s for another time. Oh well, Kim wanted to get these off to various people and I also had a few to send off and give away, so now this batch is “aw gone.”
In all, with a project I started in November 2015, I FINALLY got it dun didded and ended up with 44 “orntaminks” total.
Here they are.
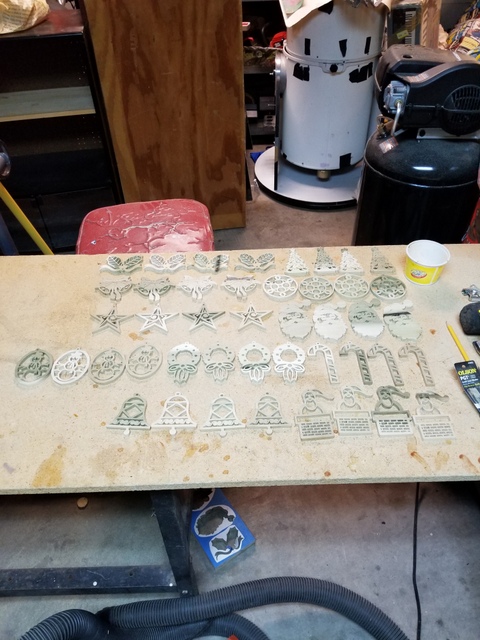
Next, I had to figure out how to clean them up for lacquering. With each individual cut, there’s the possibility of kerf. Without slogging through everything upstairs within this page, I can tell you that kerf is the fuzz left over at the edge of the wood from the saw blade cutting into the wood. Depending on the sharpness of the blade, where the wood lies in the stack (if there is one), the sloppiness of the cut, how fast I’m able to make a sharp turn and whatever other factors, there may be more or less kerf. Oh, I also must not forget the characteristics of the wood, which may affect that as well.
So, with many methods available, I chose the best for me. Tedious, but effective. Jewelers files.

Jeweler’s files are great for the main grunt work, but sometimes you just have to make a few wide sweeps. Sandpaper is best for that, but considering the delicate wood pieces, powered sanding is NOT recommended. So, instead I went for a piece of emery cloth, fine, of course.
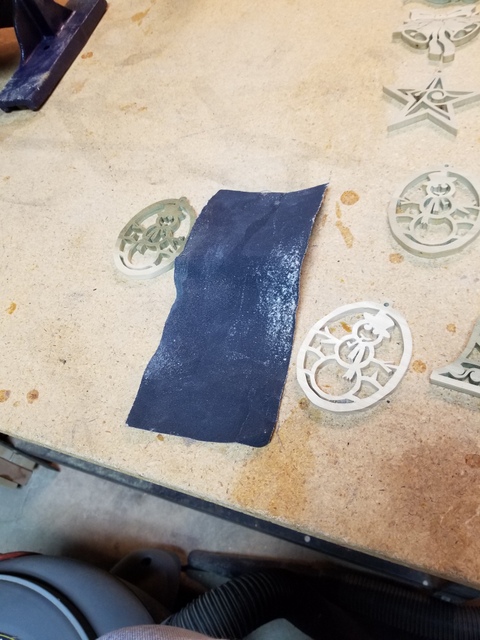
The key to this method is to first make sure the surface underneath the cloth is smooth. No bumps! That would not be good. The second thing is to always move the wood piece with the grain. The last thing you want is streaks against the grain, which would be hard to get out.
After several tedious hours of filing, sanding, re-filing, re-sanding, blowing with my mouth and then vacuuming everything, I was happy enough to say, “good enough for guv’ mint work.”
Now it was time to do the lacquering.
The goal if the lacquering was to make it quick and dirty, allow the lacquer to soak in and leave as little drip as possible.
I did not want to brush it on.
I did not want to spray it on.
In both cases, that would expose me to the fumes much longer than I wanted, plus dealing with brush marks and overspray and globs etc.
So, I chose dipping, which means thinning the mix. That always makes me think of a scene with Harry Dean Stanton in Down Periscope. You’ll have to be a movie buff to get that one.
I took everything to the back yard and the pool patio. Plenty of room, air and a slight breeze. Fumes minimal
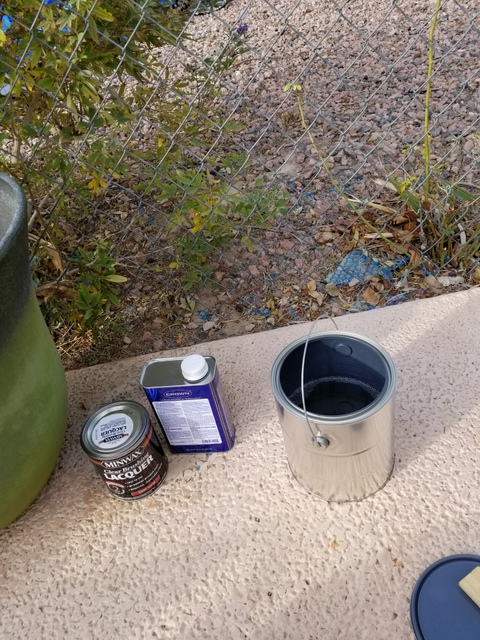
I raided Lowes and bought a quart of clear gloss lacquer, a quart of lacquer thinner and a gallon can with lid.
I then dumped both liquids together, a 50/50 mix into the can and shook it all up to get a good mix.
I was now ready for the next step. Dipping.

I placed an ornament hook (which I also bought in a pack of 75 at Lowes) on each piece, immersed it in the mixture, which was plenty thin, then tapped the excess off on the inside of the can, which still had plenty of clearance above the surface of the liquid. Then I lifted it out of the can and hung it on the chain link fence to dry.
They’re a little harder to see than what I saw in the camera, but the photo still illustrates the point. By the time I was dun didded, I had 44 ornaments strung out on the fence with hardly any drip, due to the thin mix. With the breeze at my back, the fumes were minimal, and I didn’t get high in the process!
The next morning, the ornaments were dry enough to bring inside and you couldn’t even smell them in the same room!
Job well done.
They’re now distributed worldwide, and local, and I’m ready to start the next project, whatever that might be. Hopefully, it won’t take four years!
10/09/21
JEWELRY BOX PROJECT
Okay, it’s been a few days shy of two years since I last posted. The reasons are varied and many but heat, other projects and just plain life got in the way.
This project started as a Christmas present idea from Kim. She wanted me to make a series of jewelry boxes for family members. Simple enough sounding but a little more complex in the execution.
The design I chose is not new as coming across new jewelry box ideas is as rare as hen’s teeth. The one I chose is one I’ve made before as from this design below.
The difference will be the inlay on the top. Not exactly sure what they’ll be yet as I haven’t decided. Also, I’ll not be using purpleheart this time as I don’t have enough on hand for the job. Besides, I wanted to do something different this time. Also, the original as above was made with the original thickness the board came in, which was about 3/4-inch which frankly, is too thick.
Instead, I scoured my exotic wood stock and came up with some walnut, African Padauk, and sycamore (London Plane Tree). All-in-all, I’m making one each except two of the sycamore because I had more of it than the rest. More on that a bit later.
First thing I had to do was get out the planer because the original box design called for 1/2-inch wood thickness, which for many reasons, works better and is a lot easier to cut the design into!
Here’s the planer set up with the shop vac ready to be filled up. Oh, and filled up it would get as I went through four bags just planing down the wood. On the right side is the trash can with right now, two years later, is still heavy from the bags stuffed with the wood dust! I need to take it to the dump eventually.
Here are the pieces of wood during the planing process. Notice the raw look of the walnut. This is the same walnut I got in Indiana when a friend in the woodworking group I was in cut up a tree with a portable mill and gave me a bunch of scrap. It’s been drying and seasoning for 20+ years now.
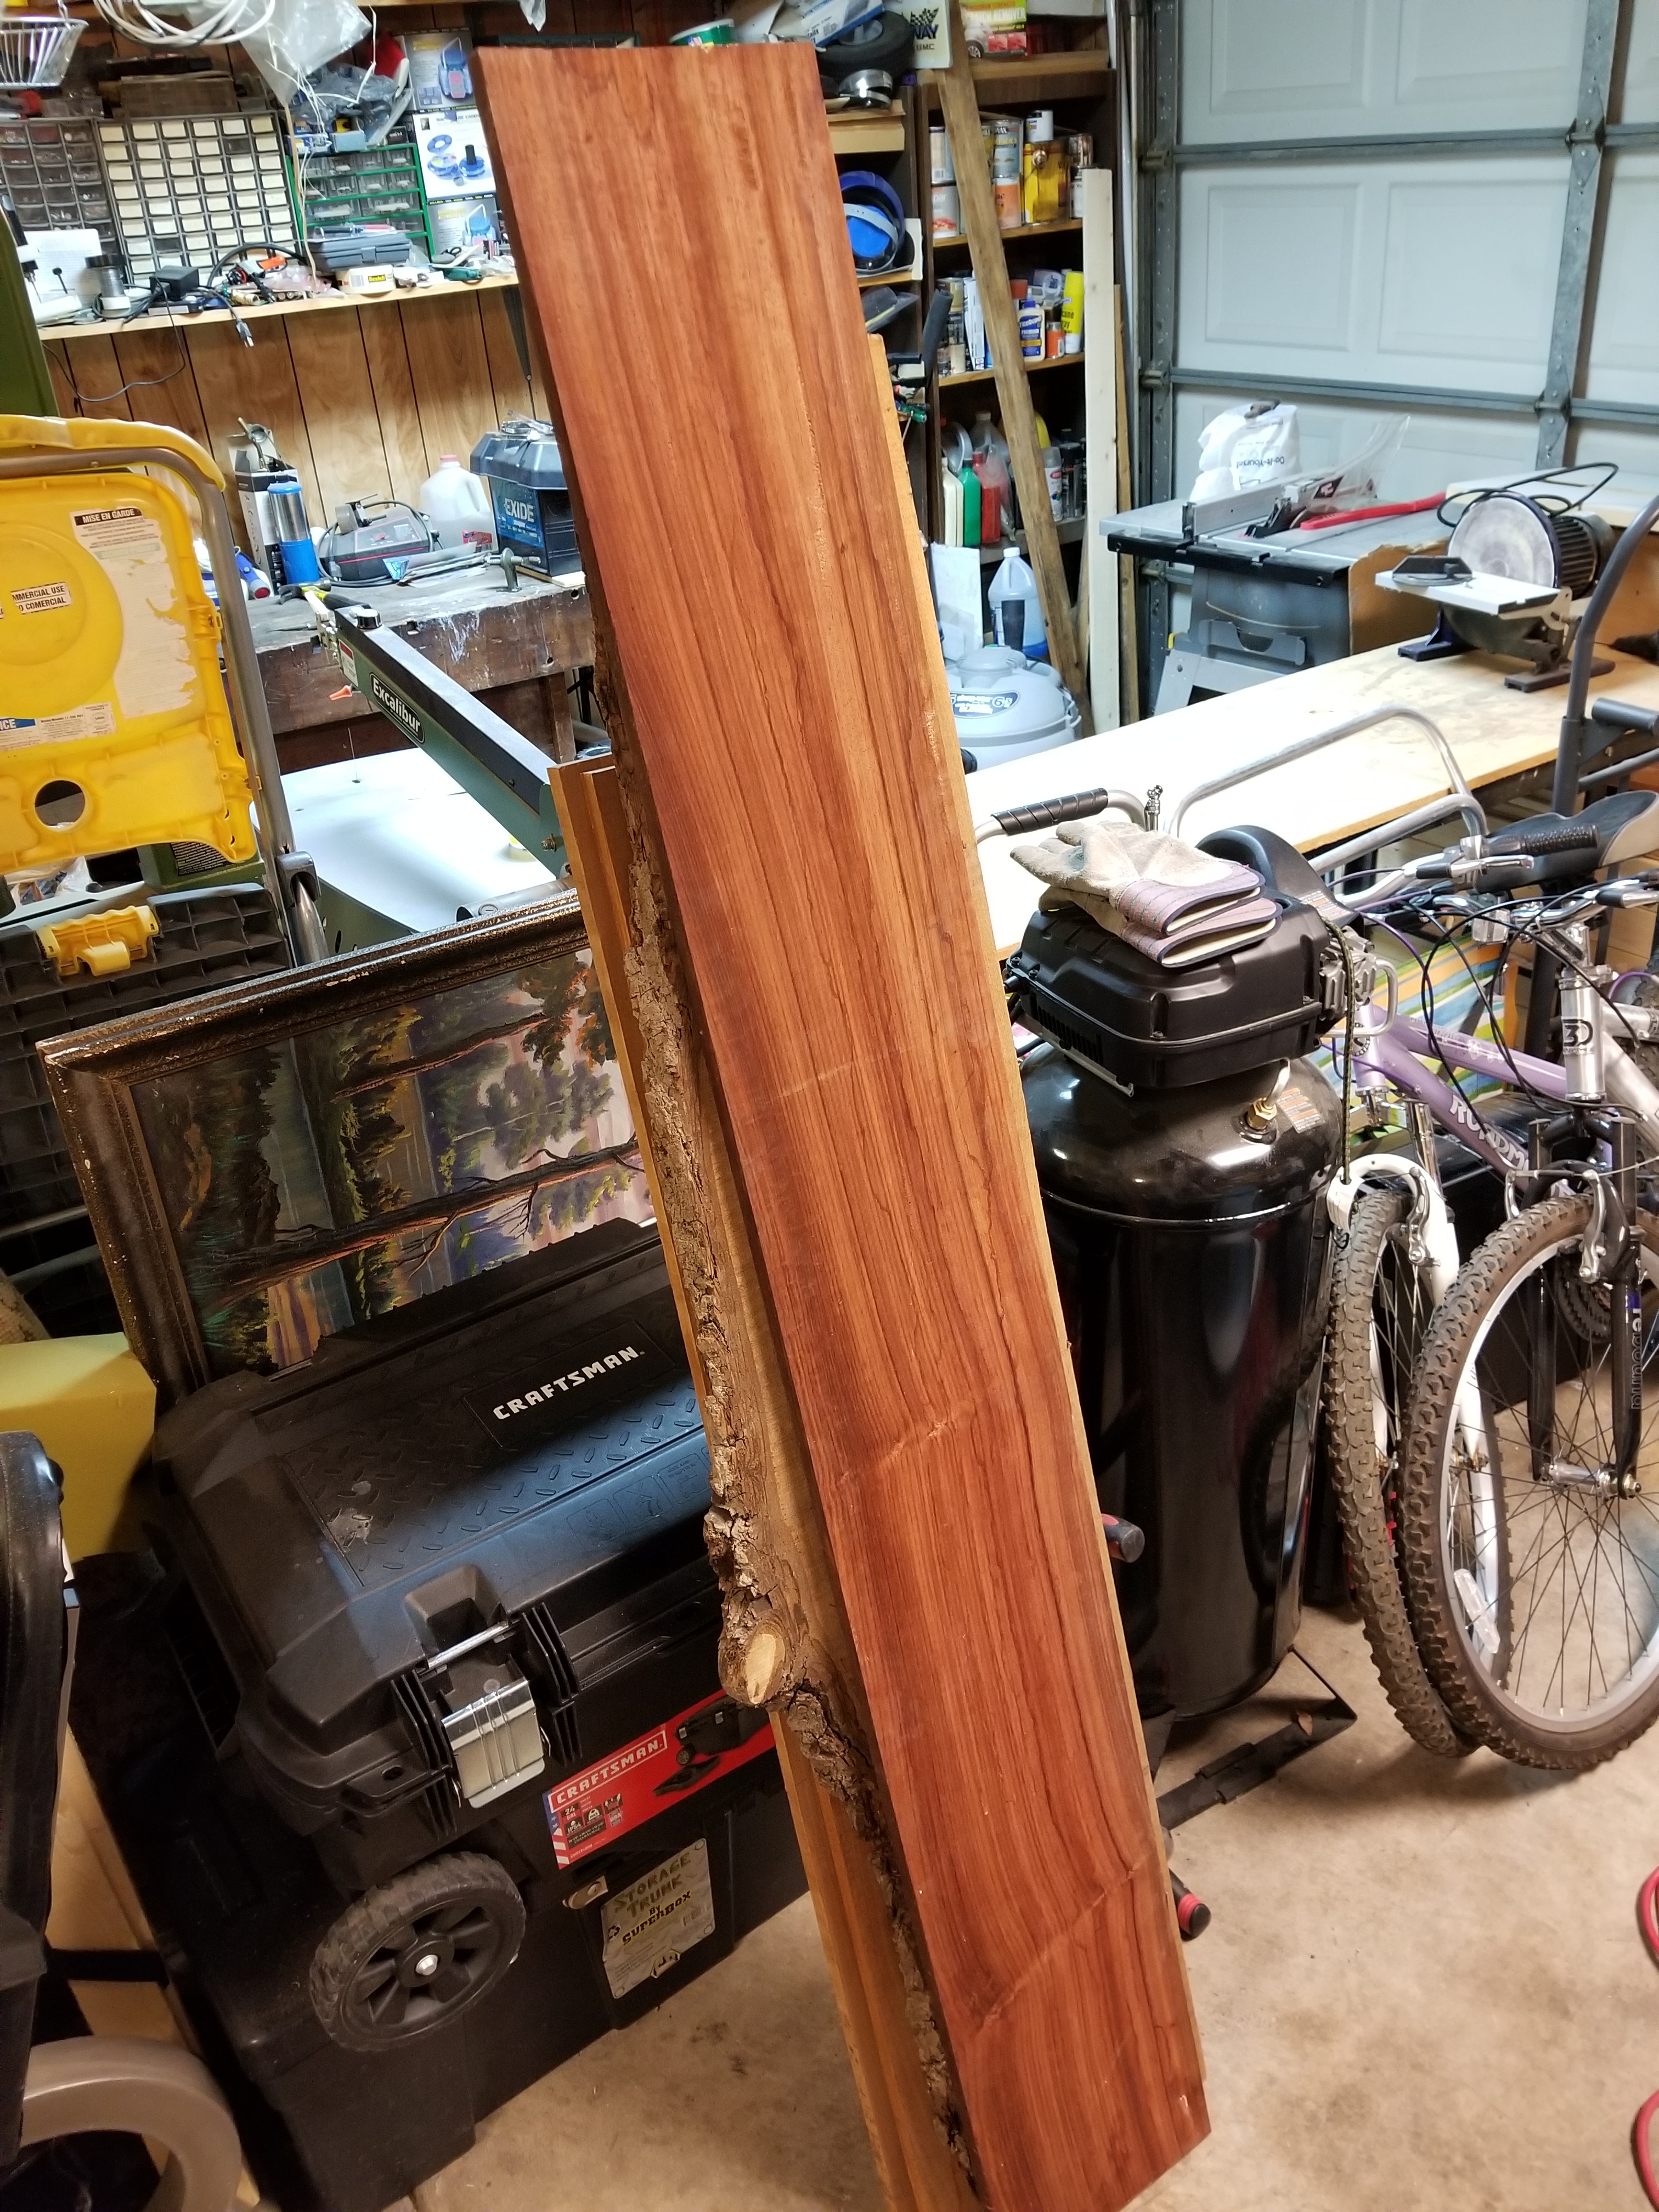
Here’s the padauk, almost or already planed down. This was in late 2020 when I actually did this.
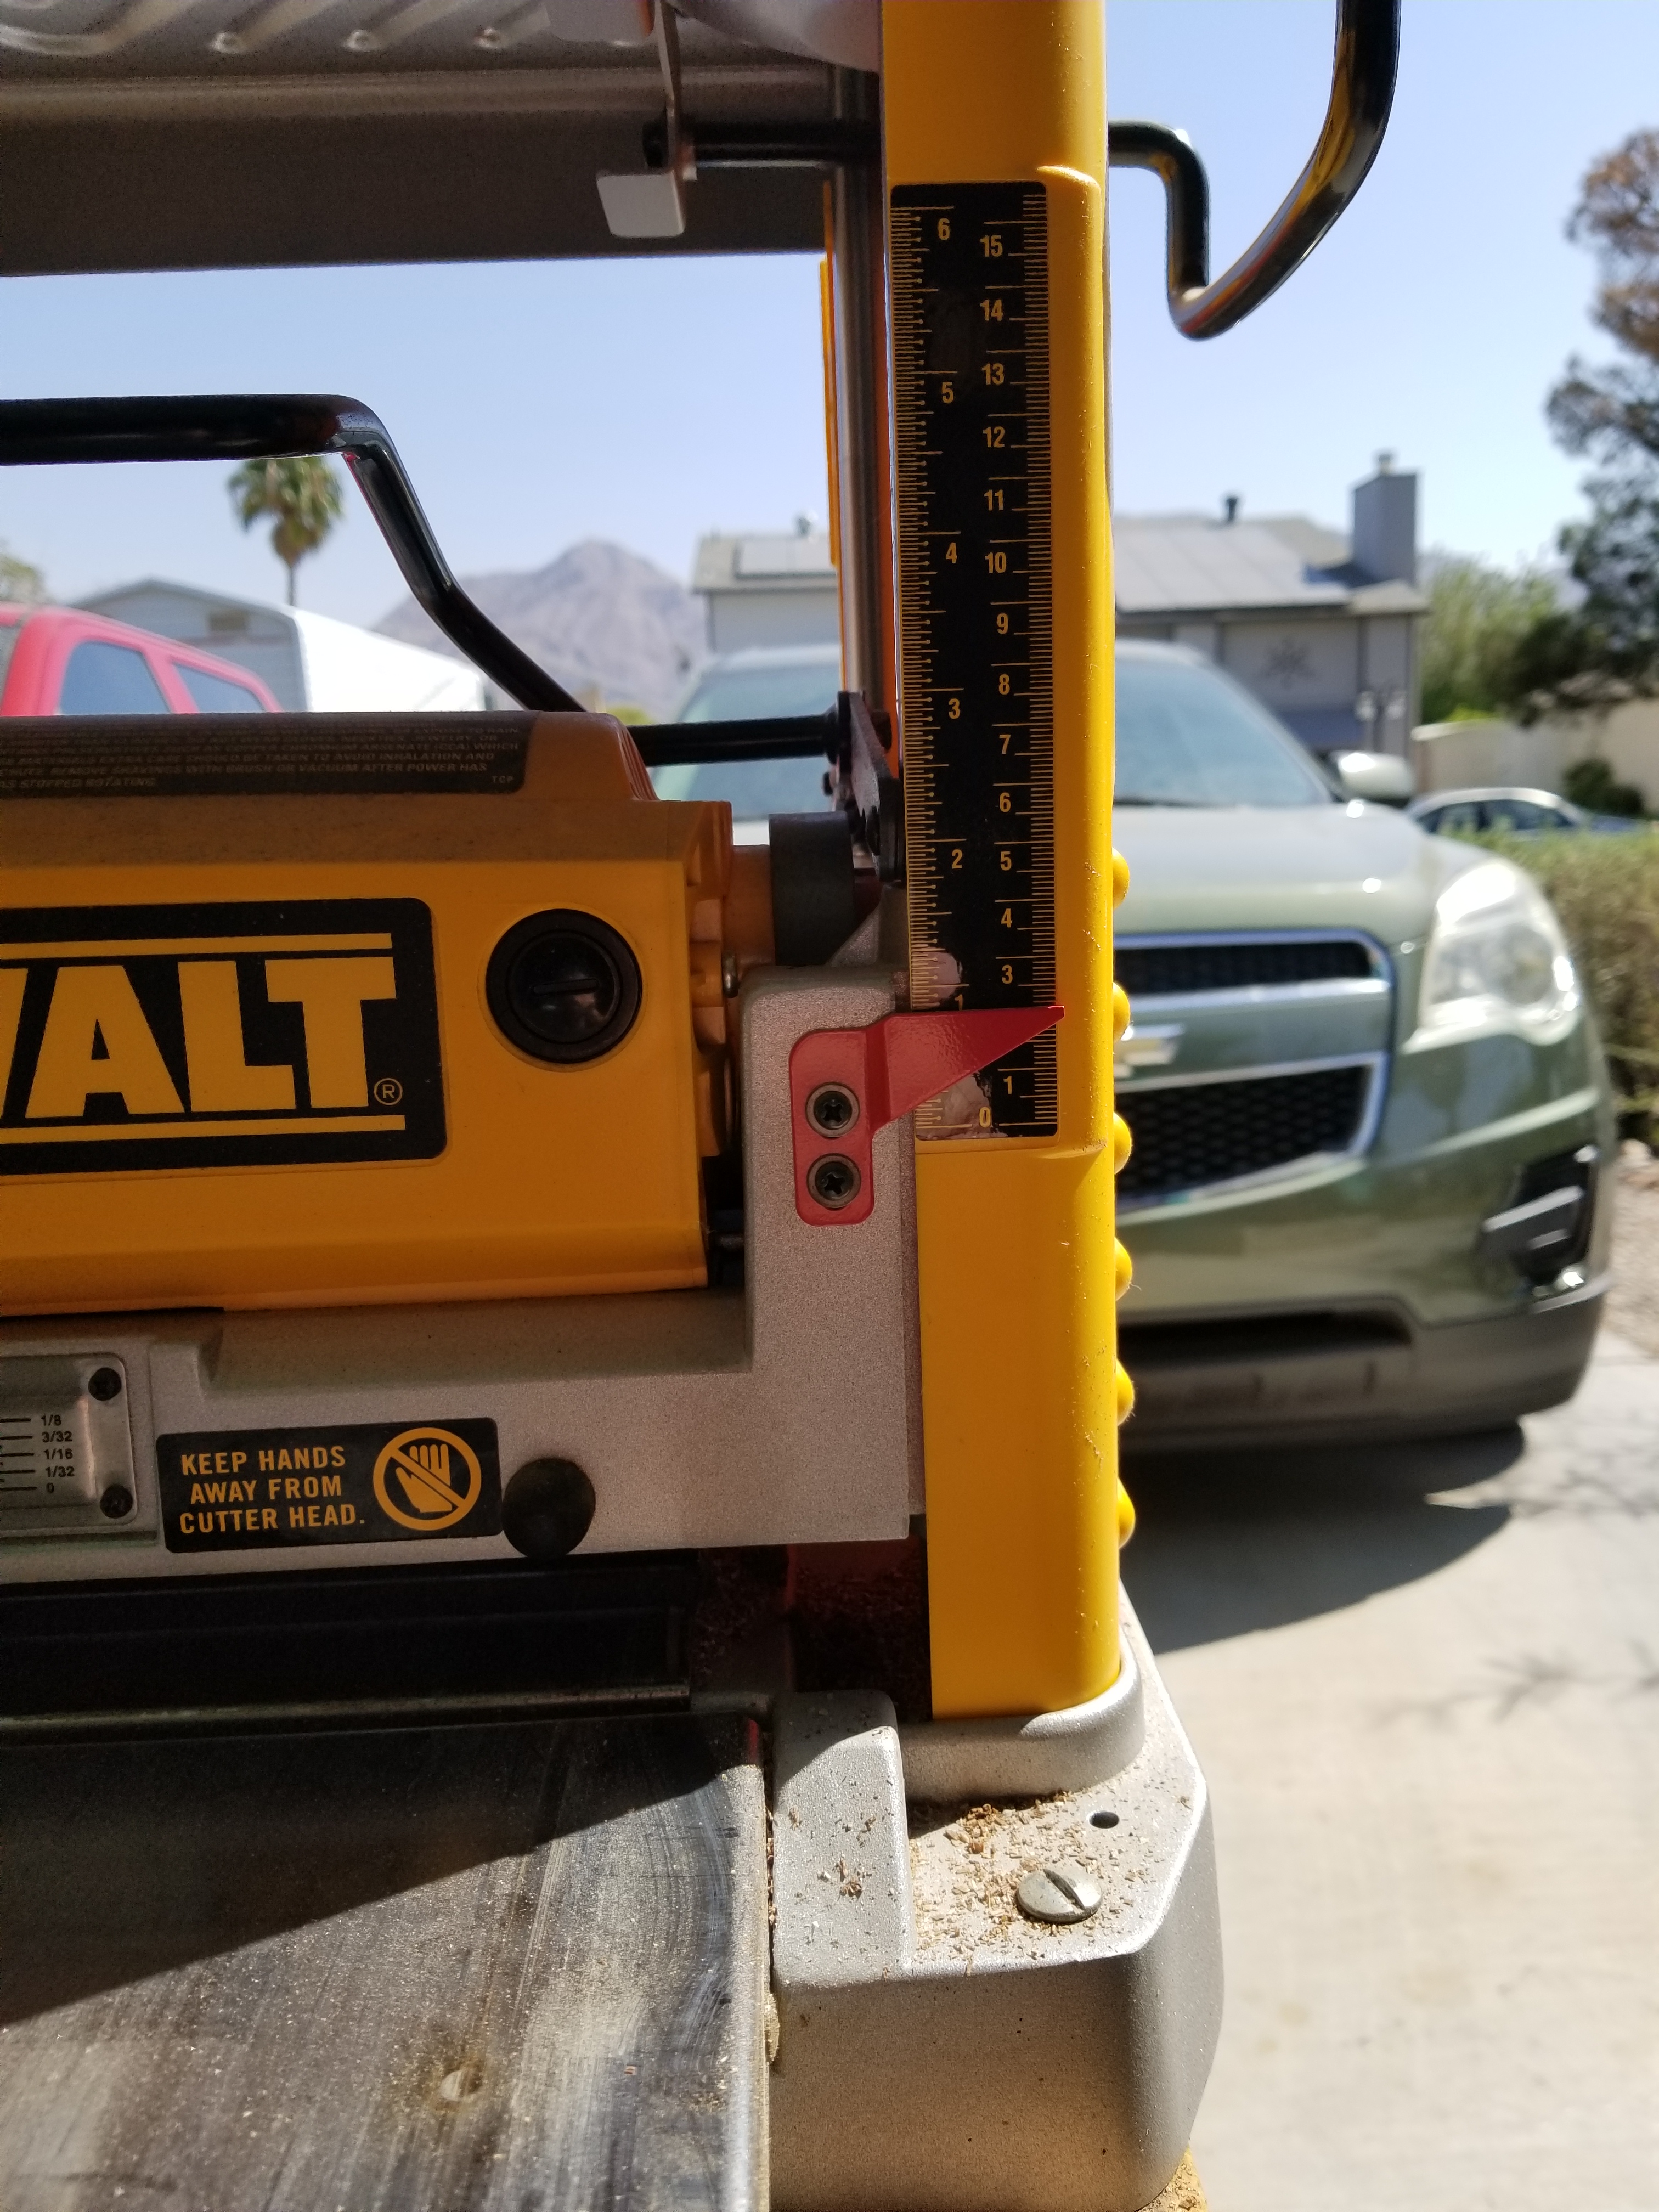
This is a shot of the planer gauge as I’m slowly shaving off the wood. What I did was shave a little off one side, flipped it and did the other side, taking off any warpage and eventually smoothing down both surfaces. In the end, I had some pretty flat pieces. Since all of the wood has been sitting in the outside shed and baking in the Las Vegas heat for at least five years, it’s pretty seasoned by now!
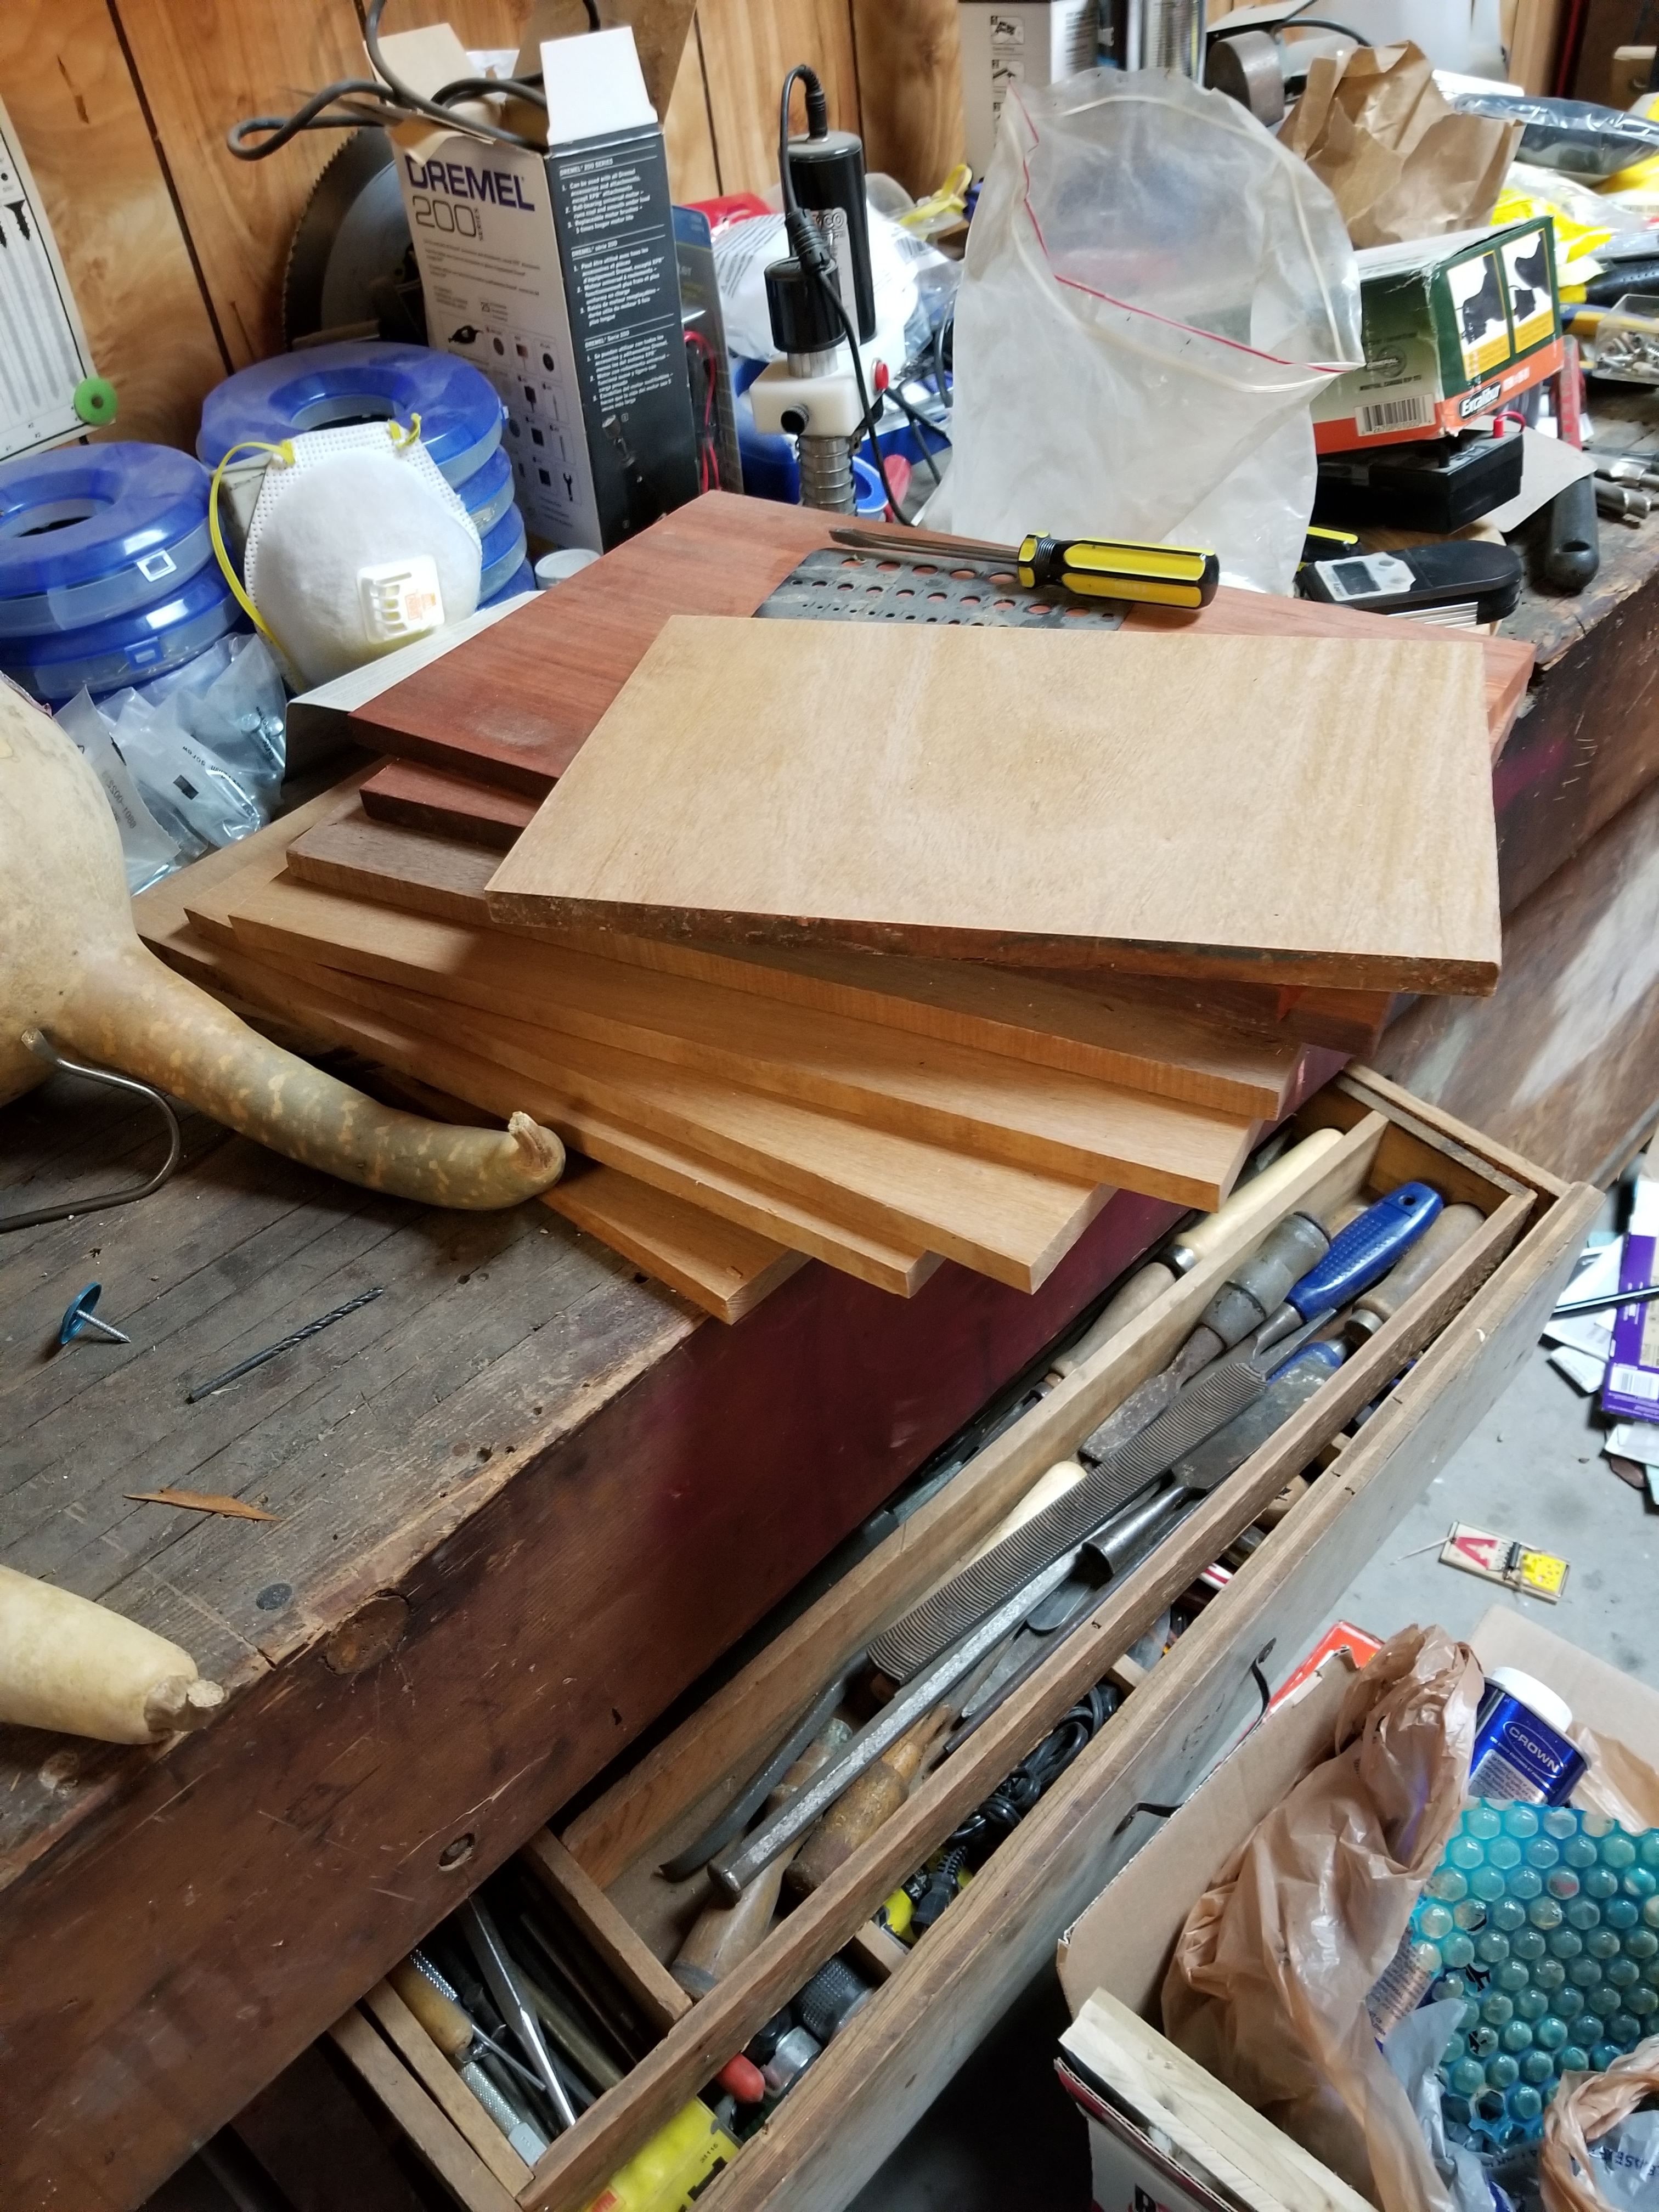
Now jump a year later, when I finally got back to working the project. This is all the tops and bottoms. Since there are going to be four boxes, there are eight pieces, four tops and four bottoms. The four bottoms are just going to be the outer frill cut out and the inner bits solid. The top pieces will be cut to the design with the center part not cut to the original, leaving an oval for the center piece untouched. The original design called for some kind of star thing, which I’m not using because of the lighter colored wood center piece. Also notice the gourds to the left side. They are a separate project of my daughters.
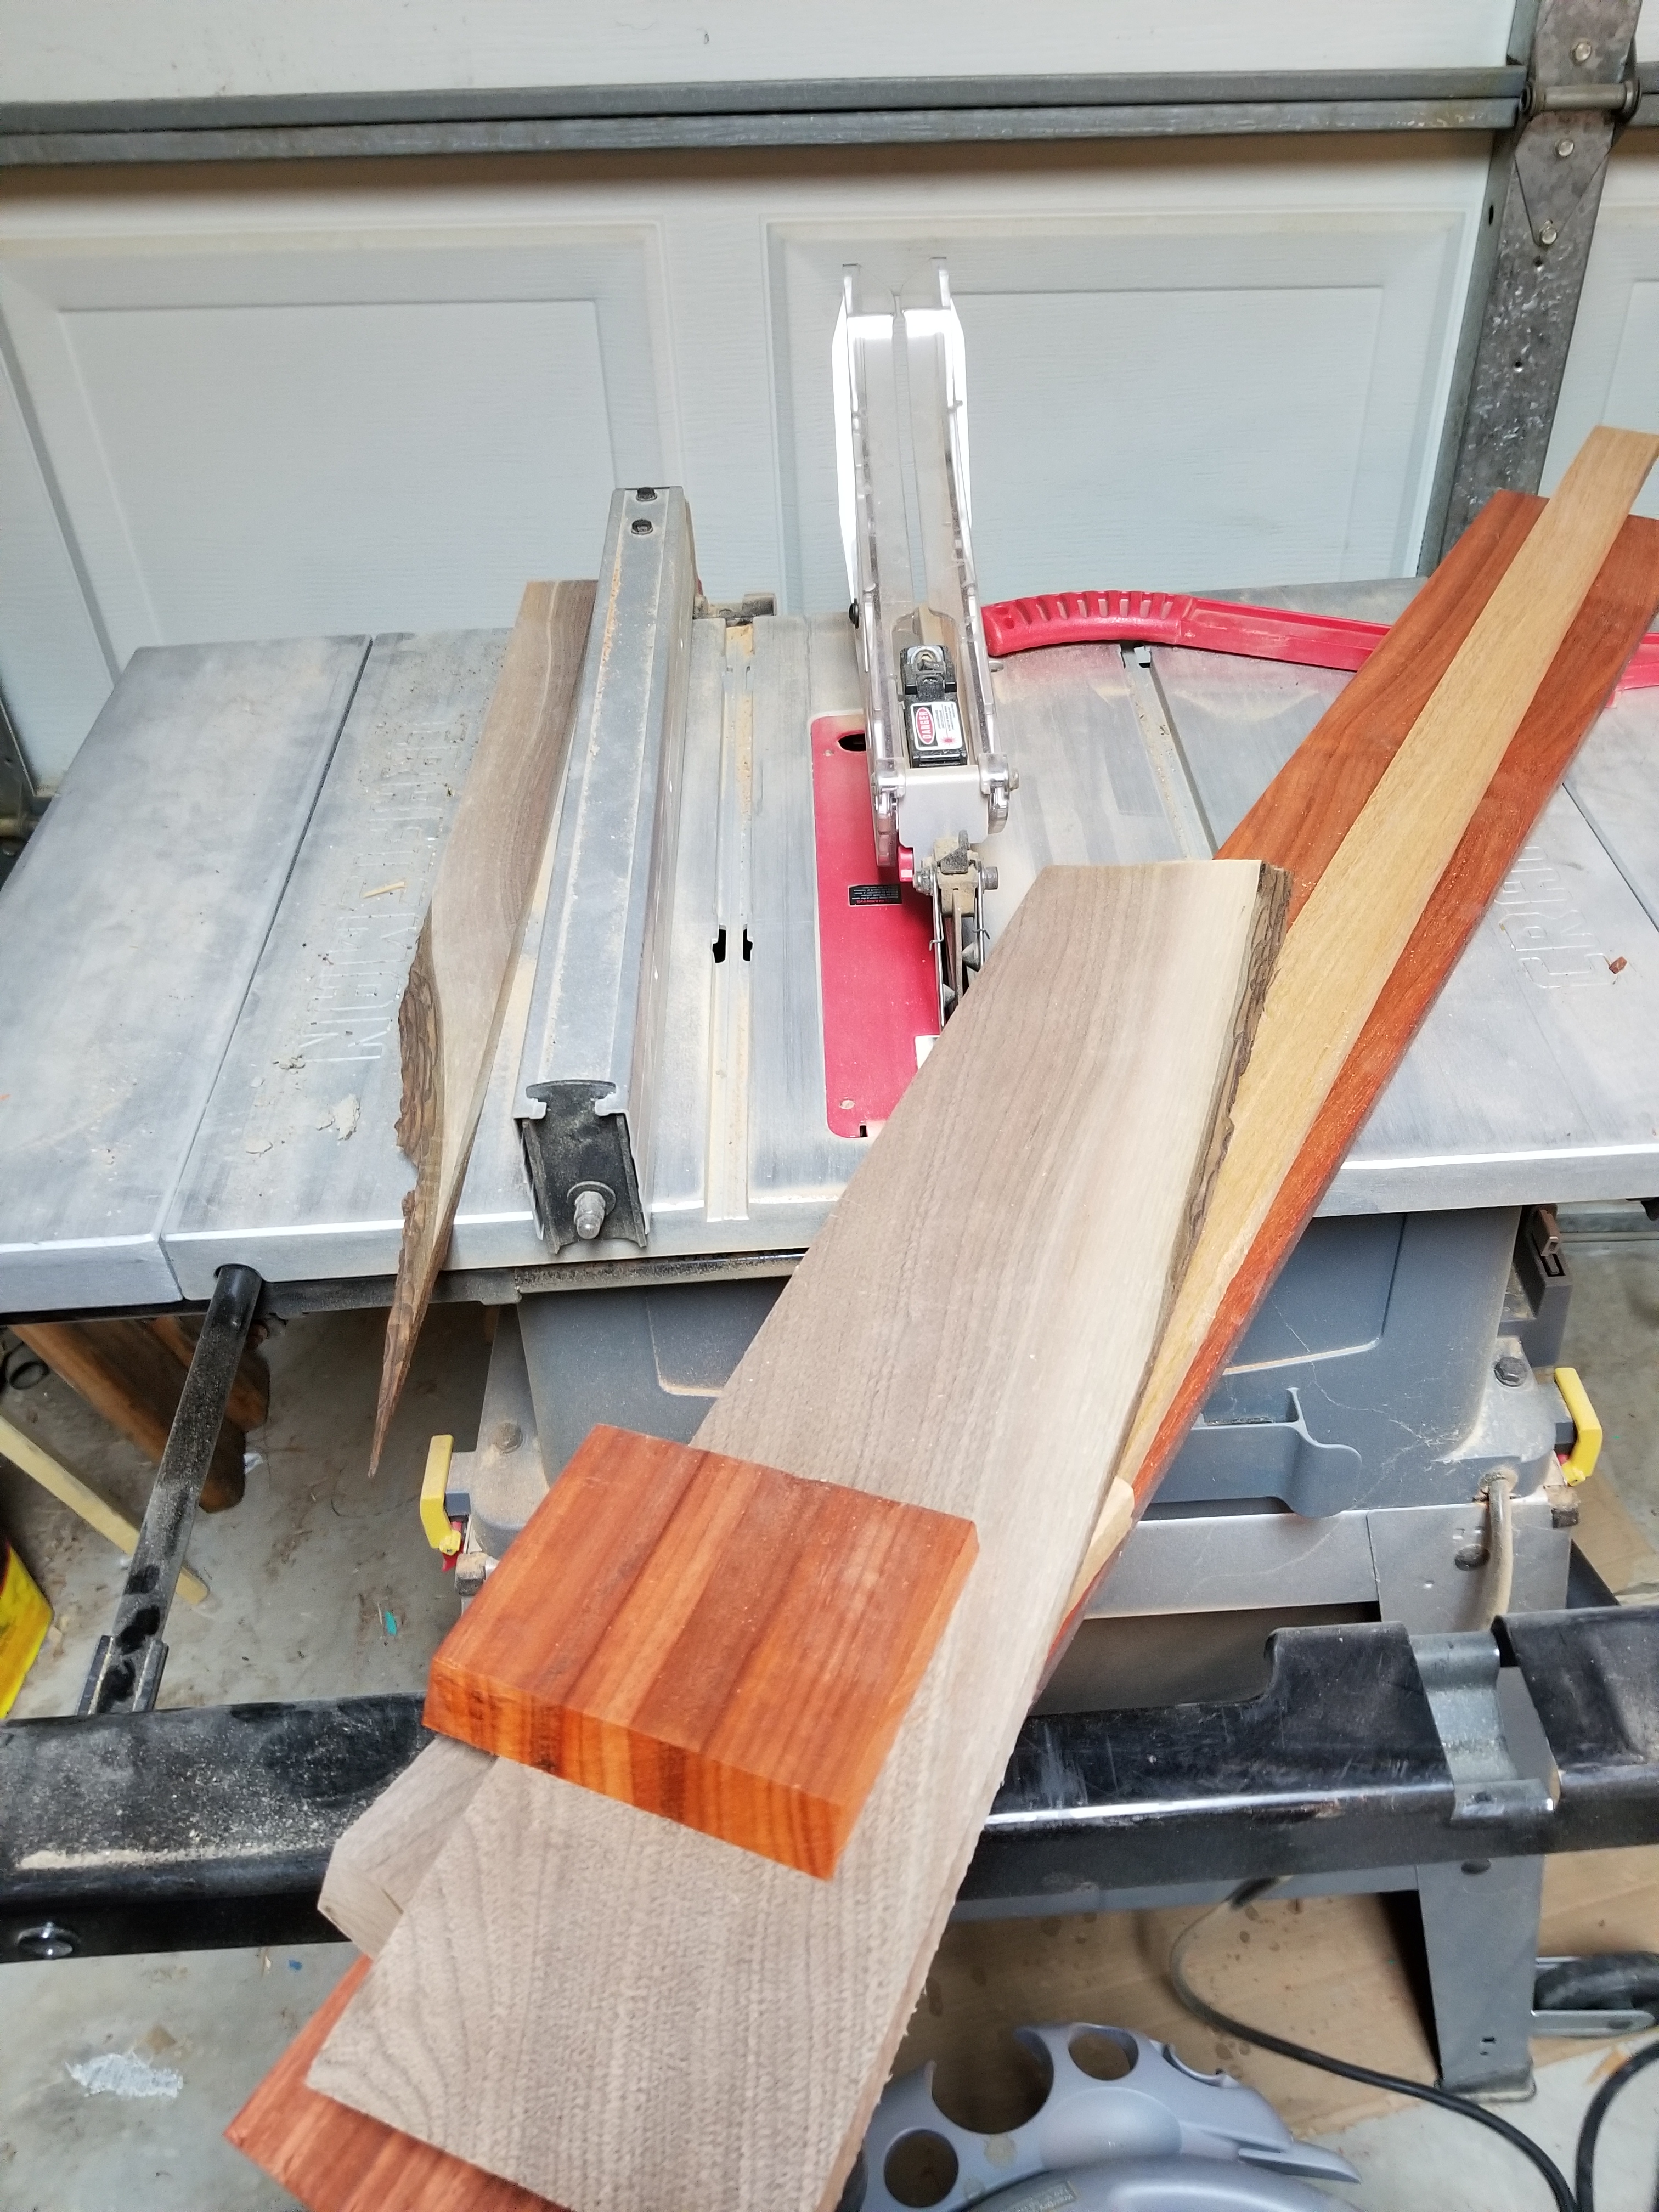
The next thing was to cut the 5-inch strips that would be the sides. This is where I worried that I would have enough wood for each box. While I obviously had enough tops and bottoms for the boxes, when it came to the sides, I started having second thoughts. What if I miscalculated? What if I came short? That would mean digging up some more, possibly mismatched wood to slap on a random side for one or more of the boxes. Not only that, exactly matching the thickness with the planer would be a pain, though possible.
I needn’t have worried. As it turned out, I calculated just fine and it worked out.
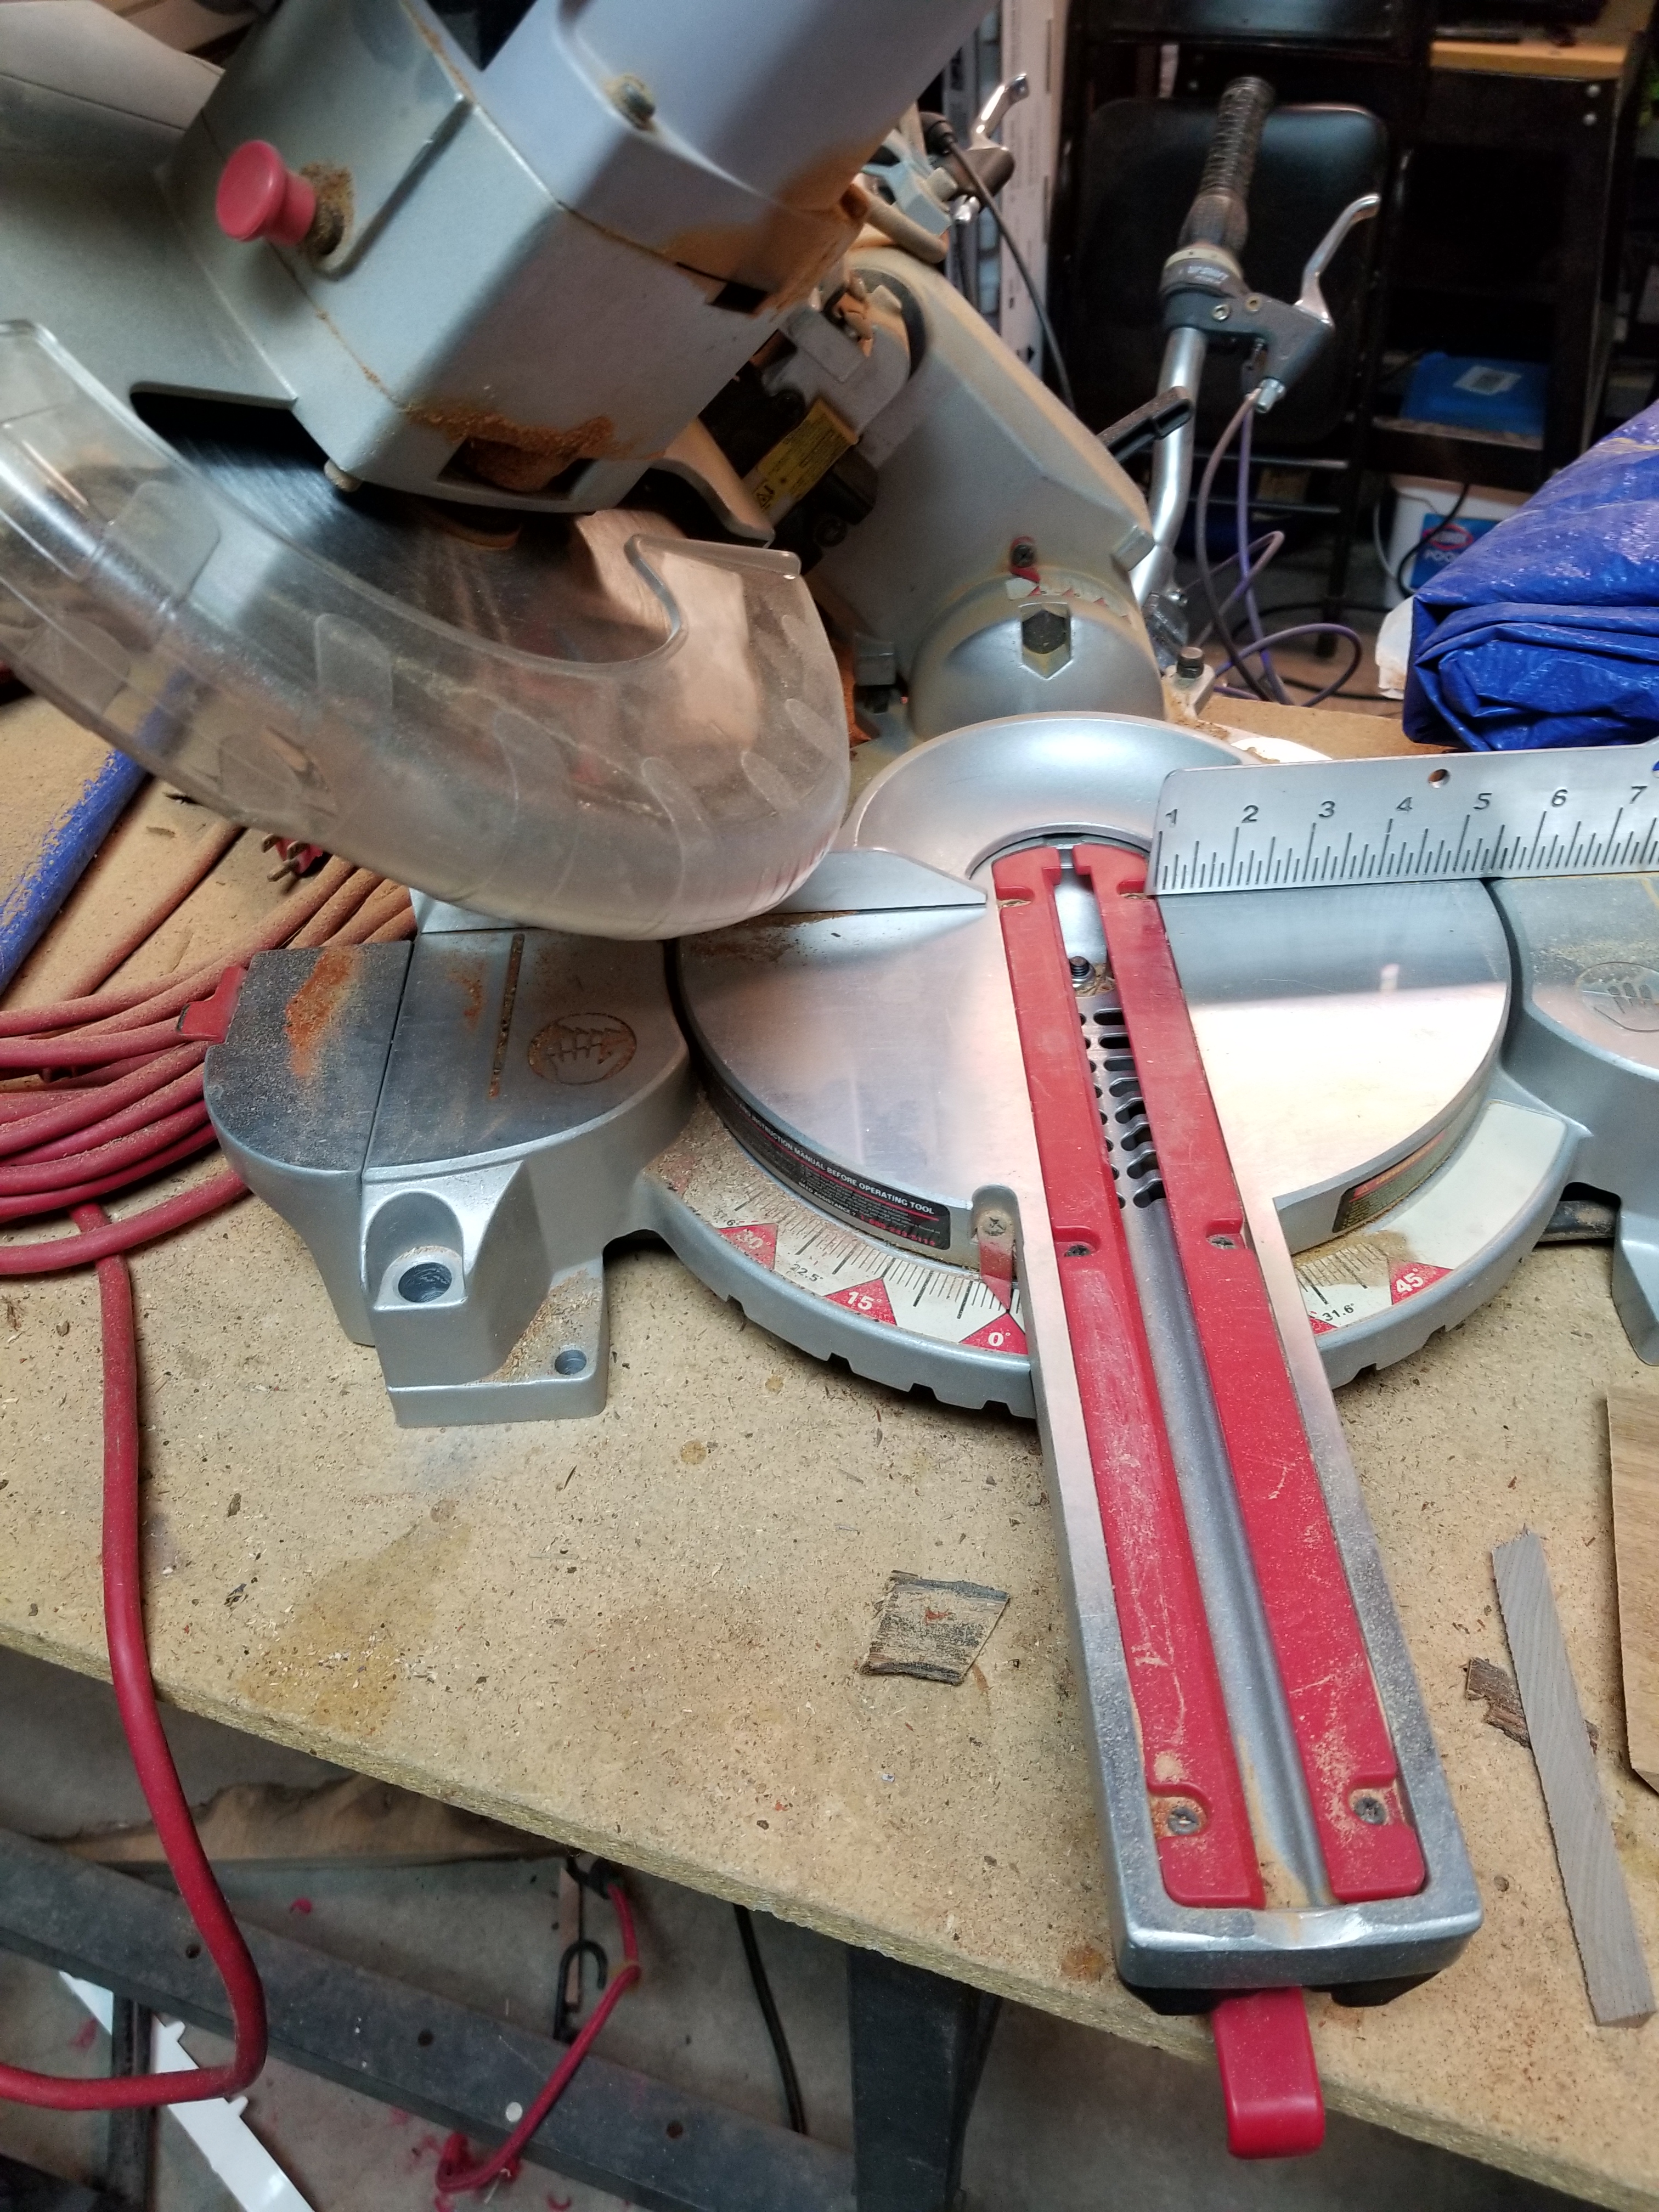
The next step was getting as precise of a 45-degree angle as possible, given that while my chop saw does the job okay, it isn’t exactly the top of the line. I had a little help in this regard.
This is a digital angle gauge. After I zeroed it, it was a matter of getting a precise 45-degree angle.
Now the only issue was getting the blade as close to that as possible which was NOT easy!

This was especially true since the way the blade was set up, the gauge faced away from me! However, I persevered and got it “close enough for guv’mint work.” At least I hope so. I’ve done this in the past and whatever angle error there is can be covered up with glue.
This is the result. All 16 sides, the long and short ones are now bookmatched with 45-degree angles.
Now, I just have to attach the designs to everything and start cutting out the designs with the scroll saw.
Until next time!

Fred,
I need you to make me one of those chess sets for a Christmas gift. I need it before next weekend….will this be problem?
Roger Ivester
Roger,
Hah! Yeah, might be a “little” problem, especially seeing as how that one took me over a year. Otherwise…
Fred
Heya i’m for the first time here. I came across this board and I find It truly useful & it helped me out
a lot. I hope to give something back and aid others
like you aided me.
Madeleine,
Welcome to my site and thanks for the kind comments! I love woodworking and am happy to share my experiences. Right now I’m working on another batch of thermometers. Progress has been slow due to life getting in the way, but they’ll get done eventually! If you have any questions about any of my projects or something you’re working on, don’t hesitate to ask.
Fred
Howdy! I could have sworn I’ve visited this website before
but after going through some of the posts I realized it’s new to me.
Anyhow, I’m definitely pleased I discovered it and I’ll be bookmarking it and checking back frequently!
Click,
Glad to have you! Hope you enjoy my woodworking projects. I update them as often as I can. Thanks for stopping by.
Fred
Wow, that’s what I was exploring for, what a stuff!
present here at this web site, thanks admin of this site.
Kisha,
Glad you found my site. Thanks so much for stopping by. I keep posting whenever I finish something new. I should have some more progress on those thermometers soon.
Fred
Thanks for finally writing about >Woodworking | The Worlds
Of Fred Rayworth <Liked it!
Thank you very much!
Fred
I am so blessed to own two beautiful pieces. I cherish them and have them in a special place so that I may see them everyday. As a wood crafter (although I’m just a painter of wood crafts) I so appreciate and admire your talent and the time and energy you put into every piece. When I see some of your work, it just blows me away.
I would like to get a copy of your Deer Shelf pattern where could I purchase? Thanks RM
Ray,
Thanks for visiting my site! The deer shelf pattern should still be available from Cherry Tree Toys at http://www.cherrytreetoys.com/Default.aspx However, I just scrolled (ha ha) through their patterns and couldn’t find the deer shelf plans. The actual pattern I bought from Dirk Boleman when he ran Wildwood Designs which was bought out by Cherry Tree. However, Dirk just passed away late last year, in fact right after I e-mailed him about some thermometer inserts which are featured as my last project. I know that deer shelf carried over to the older Cherry Tree catalogs so I’m kind of surprised I couldn’t find it. You might try writing them and see if they still have some old stock. If you still have no luck let me know and I can dig up the original stock number on my pattern which might help locate it if they can’t find what you’re talking about to them.
Fred
Doesn’t look like they offer it any longer. I emailed them just to see, as you said. We’ll see. But if the pattern isn’t in production any more that would make you owner of a copyable pattern.
Well I found it on Wildwood Designs, it should be on it’s way unless their one of those sites that don’t show backordered items. Thanks, RM
Ray,
Wow, I’m surprised they’re still in business. After Dirk Boleman passed away, I wasn’t sure if his wife would keep going. I guess she did. That’s great. I’ll have to check it out myself.
Thanks for the update and good luck!
Fred
Howdy Ray, In searching for information on how to work with raw wood, ( I just got a band saw for resawing) I came across your site! First let me comment on your work, beautifully done with a lot of patience and fine skill! Second is a question…do you have the same amount of hours in a day that I do? You are able to do more in scrolling and writing that I could do in a month of Sundays! I may have missed your supplier of the thermometers, could you repeat the seller again? I am new to the computer world, I hope to be able to put your site into a spot where I can find you again.Thanks for realistic writings! Suzanne
Suzanne,
Sorry for the late reply. I was out of town on a telescope adventure. Anyway, I really appreciate the kind comments about my web site at writing! As for hours, well, since these are passions rather than hobbies, especially the writing, I just find the time and do them. Period!
As for the resawing, I also have a bandsaw for that, but since mine isn’t top of the line, even with the thickest blade, it goes all over the place when I do anything thick. I love to work with raw wood and sometimes go to the local firewood place and will buy an interesting looking log. In fact, in the past, I used a chain saw and cut slices and that is how I made some of my log slice patterns near the top of my wood page. The cuts were ragged with the chain saw so I’d plane them down and of course, that was dangerous!
As for the thermometers, as it turned out I never got them from Cherry Tree after all. It was a place called American Crafts in Ohio someplace. Cherry Tree no longer carries them. As for the patterns, I don’t believe they carry them either. However, since Dirk Boleman passed away, his wife still maintains Wildwood Designs, from what I’ve heard. Maybe she has those thermometer patterns. Look up them on the net and they may have what you want.
Once again, thanks so much for stopping by and don’t hesitate to ask if you have more questions!
Rock on!
Fred
Ray, How did you hand your Deer Shelf? I’ve been thinking of a inset keyhole hanger.
Of course I meant “hang”.
Ray,
Don’t worry. I figured it out! To hang my deer shelf, I just pounded a nail in the wall and hung it from the round hole cut in the very top of the piece. It’s part of the pattern and since the backboard is plywood, it’s sturdy enough. Works like a charm and keeps it flat to the wall.
Fred
Whilst trawling through the internet I found this blog. After I finished reading this I entertained about some of the values mentioned here and it definitely gave me many views on the different things referred to within this blog.
Steav,
Thanks so much for the kind comments!
I really appreciate it.
All the best!
Fred